Easiest-Ever Homemade Blizzards (without an ice cream maker!)

Summer is finally here, and I'm celebrating with a homemade blizzard. You heard me right: a HOMEMADE BLIZZARD! Sorry, I got a little excited there. These lightened-up homemade blizzards are a cinch to make and will make you a superhero in your kitchen. You're not going to believe how easy they are to make, and you don't even need an ice cream maker.

I love ice cream with a passion that's usually ascribed to three-year-olds with sticky cones and sprinkles. Nothing is more nostalgic than a DQ Blizzard, eaten on the curb in the height of summer with traffic zooming by your toes. Ok, I can do without the traffic (and the curb), and I can even do without the DQ soft serve. Because guess what? If you have an ice cream tray and a food processor or Vitamix, you can whip up your own from-scratch, homemade blizzard that's far healthier than the machine-derived stuff, but just as fun.
Ingredients:
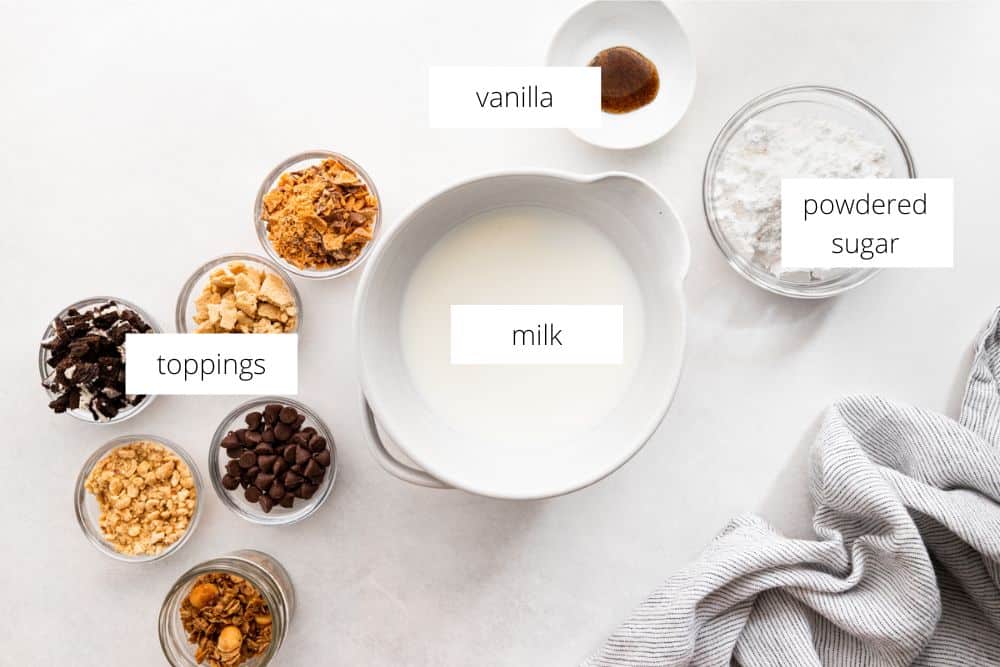
- Whole milk: The ice cream base is made with just whole milk (no cream or eggs!). See below for a dairy-free option.
- Powdered sugar: Powdered sugar lends sweetness and dissolves easily into the blizzards.
- Vanilla: Vanilla paste is one of my secret ingredients (it's far cheaper than fresh vanilla beans and has a robust flavor), but you can use vanilla extract instead.
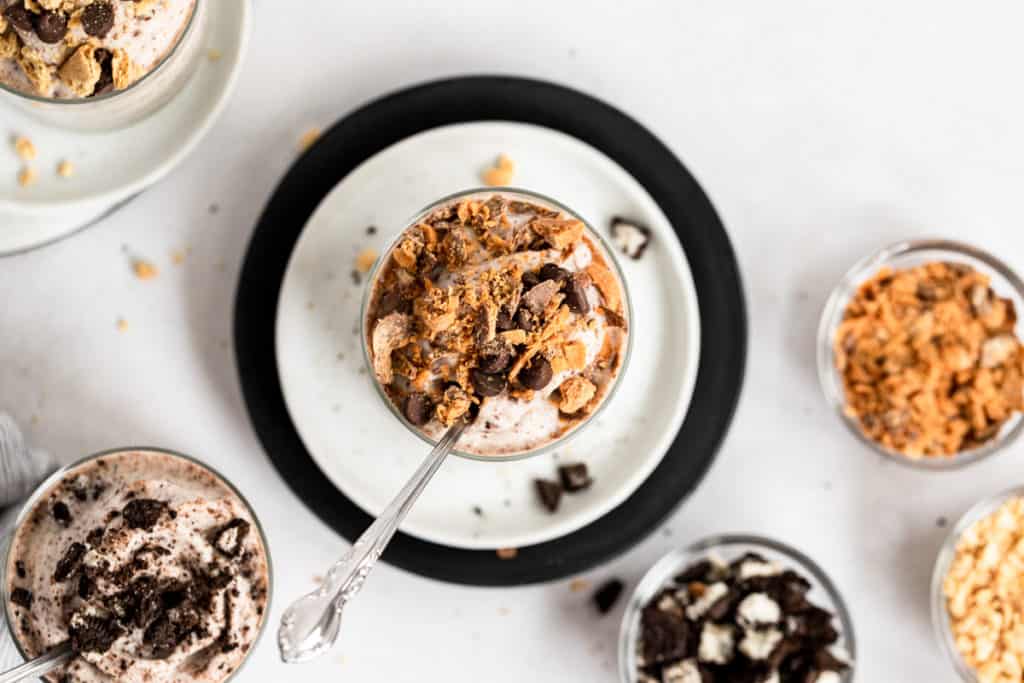
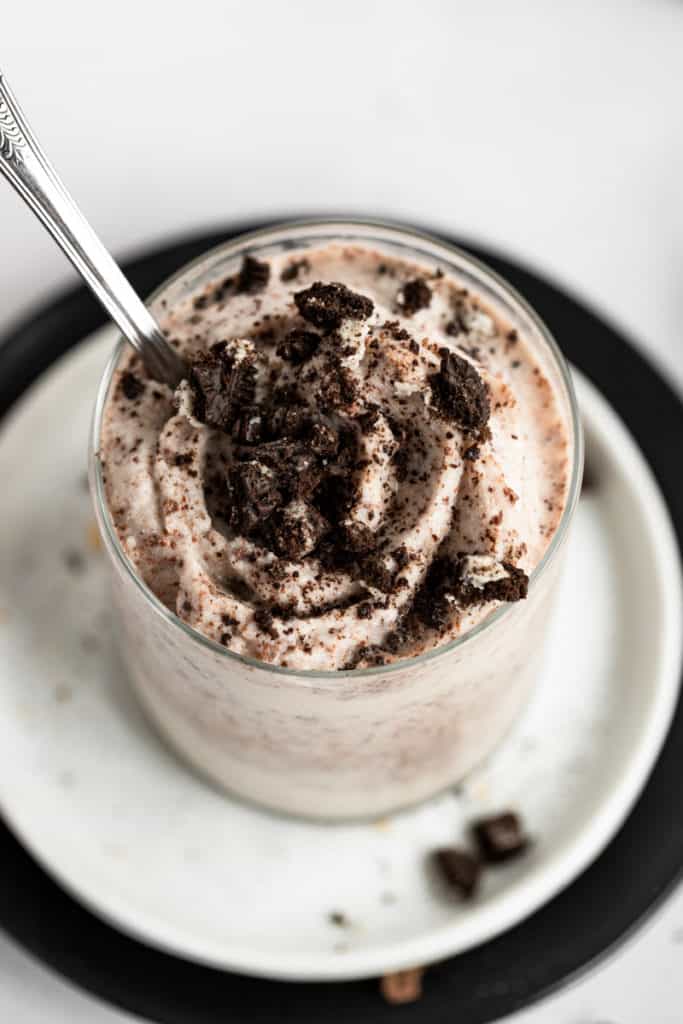
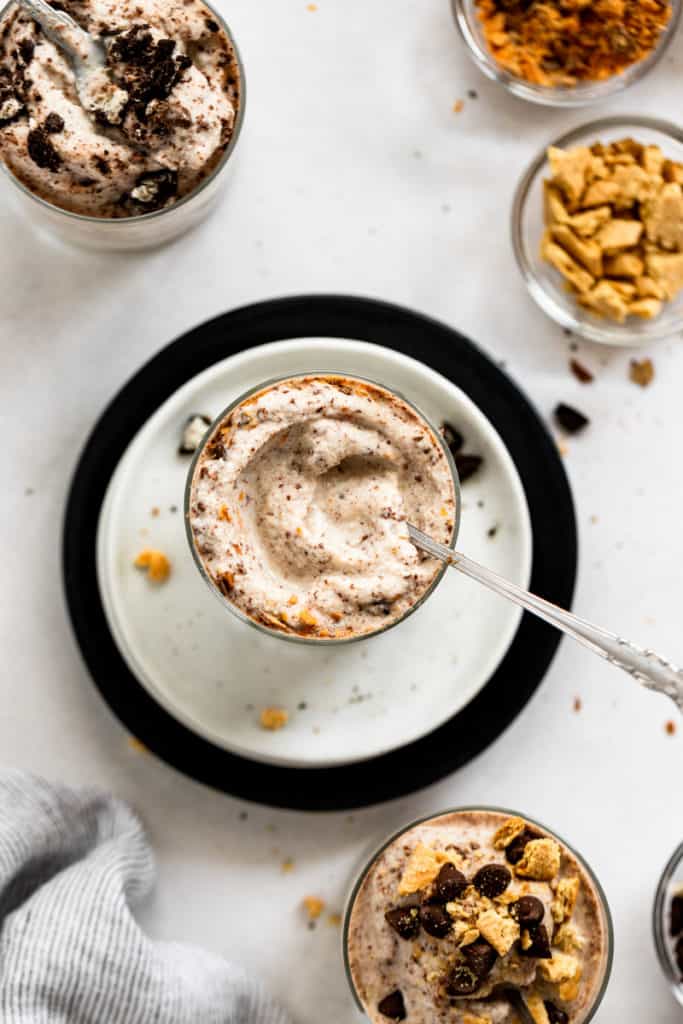
- Toppings: You can add any toppings you like! Think crumbled cookies, chopped chocolate, graham crackers, granola, or even chopped candy bars!
How to make a homemade blizzard:
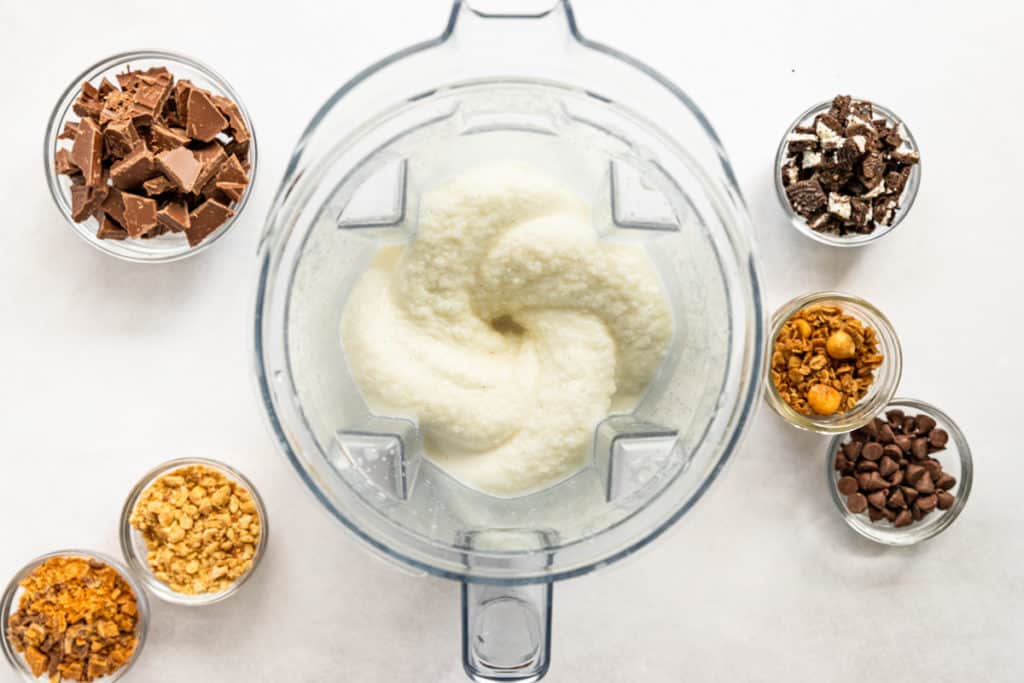
You're not going to believe how easy this is. Freeze whole milk (or you could use a rich nut milk) in ice cream trays. It might feel strange to freeze milk, but remember, that's essentially the building block of all ice cream.

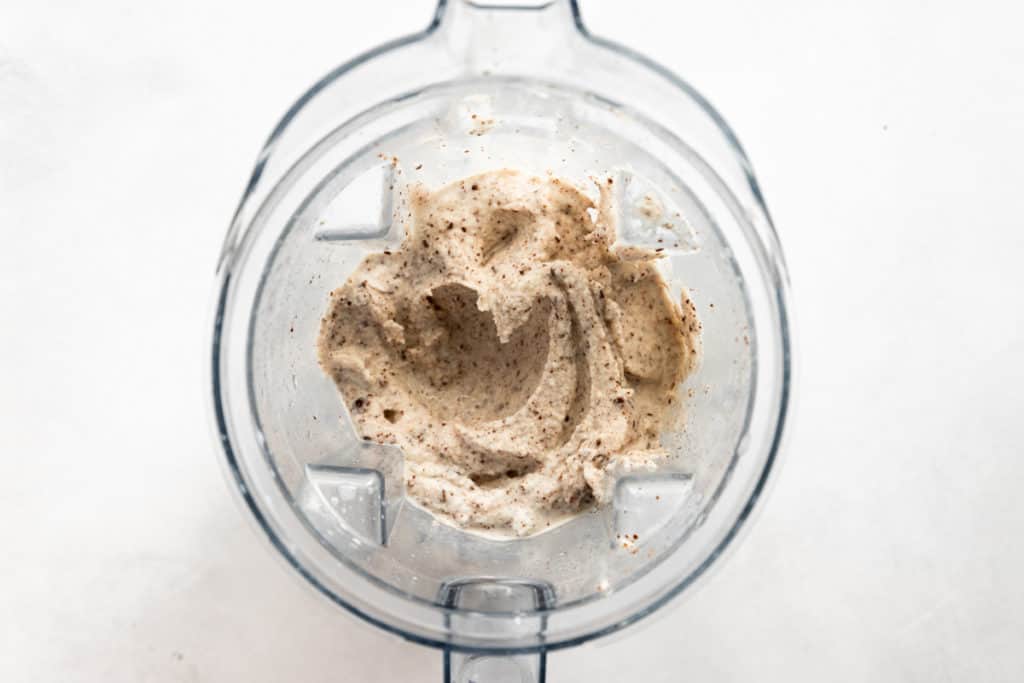
After the milk is frozen, transfer the cubes into a Vitamix or food processor with some more milk, powdered sugar and vanilla, and then process it until smooth. THAT'S IT. No eggs, no cream, no gums or weird ingredients.
But of course, we're not stopping there. Now for the fun part. You can add in whatever toppings you like to create a homemade blizzard-style treat.
My kids are obsessed with this homemade blizzard (yeah, me too).
Recipe tips:
- This ice cream isn't nearly as rich or thick as machine-derived soft serve, but that's part of its charm-it's ultra light and cooling. You can knock back a bowl with pure pleasure, without that resulting stomachache.
- The homemade blizzards are meant to be eaten soon after they're made (this isn't an ice cream you'll want to freeze longterm), so go ahead and dive in!
- Be sure to use whole milk, as low fat milk will be icier.
- Watch the Web Story for this recipe!
Vegan variation
For a dairy-free vegan blizzard, use a rich-style unsweetened nut milk in place of the whole milk. I prefer cashew milk or cashew cream.
Tools you’ll need for this recipe:
- Vitamix or Food Processor: You'll need a Vitamix or food processor to make the ice cream. I use both almost daily, not only for quick no-churn ice creams and smoothies, but also for sauces, soups, and to help with my prep work!
- Vanilla Paste: Vanilla paste is an affordable alternative to fresh vanilla beans. It's made with fresh vanilla seeds that are bound in a syrup, offering a stronger punch of vanilla flavor than extract. It will last forever in your pantry, and you can use it in all your favorite baked goods!
- Metal bowl: A metal bowl works great for chilling the ice cream quickly. I'm in love with my enamelware bowls, which are as pretty as they are functional.
- Ice cream trays: If, like me, you have an automatic ice cube maker, you might need to invest in some inexpensive ice cube trays. These silicone trays with lids look really easy to use.

FAQs
YES! You can make a homemade blizzard from scratch using a food processor or high speed blender.
This homemade blizzard is thickened with just milk ice cubes. The frozen cubes give the blizzard a rich, spoonable texture without any added ingredients.
If you don't have a high speed blender (such as a Vitamix or Ninja) you can make a blizzard using a food processor instead.
*This post contains Amazon and other affiliate links to products I use and love (from which I earn income, at no cost to you). Thank you for supporting From Scratch Fast!
Stay connected

Subscribe
Get exclusive new weekly recipes (all gluten-free, but you'd never know it), along with tips for finding more intention, ease, and joy in the kitchen in my Mind, Body, Spirit, FOOD newsletter!
Get the recipe!
Easiest-Ever Homemade Blizzard (without an ice cream maker!)
Ingredients
- 3 ½ cups whole milk, divided
- ½ teaspoon vanilla paste or vanilla extract
- ⅔ cup (2.5 ounces) powdered sugar
- ½ cup (or more!) add-ins, such as chopped chocolate, crumbled cookies, crushed graham crackers, granola, chopped candy bars and/or chopped nuts or nut butter
Instructions
- Pour 3 cups of the milk into 2 ice cube trays. Freeze until solid, about 2 hours. (Once frozen, the ice cubes can be transferred to a zip-top freezer bag and stored in the freezer for up to 2 days.)
- Pour ½ cup of milk into a Vitamix or food processor. Add the vanilla paste and powdered sugar. Blend until combined.
- Add the milk ice cubes. If using a Vitamix, slowly increase the speed to high while using the tamper to press the ingredients into the blades; blend until smooth. If using a food processor, process, scraping the sides occasionally, until smooth. Stop and add your add-ins.
- Blend again on high, stirring with the tamper (or pulse if using a food processor), until the add-ins are incorporated, about 3-5 seconds. If you can resist not devouring it right away, scrape the ice cream into a metal bowl and freeze it for 15 minutes, stirring halfway through (this will help it set up). Don't freeze for too long, otherwise it will harden. Divide the blizzards into bowls and serve!
Notes
- You'll need a Vitamix or food processor to make these Blizzards. I use both almost daily, not only for quick no-churn ice creams and smoothies, but also for sauces, soups, and to help with my prep work!
- Vanilla paste is an affordable alternative to fresh vanilla beans. It's made with fresh vanilla seeds that are bound in a syrup, offering a stronger punch of vanilla flavor than extract. It will last forever in your pantry, and you can use it in all your favorite baked goods!
- A metal bowl works great for chilling the ice cream quickly.
- If, like me, you have an automatic ice cube maker, you might need to invest in some inexpensive ice cube trays.
Milk, powdered sugar, vanilla and your favorite add-ins. THAT'S IT!!
It's SO EASY! The trick is to freeze whole milk then blend it in a high speed blender or food processor with powdered sugar and vanilla until smooth. Mix in your favorite toppings, and you're done.
Whatever you like! Some of my favorite add-ins include cookies, chopped chocolate, granola, peanut butter, candy bars, nut butter and/or pretzels.


I absolutely LOVE this recipe! I saw a commercial for a DQ blizzard a couple of days ago and I've been craving one ever since! I figured we could celebrate our carpets being cleaned (just looking for an excuse haha) so we might as well try this recipe out today! It's definitely our go-to now! Thanks for sharing!
What is the reason for using powdered sugar over regular granulated sugar?
Hi there! The powdered sugar dissolves better in the cold mix, giving you a smoother texture (granulated sugar will still work but might be a bit grainy). I hope you enjoy!
Do you put the blizzard toppings in the blender or add them to the ice cream after you put it in a bowl?
Hi there! I add the blizzard toppings to the blender and pulse them in (stir it with the tamper). That way they get fully incorporated. I hope you enjoy!
Sounds delicious. What ingredient would you recommend to veganize this recipe ? What can j use instead of whole milk? Soy milk? Oat milk?
Hi Maribel! I've made this with almond milk and cashew milk with success. You want to go with a rich nut milk (I usually use homemade, but you could go for a good quality brand without fillers, such as Elmhurst). I haven't tried oat milk, but I think that would work! Take note that you might need to sweeten the mixture a touch further, and the Blizzards will be a bit icier than if you use whole milk, but they're still delicious!! I hope you enjoy!
OK seriously? This looks so good! And so easy. 🙂
I am making this right now.
-Raine.
I hope you like it!
5