How to Make Grits from Scratch (the best grits ever!)
I can't believe it's taken me so long to devote a post to grits. Grits are one of my favorite comfort foods. They're so easy to make from scratch, and with the right technique you get the most luxurious, creamy texture, without the need for any heavy cream or for loads of butter!
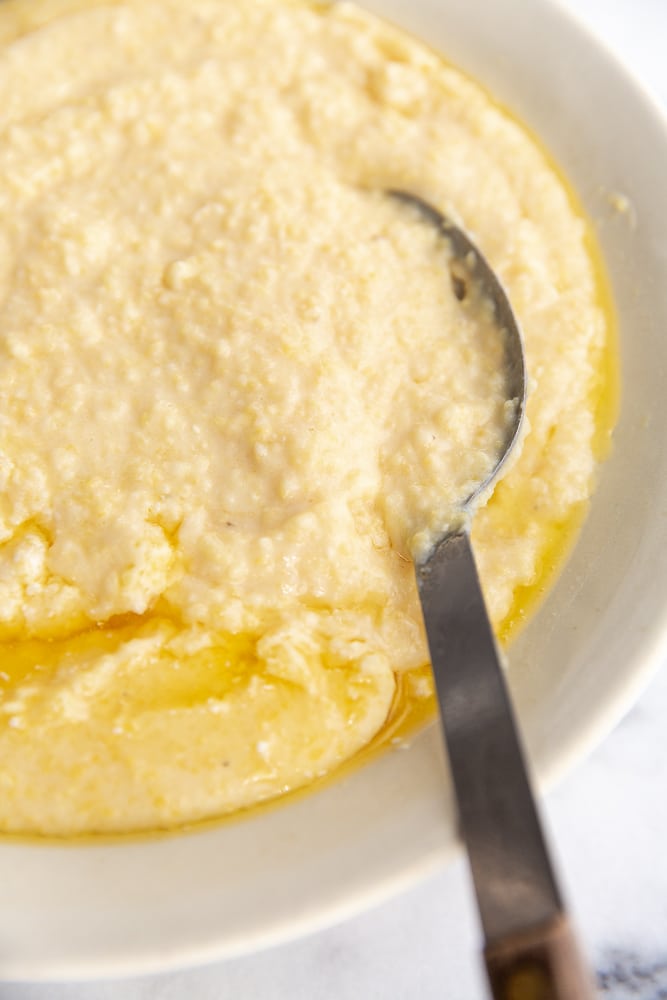
I'm pretty sure I was in my early twenties before I first tried grits. Cornbread, corn pudding and creamed corn were all part of my childhood in the Midwest, but grits? Nope. But then I fell in love with a Southern boy. James is from Atlanta, and while I don't remember the first time I ate grits, I do remember that it was with him and that they were loaded with cheddar cheese. Just like I fell hard for James, I fell in love with grits. And I've had a deep affection (to both) ever since. [Don't miss the VIDEO below!]
What are grits?
Traditionally, grits were made from boiled dried hominy, a type of corn that has been treated with a lime or lye solution, allowing the tough outer hulls to be removed. However, you can also make grits from simply dried ground corn (stone-ground cornmeal). Grits are usually made with American dent corn, which is lower in sugar than the fresh corn we eat on the cob.
How to make grits
- First of all, it's important to buy good-quality grits! Bob's Red Mill is a reliable supermarket brand, but you can also find a slew of stone-ground grits like these online.
- To achieve a creamy texture, use 5 cups of liquid to 1 cup of grits. It will seem like way too much liquid at first, but I promise that the cornmeal will absorb it all. Use half water and half milk (regular or low-fat milk, whatever you drink) to achieve a creamy texture. Keep your eye on the liquid as it comes to a boil, since the milk can boil over.
- You'll want to use a heavy pot for these grits. Avoid a lightweight aluminum pots, as the bottom can burn.
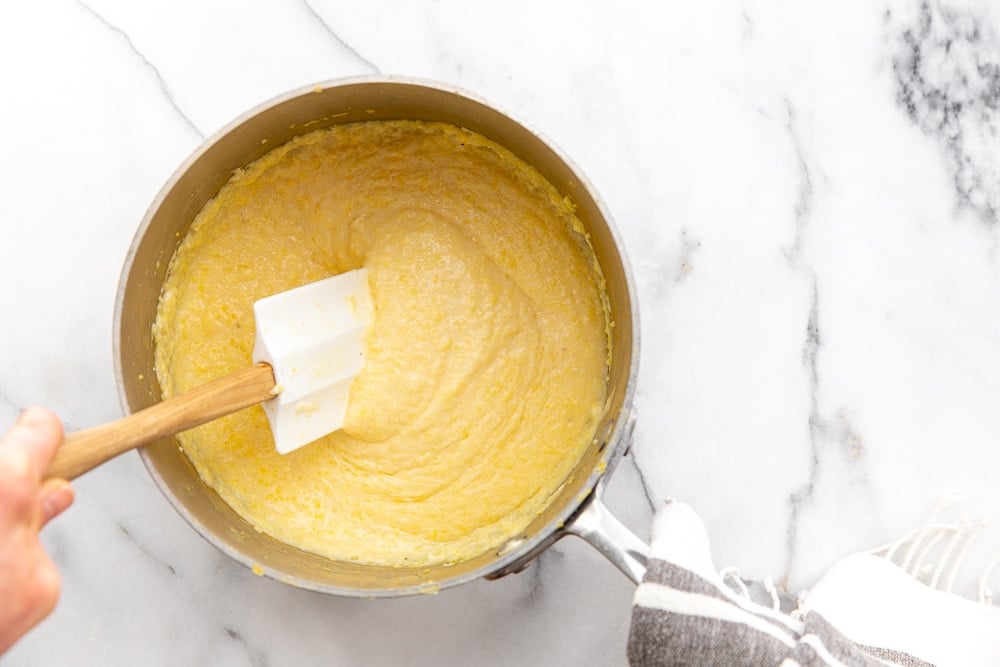
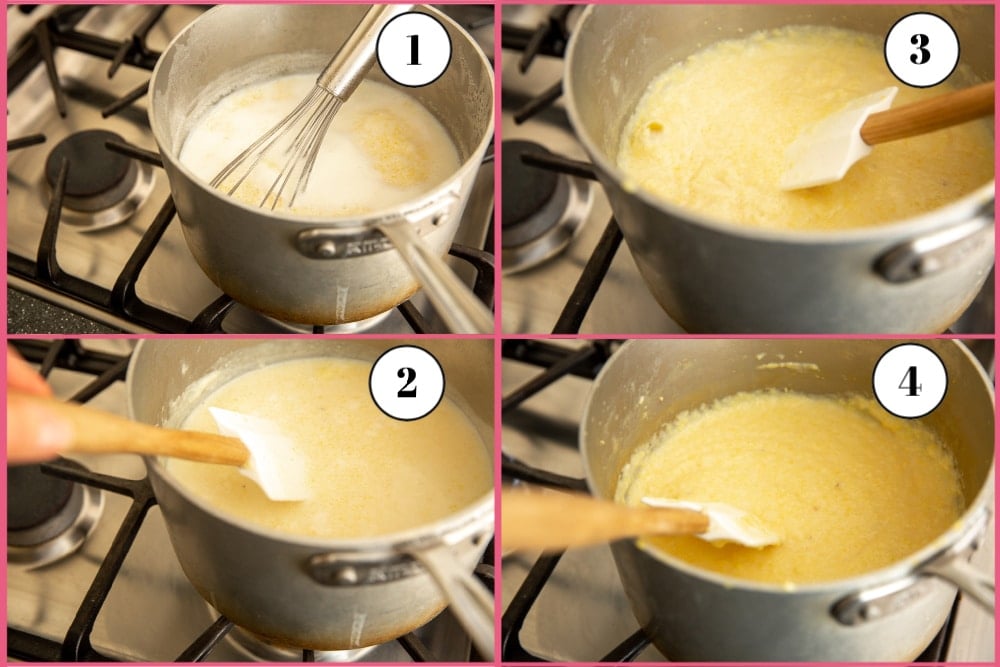
- Start with a whisk, then move to a spatula (watch the video below to see how it comes together). The mixture will be very liquidy at first, but it will start to thicken up. When you stir with the rubber spatula, be sure to scrape the bottom often, as the grits have a tendency to cake up there (which won't affect the flavor, but which will be a pain to clean off later).
- Feel free to splash in more milk as needed while the grits cook. They should look creamy and should swirl easily. If they start to look gritty, or if the edges start to look dark, it's a sign you need more milk.
- The grits will cook partially covered on your lowest heat. They should be bubbling and burping intermittently. Try to stir the pot every 5-10 minutes if you remember. (It's okay if you don't but you will get that caked on layer of grits on the bottom of the pan…)
- Speaking of which, if you do have a stubborn grit layer on the bottom, a scraper like this works wonders for getting it loose. (And call me crazy, but I love to eat that skin layer!)
Grits vs. cornmeal
When shopping for grits, you might find hominy grits and/or cornmeal grits (such as Bob's Red Mill brand). You might also see white grits or yellow grits (depending on the type of corn used). Stone ground grits are ground between traditional stone wheels and have a fabulous nutty flavor. It might seem confusing, but all are delicious and all are cooked in the same way! Just be sure that the grits you buy are coarse, not fine or "instant," which won't give you the same naturally sweet flavor and creamy texture.
I encourage you to experiment with different types of grits and different brands. Bob's Red Mill grits are a good supermarket choice, as they're readily available and consistently fresh. You can also mail order grits from sites such as Anson Mills.
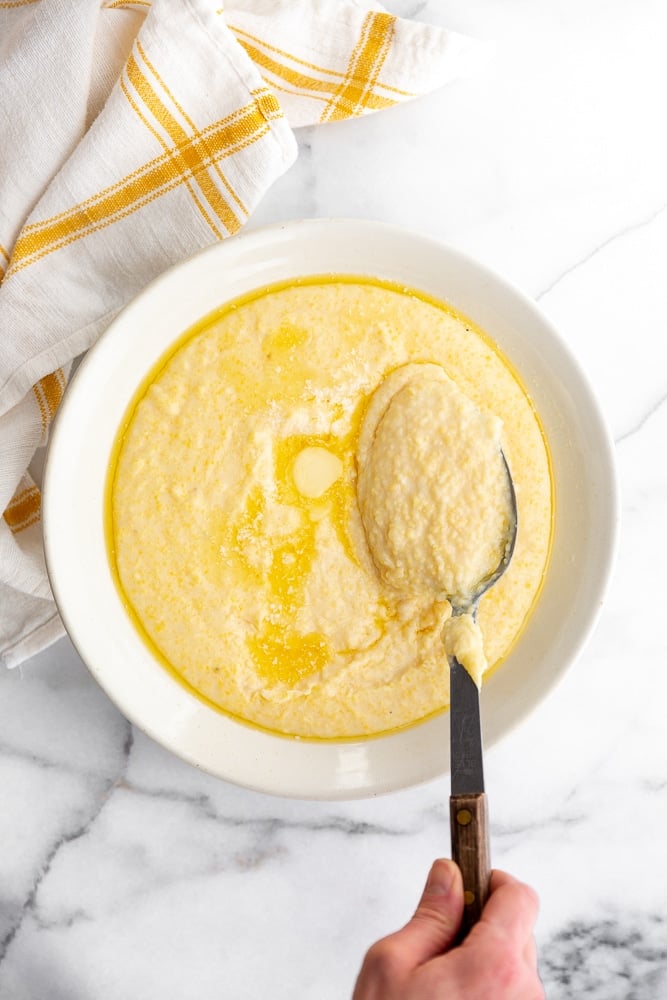
Grits vs. Polenta
Polenta is also made from boiled dried cornmeal. Unlike hominy grits, the corn used for polenta is not treated in an alkali solution to remove the hull. Polenta is also often made with Italian flint corn instead of American dent corn. However, you can cook grits and polenta in the the same way, and both are interchangeable in this recipe!
How to serve grits

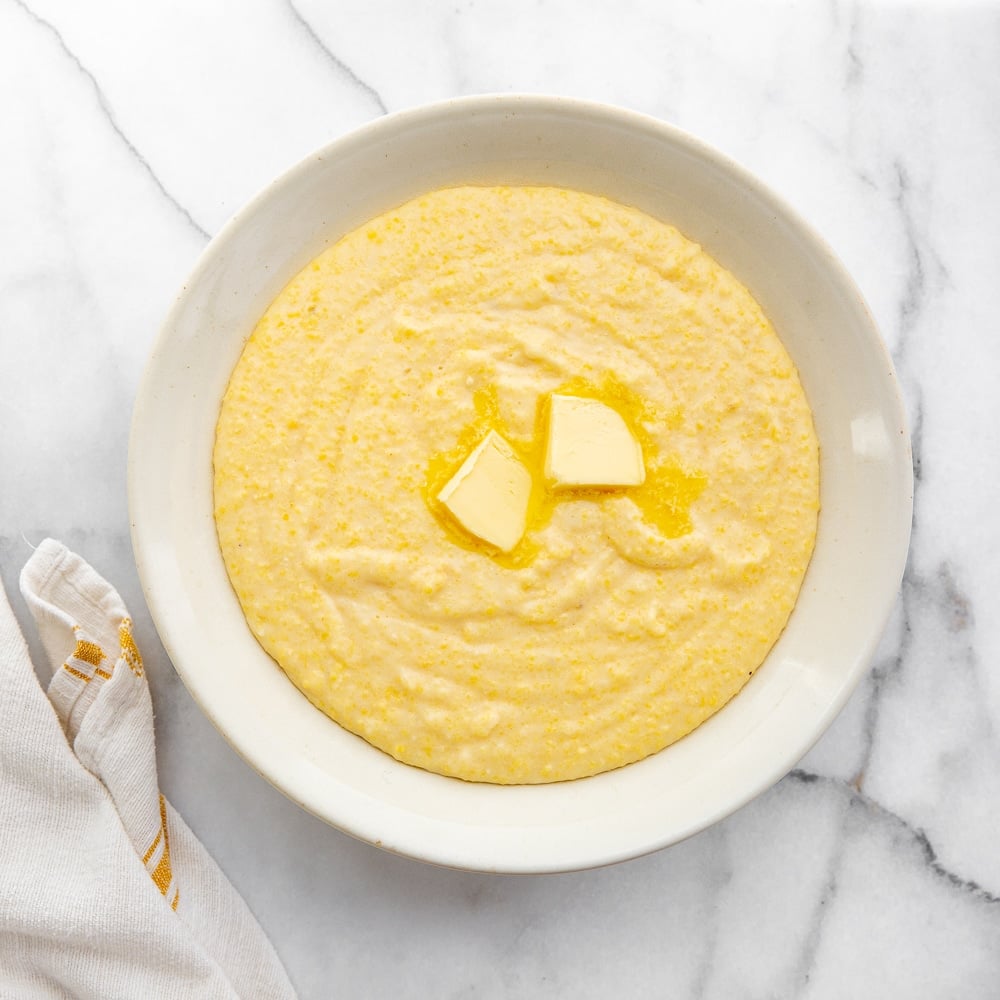
While I could be content with nothing more than a giant bowl and spoon (it's love, people), grits also make for a fantastic side dish! They pair spectacularly with grilled, roasted and braised meats, fish and vegetables. One of my favorite meals of all time is this Coconut Sriracha Shrimp and Kale with Grits, which is like a healthy twist on shrimp and grits. I also often swap out the grains from the recipes in my book, Build-a-Bowl, for grits. Since they're so mild, grits work well with sauces, like this green sauce (pictured below over sliced pork) or this salsa verde.
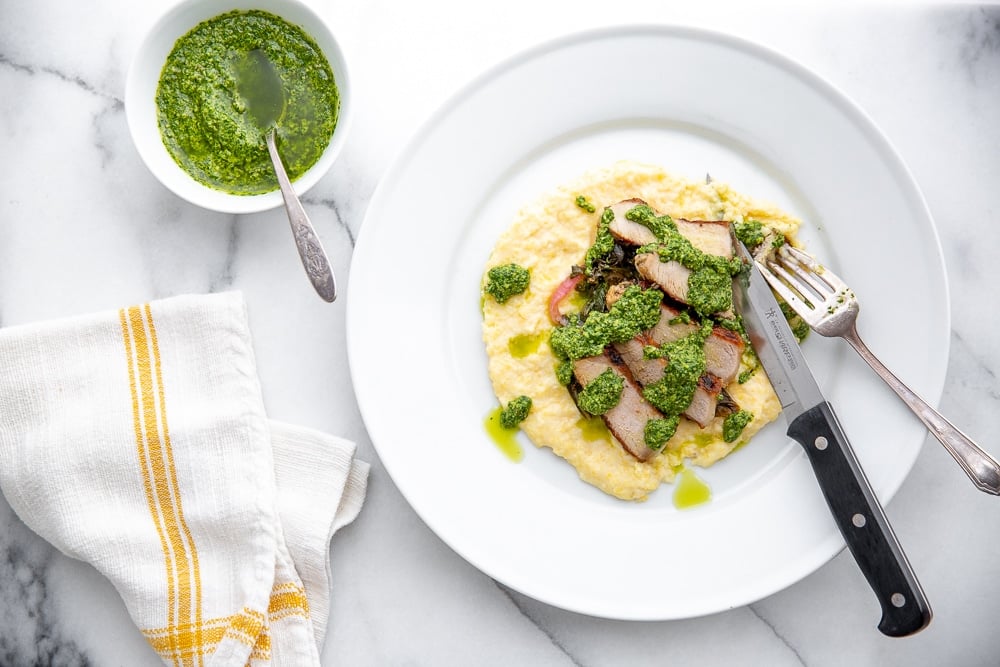
You can also serve grits for breakfast, as is traditional in the South. I love to pair them with sausages, eggs and collard greens (or fried green tomatoes if it's the season) for what has got to be one of the best breakfasts imaginable.
I hope you fall as hard for these grits as I did. (Just stay away from my husband. 😂)
FAQs
Traditionally, grits were made with dried hominy, which is corn that has been treated with an alkali solution (such as lime or lye). However, these days you can also find grits that are simply coarsely ground or stone-ground cornmeal.
Cooking grits is easy! Boil 5 cups of liquid (I use a mix of half water and half milk), then whisk in 1 cup of grits. Continue whisking until the grits come to a boil and thicken slightly. Reduce the heat to a low simmer, partially cover the pan, and cook until the grits are creamy and tender.
Yes! Grits are naturally gluten free. If you are celiac, however, seek out brands that test for cross-contamination (such as Bob's Red Mill).
It's best to store uncooked grits in the refrigerator or freezer, which will keep them fresher longer.
*This post contains Amazon and other affiliate links to products I use and love (from which I earn income, at no cost to you). Thank you for supporting From Scratch Fast!
What to serve with grits:
- Easy Lamb Ragu
- Creamy Coconut Shrimp with Kale
- Grilled Pork Chops
- Roasted Ratatouille
- Baked Turkey Meatballs
- Slow Cooker Meatballs
- Instant Pot Pinto Beans with Bacon
Watch the video!
Stay connected

Subscribe
Get exclusive new weekly recipes (all gluten-free, but you'd never know it), along with tips for finding more intention, ease, and joy in the kitchen in my Mind, Body, Spirit, FOOD newsletter!
Get the recipe!
Creamy Grits from Scratch
Ingredients
- 3 cups water
- 2 cups milk
- Salt
- 1 cup grits or polenta (not instant)
- 2 tablespoons butter
Instructions
- In a medium heavy saucepan, combine the water and milk and bring it to a boil (keep an eye on the pot, as the milk can boil over!). Season the liquid generously with salt, then whisk in the grits. Bring the mixture back to a boil while whisking. Continue whisking for 2-3 minutes, or until the grits are slightly thickened (the mixture will still be quite liquidy, and that's okay).
- Reduce the heat to low and partially cover the saucepan (there should be a small crack so that some steam can escape). Cook, stirring often with a rubber spatula, until the grits are tender and thickened, about 30-40 minutes (they should feel soft on the tongue, not gritty). Feel free to splash in more milk as needed while cooking if the grits start to look really thick-they should be creamy and should swirl easily. Stir in the butter. Season the grits generously with salt (this is key for flavor-you will need more than you think!).
- Remove the saucepan from the heat and cover it until you're ready to serve, up to 30 minutes. If you want to hold the grits for longer, drizzle a bit of milk over the surface before covering (this will help prevent a skin from forming)-they can sit out for up to 1 hour. Before serving, reheat the grits over low, stirring and adding more milk if needed.
Notes
- it's important to buy good-quality grits! Bob's Red Mill is a reliable supermarket brand, but you can also find a slew of stone-ground grits like these online.
- To achieve a creamy texture, use 5 cups of liquid to 1 cup of grits. It will seem like way too much liquid at first, but I promise that the cornmeal will absorb it all. Use half water and half milk (regular or low-fat milk, whatever you drink) to achieve a creamy texture. Keep your eye on the liquid as it comes to a boil, since the milk can boil over. You may need to add even more liquid at the end, depending on the grits you use.
- You'll want to use a heavy pot for these grits. Avoid a lightweight aluminum pots, as the bottom can burn.
- Start with a whisk, then move to a spatula (watch the video above to see how it comes together). The mixture will be very liquidy at first, but it will start to thicken up. When you stir with the rubber spatula, be sure to scrape the bottom often, as the grits have a tendency to cake up there (which won't affect the flavor, but which will be a pain to clean off later).
- Feel free to splash in more milk as needed while the grits cook. They should look creamy and should swirl easily. If they start to look gritty, or if the edges start to look dark, it's a sign you need more milk.





The 5-to-1 ratio made the grits turn out super creamy. Delicious!
It really makes for the creamiest grits. So happy you enjoyed!!
I see a contradiction. In the story, you say 5 cups of liquid and 1 cup of grits. In the recipe instructions, you say 6 cups of liquid and 1 cup of grits. Is this a mistake or is it another option to use 6 cups instead of 5?
Hi Matt, thank you for catching that! You should use 5 cups of liquid (I just edited the tips). However, you may need to add even more liquid at the end, depending on the grits you use. I hope you enjoy!
Thanks for clarifying, Nicki. I made them this morning. I think it was the first time I made grits ever and I loved them, but I did 2.5c milk and 2.5 water for a true half and half split. I live in Romania and can't get your typical American "grits," so I used good quality corn meal instead, and it (to me) worked just fine. I've eaten three portions already today. This recipe is a keeper.
I'm so happy to hear, Matt!!
Just saw this. Just FYI, True 100% Southern Grits are not made from Hominy! That substitution was done by Northerners and those from Mexico/ Central America who wanted Grits but could not get proper type of ground corn. So, they substituted hominy meal often in the form of Masa which was readily available to them. Grits in what it is can be found in other cultures such as in Mexico/ Central America, Italy and Spain generally as a rule made from hominy. Boil ground corn is basically what grits are. However, the type of corn and processing of said corn does matter in overall taste. This is why grits can have an off taste when someone is using the wrong type of ground corn meal. Certain corn varieties pair better with certain spices as well. The more spices you use it is better to go with Hominy type. The original grits should have a nutty, very creamy type of taste and if done right does not have any overt corn flavor profile. Which is why butter and salt is classic with some adding a bit of sugar is all that is needed. With hominy meal, you need more spice and other ingredients to help the flavor profile that is totally unnecessary often overpowering with traditional grits.
Such great insights!
First taste of grits for me was probably in Charleston SC where I lived for six years and have love them ever since will try the homemade scratch recipe.
I hope you enjoy!!
I never thought cooking grits could be so sensual!
What an amazing video.
This recipe is so simple yet so Delicious!
My first time making grits from scratch. I have a local mill that grinds these grits. I halved the recipe but then added an additional 1/2 cup of . Awesome and delicious.
I’m so glad you enjoyed (and you’re so lucky to have a local mill!).
thankyou soo much for this recipe, i made this with my own home grown dent corn and it was the most delicious corn frits I've ever had in my whole life!!!
I'm so glad you enjoyed, and you're so lucky to have homegrown dent corn!
I saw a recipe on tv... the chef soaked the grits first but I'm not sure what in. Have you ever seen this? I've made so many recipes and I can't seem to find the perfect one. Milk vs cream ? Cheese? Or just butter? I LOVE grits...
Hi Debbie, for this recipe there's no need to soak the grits. There are so many different recipes (and they all have their merits), but this is my personal favorite!
Thought they were awesome. Used half and half instead of milk. Yummy 5 cups liquid was perfect
Hi Julia, I'm so glad you enjoyed! Great tip about using half-and-half; it provides an even richer flavor!
Use fresh grits and have way way too much liquid.
Hello!
Are the brands of grits that you mentioned, are they treated with lime or lye solution?
Hi Charlie! The brands I mentioned are made with just stone-ground corn, not hominy, which is treated with lye.
Looks delicious! I used to have this as a kid but haven't made it before myself but I will try it today! Thanks Nicki!
Thank you so much, and I hope you enjoy the grits!!
Hi:
I would love to try your recipe for creamy grits! They look delicious.
However, in the video you put in 3 cups of water and 3 cups of milk but the recipe says 2 cups of milk?
Which amount should I use?
Thank you
Hi Mary! You should follow the measurements as written here (2 cups of milk). I ended up reducing the amount in the recipe, as I've found that different brands of grits/polenta can absorb liquid differently (you can always add more milk, but you can't take it out 😊). I hope you enjoy the recipe!
Guys, Thanks For sharing this Great Recipe. My Family Loved it. I am definitely sharing this recipe and this website with my friend. Hope they also love it. Thank you again for sharing such a great recipe.
I'm so happy to hear that you and your family enjoyed!
I lost interest in finding the recipe because there is waaaaayyyyyy too much intro. I don't need a life story when I'm looking for a recipe.
You can click “jump to recipe” to jumó straight to the recipe. If we didn’t care for stories, we could just read the instructions that come on the label..
I made this with ground popcorn in the blender. Perfect!
Hi Janine, I've never tried that! So glad it worked and will have to give it a go. Thanks for your comment!
can you use chicken broth instead of water?
Hi Karen, I prefer to use water since it lets the sweet corn flavor shine through, but you can use stock instead if you prefer (just note that the stock will overpower the corn flavor a bit). Happy cooking!
thank you so much..... just found out I am allergic to potatoes and pork....... i hve been trying to find a “substitute” for mashed potatoes because they hve always been my favorite..... i have never tried grits before...... i am super excited about trying your recipe... just want to find something that reminds me of the potatoes......??? Wish me luck!
Best of luck to you, Karen!! I know how hard it can be to have to cut foods out of your diet, but hopefully this journey will enhance your health. I often eat grits in place of mashed potatoes and hope you will love them too!
These grits turned out perfect!
Woohoo!
I have read several recipes for grits. Some say 3 to 1 ratio most say 4 to 1 ratio. You say 5 to 1 ratio. Can you explain please I explain I don’t know which one to use.
Also can you cut the recipe I. Half?
Thank You
Hi Michelle! I prefer a 5-to-1 ratio, which yields super creamy, luscious grits. A 4-to-1 ratio will give you a thicker results. Neither is right or wrong, but I find the 4-to-1 ratio a bit stodgy (but it's a preference). I don't recommend a 3-to-1 ratio, as the grits will be too thick and will be hard to clean from the pan. Yes, you can cut the recipe in half - just be sure to use a small pot, otherwise there will be too much surface area and the liquid will evaporate too quickly. I hope this helps!
5