Simple & Crispy Cheese Wafers Recipe
These buttery cheese wafers, enhanced with rosemary and the nutty crunch of walnuts, are the ultimate appetizer! Whether you're hosting the holidays or a cozy cocktail party, these wafers are sure to impress.

Why You’ll Love This Cheese Wafer Recipe
I've been making a version of these cheese wafers for at least a dozen years. They started as a simple classic and have evolved to include herbs and nuts, giving them more a modern feel. They're crumbly, cheesy, and perfect with a glass of wine or bubbly.
Plus, they're make-ahead friendly! You can freeze the dough and bake off the wafers as needed, which means less stress during the holiday rush. Whether you're serving a crowd or enjoying a family dinner, the wafers are endlessly adaptable. Swap rosemary for thyme, amp up the spice with a bit of cayenne pepper, or trade walnuts for pecans to make them your own.
This recipe will make all your savory snacking dreams come true. For more, try these Gluten-Free Seed Crackers, this Herby Feta Dip, or this Whipped Ricotta Crostini.
Ingredients You’ll Need
- Gluten-free flour or all-purpose flour: The foundation of the wafers, providing structure and a light crumbly texture. Use a gluten-free blend like Bob's Red Mill or King Arthur Measure for Measure, or swap for regular all-purpose flour if gluten isn't a concern.
- Fresh rosemary: Adds an herby, aromatic kick. Fresh thyme or sage will also work.
- Fine sea salt
- Cayenne pepper (optional): Just a pinch adds a subtle spice. Omit if you prefer a milder flavor.
- Unsalted butter
- Comté cheese: This nutty, buttery cheese is the star of the show. Substitute with Gruyere or sharp cheddar for a twist.
- Water
- Egg
- Walnuts: Adds a crunchy texture to the edges of the wafers. Swap with pecans or skip entirely for a nut-free option.
How to Make Crispy Cheese Wafers
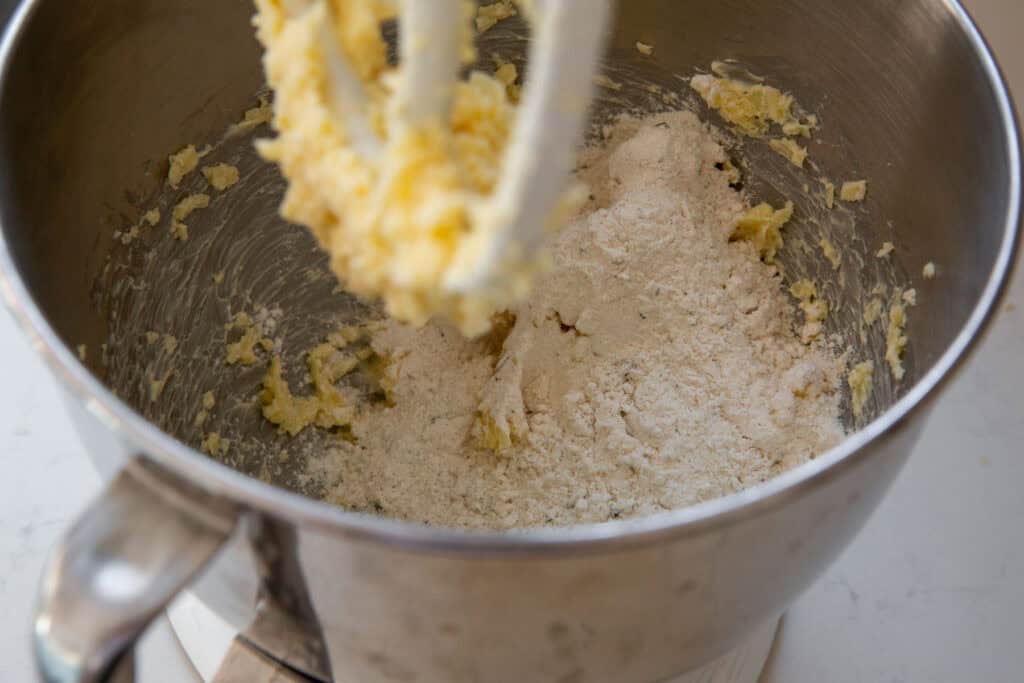
Step 1: In a small bowl, whisk together the flour, rosemary, salt, and cayenne (if using). In the bowl of a stand mixer with the paddle attachment (or a large bowl using a rubber spatula and some arm strength), beat the softened butter and shredded cheese until well combined. Scrape down the sides. Add the dry ingredients, and beat until the flour is incorporated and the mixture looks crumbly.
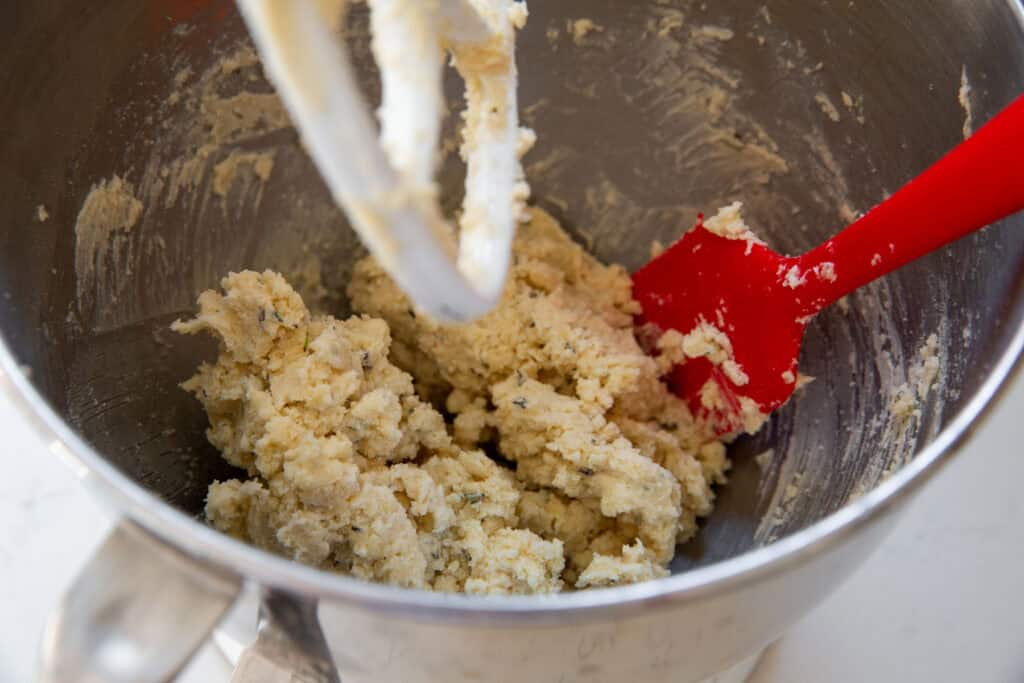
Step 2: Scrape down the sides. Drizzle in 2 teaspoons of water and beat until the mixture sticks together into a rough dough.
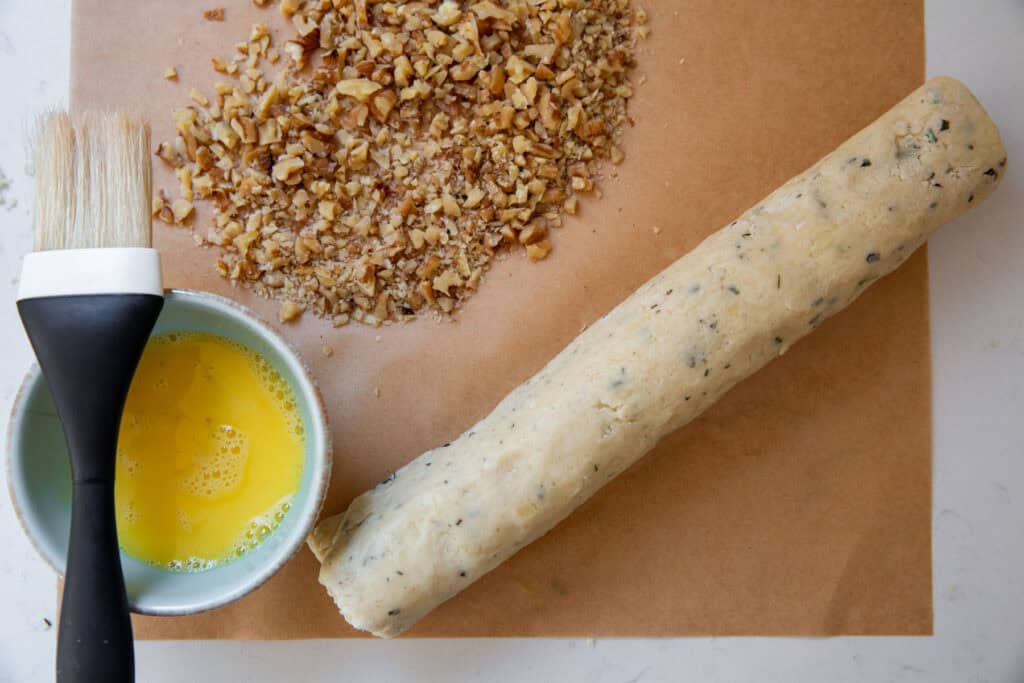
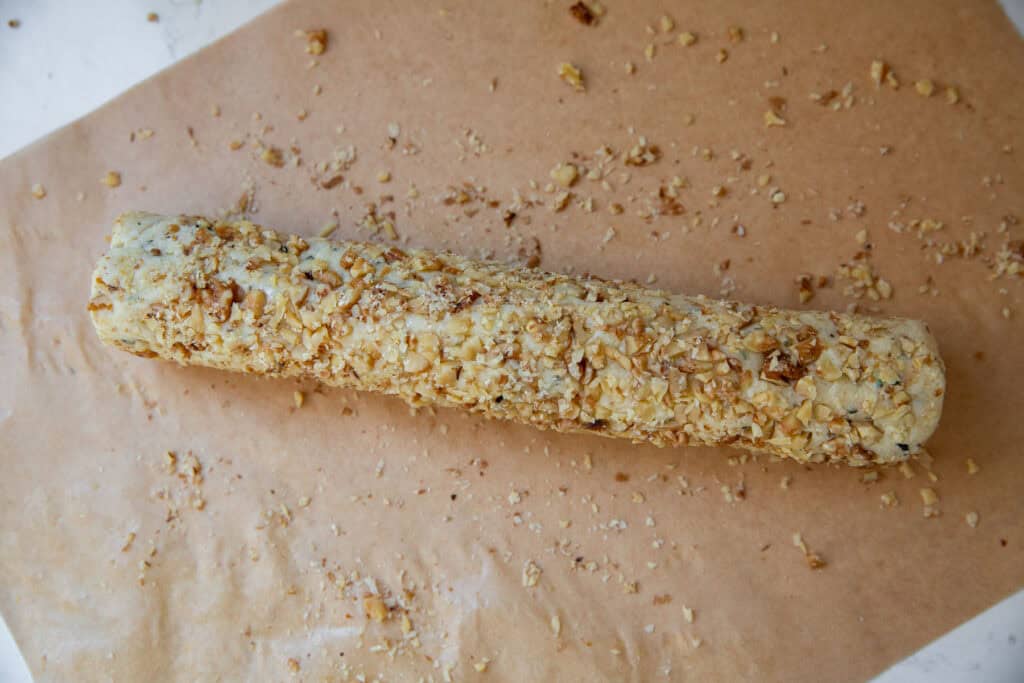
Step 3: Transfer the dough to a work surface and shape it into a 10 to 11-inch long log (about 1 ½ inches in diameter). In a small bowl, beat the egg with 1 teaspoon of water. Brush the egg wash all over the log of cheese wafer dough (you won't need it all). Spread the walnuts out onto a piece of parchment paper, and roll the dough in the walnuts to coat, pressing the walnuts gently to adhere.
Step 4: Wrap the dough with plastic wrap and refrigerate it for at least 1 hour or for up to 48 hours.
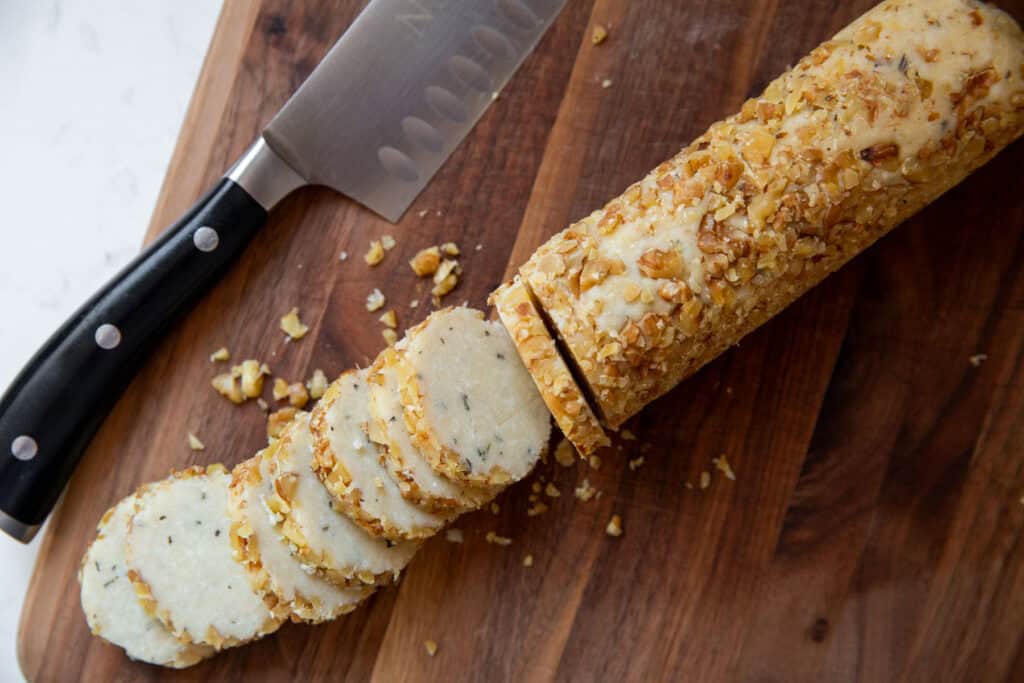
Step 5: Preheat the oven to 350˚F (175˚C). Line 2 large baking sheets with a sheet of parchment paper. Slice the chilled dough into ¼-inch thick rounds and arrange them on each parchment-lined baking sheet, spacing them 2 inches apart. Bake the wafers, rotating the pan positions halfway through, until they're lightly golden on the edges, about 11-13 minutes.
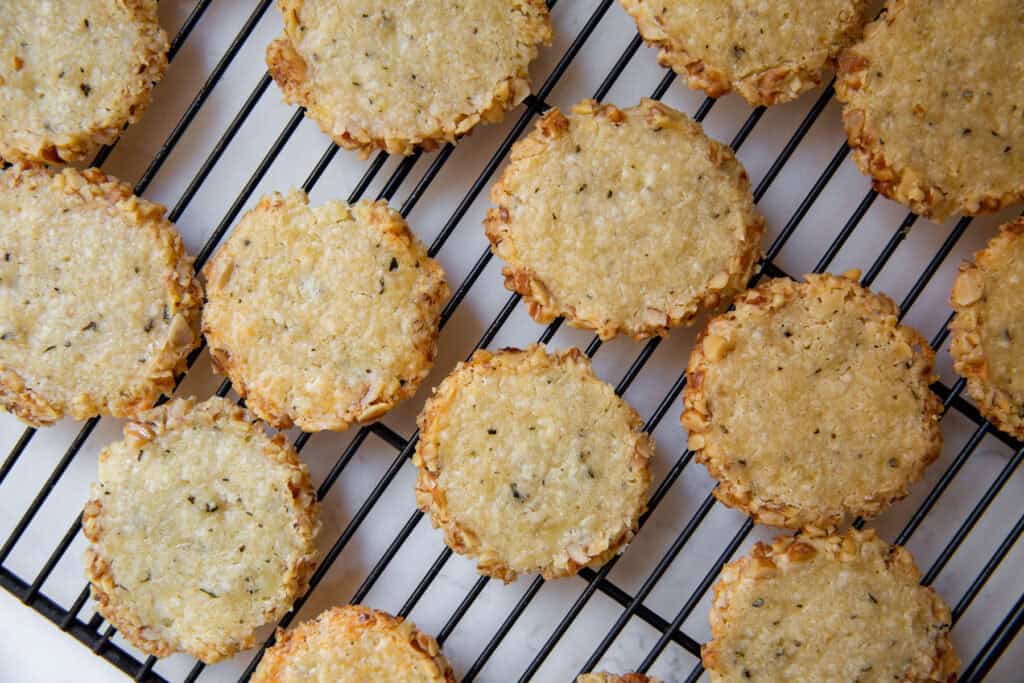
Step 6: Let the wafers cool on the pans for a few minutes, then transfer them to a wire rack and let them cool completely (they will firm up as they cool). Transfer the cooled wafers to a platter, and serve.

Expert Tips
- Cheese substitutions: Try Gruyere, regular cheddar cheese, extra sharp cheddar cheese, or even parmesan cheese for a different flavor profile.
- Herb swaps: Rosemary adds earthy depth, but thyme or sage would also work beautifully.
- Keep the edges clean: Use a sharp knife to slice the dough for uniform wafers.
Serving and Storage
- Serving suggestions: Pair these cheese wafers with wine, Champagne, or festive cocktails for an elegant pre-dinner snack. They make a great addition to a charcuterie board or cheese plates as well. This is a versatile, great recipe for all gatherings from baby showers and birthdays to holidays and other fun celebrations.
- Storage tips: The baked wafers can be stored in an airtight container at room temperature for up to 5 days or frozen for up to 1 month. Defrost at room temperature before serving.
- Freezing: The dough can be refrigerated for up to 2 days or frozen for up to 2 months. If freezing, place the wrapped cheese log in a freezer bag or airtight container to prevent freezer burn. For best results, defrost the dough in the refrigerator overnight and bake.

Recipe FAQs
Yes! The dough can be made and frozen for up to 2 months. You can also bake the wafers in advance and freeze them.
Absolutely. If you prefer a nut-free version, simply skip the walnuts. The wafers will still be deliciously crispy and cheesy.
*This post contains Amazon and other affiliate links to products I use and love (from which I earn income, at no cost to you). Thank you for supporting From Scratch Fast!
More Delicious Snacks & Appetizers
- Cheese and Scallion Scones
- Savory Spinach Tart Recipe
- Easy Baked Tomatoes
- Butternut Squash and Goat Cheese Galette
Stay Connected

Subscribe
Get exclusive new weekly recipes (all gluten-free, but you'd never know it), along with tips for finding more intention, ease, and joy in the kitchen in my Mind, Body, Spirit, FOOD newsletter!
Get The Recipe

Simple & Crispy Cheese Wafers Recipe
Ingredients
- 1 cup (148g) gluten free flour (I recommend Bob's Red Mill Gluten Free 1-to-1 Baking Flour or King Arthur Measure for Measure) or 1 cup (136g) regular all-purpose flour
- 2 teaspoons finely chopped fresh rosemary
- ¾ teaspoon fine sea salt
- Pinch cayenne pepper (optional)
- 1 stick (113g) unsalted butter, softened
- 8 ounces (227g) Comté cheese, shredded (3 cups shredded)
- 3 teaspoons water divided
- 1 large egg
- ½ cup walnuts finely chopped
Instructions
- In a small bowl, whisk together the flour, rosemary, salt and cayenne (if using).
- In the bowl of a stand mixer with the paddle attachment (or you can use a rubber spatula and some arm strength), beat the softened butter and shredded cheese until well combined. Scrape down the sides.
- Add the dry ingredients, and beat until the flour is incorporated and the mixture looks crumbly. Scrape down the sides. Drizzle in 2 teaspoons of water and beat until the mixture sticks together into a rough dough.
- Transfer the dough to a work surface and shape it into a 10 to 11-inch long log (about 1 ½ inches in diameter). In a small bowl, beat the egg with 1 teaspoon of water. Brush the egg wash all over the log of dough (you won't need it all). Spread the walnuts out onto a piece of parchment paper, and roll the dough in the walnuts to coat, pressing the walnuts gently to adhere.
- Wrap the dough with plastic wrap and refrigerate it for at least 1 hour or for up to 48 hours. Do Ahead: The dough can be refrigerated for up to 2 days or frozen for up to 2 months. If freezing, place the wrapped log in a freezer bag or airtight container to prevent freezer burn. Defrost the dough in the refrigerator overnight.
- Preheat the oven to 350˚F (175˚C). Line 2 large baking sheets with parchment paper.
- Slice the dough into ¼-inch thick rounds and arrange them on the prepared baking sheets, spacing them 2 inches apart. Bake the wafers, rotating the pan positions halfway through, until they're light golden on the edges, about 11-13 minutes. Let the wafers cool on the pans for a few minutes, then transfer them to a rack and let them cool completely (they will firm up as they cool). Transfer the cooled wafers to a platter, and serve.
- Do Ahead: The log of dough can be tightly wrapped and frozen for up to 2 months. Defrost it overnight in the fridge. Once baked, the wafers can be frozen for up to 1 month (defrost them at room temperature before serving).
Notes
- Cheese substitutions: Try Gruyere, regular cheddar cheese, extra sharp cheddar cheese, or even parmesan cheese for a different flavor profile.
- Herb swaps: Rosemary adds earthy depth, but thyme or sage would also work beautifully.
- Keep the edges clean: Use a sharp knife to slice the dough for uniform wafers.