Chickpea Waffles: The Easiest Waffles you will Ever Make

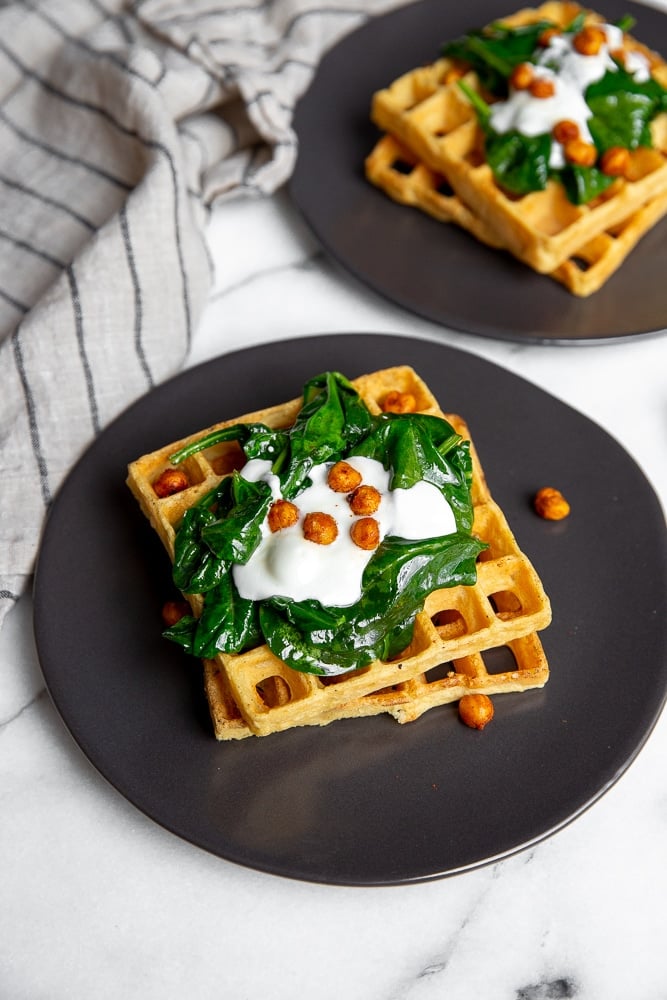
These 4-ingredient savory chickpea waffles are insanely easy and are naturally gluten-free and vegan! The waffles are light and crispy, and are irresistible as a side dish or as the base for savory toppings. You can even freeze them for quick and easy breakfasts, lunches and dinners down the line.
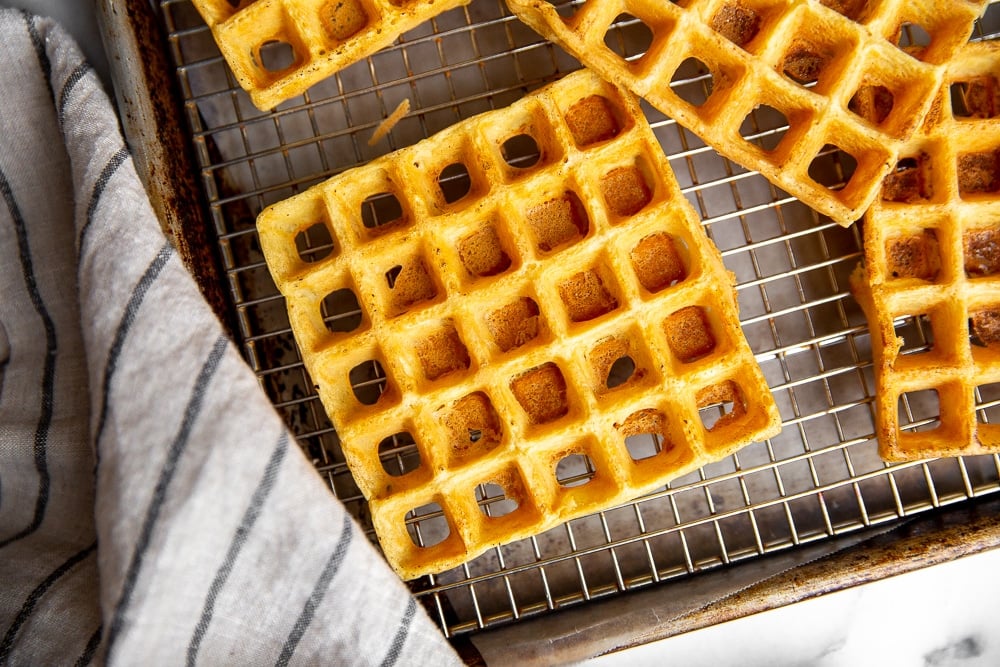
Chickpea flour waffles
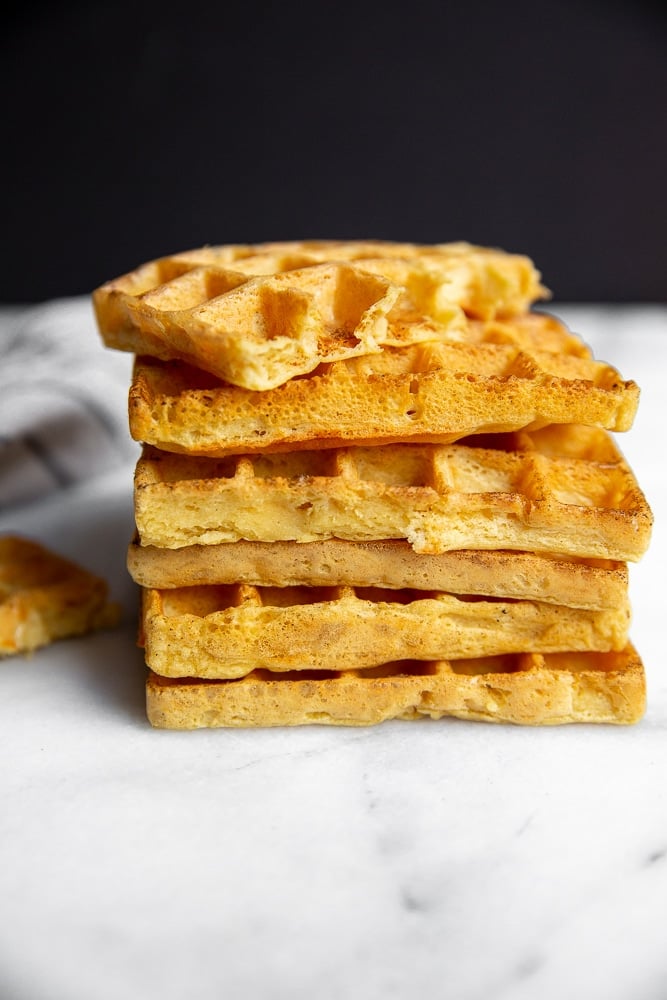
These are the easiest waffles you will ever make, made with just chickpea flour (also called garbanzo bean flour), olive oil, water and salt (you can also add a touch of sugar, but it's optional). The recipe was inspired by chickpea socca, a thin, crispy flatbread that originated in Italy and is often served as an appetizer. Cooking the batter in a waffle maker maximizes the surface area, resulting in a crispy exterior with a tender, almost creamy center. They're so good.
How do you make chickpea waffles?
The batter couldn't be easier-all you do is whisk together the ingredients! While it's definitely a fast recipe, it does require a bit of advance planning, as the batter needs to sit for an hour to allow the flour to absorb the liquid. However, it can sit out all day, so I whisk up the batter in the morning after breakfast; leave it on the counter; and it's ready for me come dinnertime.
How do you serve chickpea waffles?
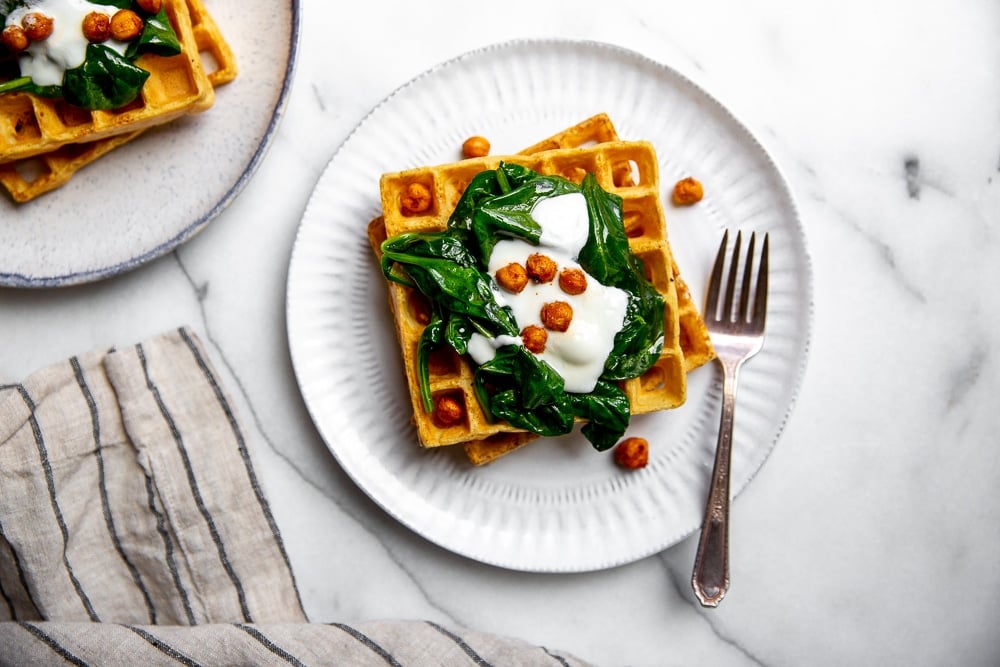
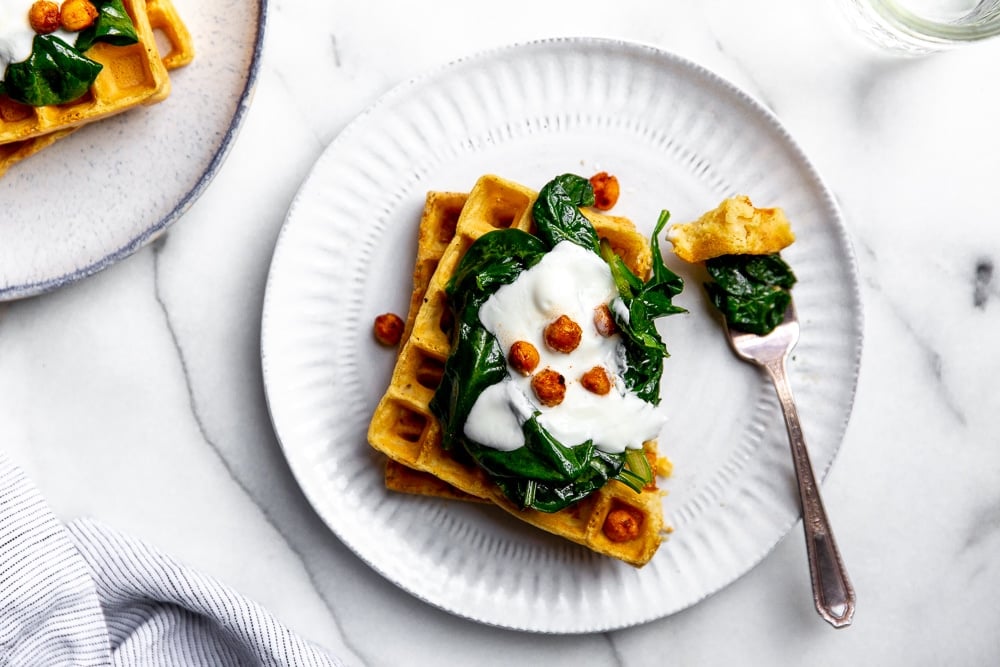
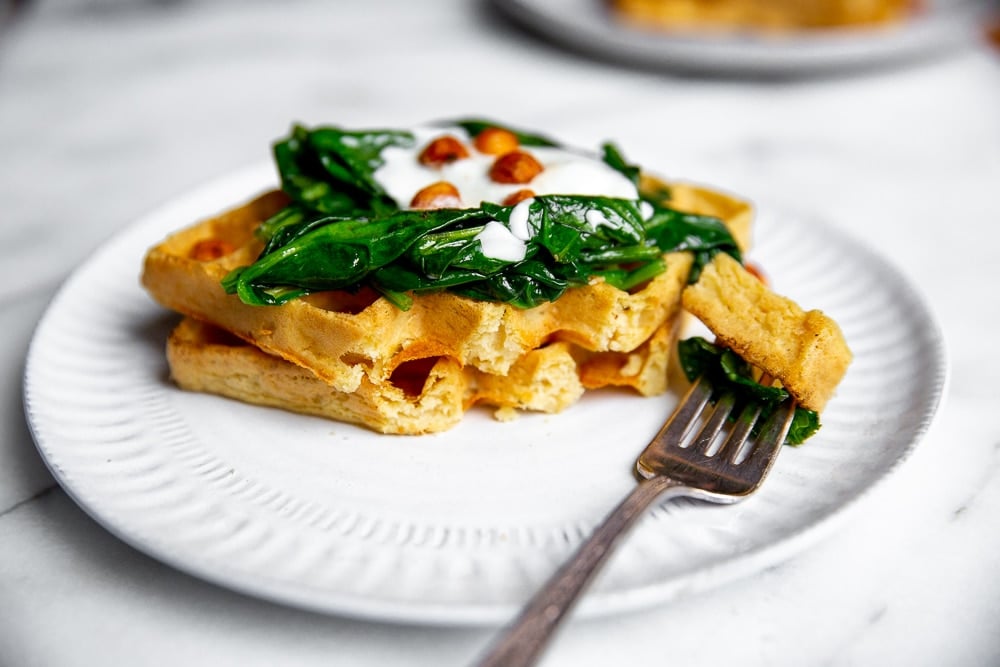
While it's hard to resist eating the chickpea waffles on their own straight out of the waffle maker, I prefer to turn them into a meal by piling them with savory toppings such as sautéed vegetables, fried or poached eggs, or even a mix of leftovers. If I'm short on time, one of my favorite variations is to top the waffles with sautéed spinach, a dollop of plain yogurt (regular or vegan), some flaky sea salt and a smattering of smoky-sweet roasted chickpeas (I've included the recipe below!).
FAQs
Yes! The waffles can be kept warm in a 200˚F oven for 15 minutes. They also freeze beautifully, making for quick and easy lunches and dinners. Reheat them in a toaster oven until warmed through and crisp.
You can use either a regular waffle iron or a Belgian waffle iron for this recipe. I have a Belgian waffle iron, which creates slightly thicker waffles.
Most grocery stores now carry chickpea flour - check the the gluten-free section if you can't find it - or you can buy it online.
Recipe tips:
- I prefer cooking with Diamond Crystal Kosher Salt, which has a fine texture and mild flavor. If you use Morton Kosher Salt, be sure to cut back on the quantity as indicated in the recipe, otherwise the waffles will be too salty.
- Be sure to preheat your waffle iron and to spray it with cooking spray (or brush it lightly with oil) before adding the batter. You can use a regular waffle iron or a Belgian waffle iron to make these waffles. I LOVE this Cuisinart Belgian Waffle Maker, since it makes 4 waffles at once (no waiting around for individual waffles to cook!).
- The waffles are the crunchiest straight out of the waffle maker. You can also make them ahead and let them cool, then freeze them in an airtight container or ziptop bag. Reheat the waffles in a toaster oven until crisp (they're a perfect lunch or easy side dish!).
- If you like these waffles, you've got to try these Savory Green Chickpea Flatbreads!
- For other breakfast and lunch ideas, try these Strawberry Oat Waffles, these Banana Oat Pancakes, or this recipe for Gluten Free Crepes.
*This post contains Amazon and other affiliate links to products I use and love (from which I earn income, at no cost to you). Thank you for supporting From Scratch Fast!
Other vegan recipes to try:
- Vegan Chocolate Pudding Tart
- Vegan Panna Cotta with Roasted Berries
- Slow Cooker Red Lentil & Kale Soup
- Vegan Quinoa Burgers
- All my Vegan Recipes!
Watch the video!
Stay connected

Subscribe
Get exclusive new weekly recipes (all gluten-free, but you'd never know it), along with tips for finding more intention, ease, and joy in the kitchen in my Mind, Body, Spirit, FOOD newsletter!
Get the recipe!

Chickpea Waffles (Gluten-Free, Vegan)
Ingredients
- 2 cups (7oz/200g) chickpea flour (also called garbanzo bean flour)
- 2 cups water
- 2 tablespoons extra virgin olive oil, plus more for waffle iron
- 1 ½ teaspoons Diamond Crystal kosher salt (1 teaspoon if using Morton brand kosher salt)
- ¼ teaspoon sugar, optional
Instructions
- In a large bowl, whisk together the chickpea flour, water, olive oil, salt and sugar (if using) until smooth (the batter will be quite thin). Cover and let sit at room temperature at least 1 hour, or up to 9 hours. Do Ahead: The batter can be made up to 9 hours in advance. Store at room temperature.
- Preheat a waffle iron to medium-high.
- Brush the waffle iron with a bit of olive oil or spray it with cooking spray. Working in batches, cook the waffles until golden and crisp. Serve immediately. Do Ahead: The waffles can be kept warm in a 200˚F oven for 15 minutes. Once cooled, the waffles can be stored between layers of parchment or wax paper and frozen for up to 2 months. Reheat in a toaster oven.
Notes
- I prefer cooking with Diamond Crystal Kosher Salt, which has a fine texture and mild flavor. If you use Morton Kosher Salt, be sure to cut back on the quantity as indicated in the recipe, otherwise the waffles will be too salty.
- Be sure to preheat your waffle iron and to spray it with cooking spray (or brush it lightly with oil) before adding the batter. You can use a regular waffle iron or a Belgian waffle iron to make these waffles. I LOVE this Cuisinart Belgian Waffle Maker, since it makes 4 waffles at once (no waiting around for individual waffles to cook!).
- The waffles are the crunchiest straight out of the waffle maker. You can also make them ahead and let them cool, then freeze them in an airtight container or ziptop bag. Reheat the waffles in a toaster oven until crisp (they're a perfect lunch or easy side dish!).
- If you like these waffles, you've got to try these Savory Green Chickpea Flatbreads!

Roasted Chickpeas
Ingredients
- 1 15-oz can chickpeas, drained, rinsed and patted dry with paper towels
- ½ teaspoon smoked paprika
- ½ teaspoon granulated garlic (or garlic powder)
- ¼ teaspoon sugar
- Salt and freshly ground black pepper
- 1 tablespoon extra virgin olive oil
Instructions
- Preheat the oven to 450˚Line a baking sheet with parchment paper.
- Spread the chickpeas on the baking sheet and sprinkle with the smoked paprika, granulated garlic and sugar. Season with salt and pepper. Drizzle with the olive oil, and toss well to coat. Roast 15 minutes, shaking the pan twice during cooking, or until the chickpeas are crisp and are starting to split. As soon as they come out of the oven, season them with more salt and pepper. Do Ahead: The roasted chickpeas can be made up to 2 hours in advance. Store uncovered at room temperature.


I had the exact experience that you had. I added two eggs and a teaspoon of baking powder and
they cooked great and tasted great.
While I enjoy the simplicity of this recipe, I found mine to take quite a long time to cook in the waffle iron; the texture was still a little underdone if I added a typical amount of batter. They didn't rise/fluff up for me. They were still good though! We enjoyed them with classic waffle toppings of butter and maple syrup.
Hi Zoe, next time I'd suggest adding less batter to the waffle iron (I add about half of what I add for regular waffle batters). Hopefully that should fix the issue!
I had the exact experience that you had. I added two eggs and a teaspoon of baking powder and
they cooked great and tasted great.
Finally remembers to make these (as the batter needs to sit) and OMG BEST WAFFLES IVE MADE YET!!!
I let the batter sit for about 5 hours and it was still really good they turned out so crispy and perfect!
Will definitely be making this again and again!
I'm so happy to hear you like the waffles!
Hi I was just wondering looking at the photos of the waffles why they're so porous, meaning there's no cooked batter between the individual squares like traditional waffles? They do look crunchy and crispy which sounds good but don't see how they would hold any butter, syrup or gravy in the little nooks, and I make my children and myself too sandwiches with waffles like peanut butter and jelly, or savory ones with egg or chicken salad. I don't believe you could do that with these being so porous. Can you suggest a remedy?.
Hi there! The batter for these waffles is thinner than traditional waffle batter, which accounts for the holes in the waffles. Those thin spots are actually beneficial, as they create a crispier waffle. I don't recommend these savory waffles with syrup, but they could make for fun savory sandwiches (just take note that they're best eaten warm, as they lose their crunch once cooled). You could try adding more batter to the waffle iron, or embrace the holes!!
5
These look yummy. Is there any substitute for the oil in the waffles?
Thank you! The oil is integral to this recipe so I wouldn't suggest swapping it out, but you could use another type of oil, such as grapeseed or safflower. I hope you enjoy!
These look great! Do you have any tips for how to keep the batter from sticking in the waffle iron? Do you tend to do these low and slow, or higher setting? About how long do they typically take per waffle? Thanks, can't wait to try this savory version.
Thank you! I suggest spraying the waffle iron with cooking spray to prevent sticking. I've never had trouble with the batter sticking, but our iron is well seasoned (we use it a LOT)! You'll want to cook the waffles on medium-high, and the time will depend on the waffle maker you have. Just keep your eye on them. Once they're golden and crisp, you're ready to go. Good luck, and I hope you enjoy!
The crispy chick peas are a great snack. Absolutely guilt free and sooo good.
I'm so glad you like them! (They're totally addicting, right?!)
These recipes look great, thanks for them! While I'm not gluten (or dairy or anything-else free, I am looking for ways to eat more healthy protein and cut down on my meat consumption). I'll be trying these this week!
Hi Barb,
Thanks so much for visiting, and I hope you enjoy!!