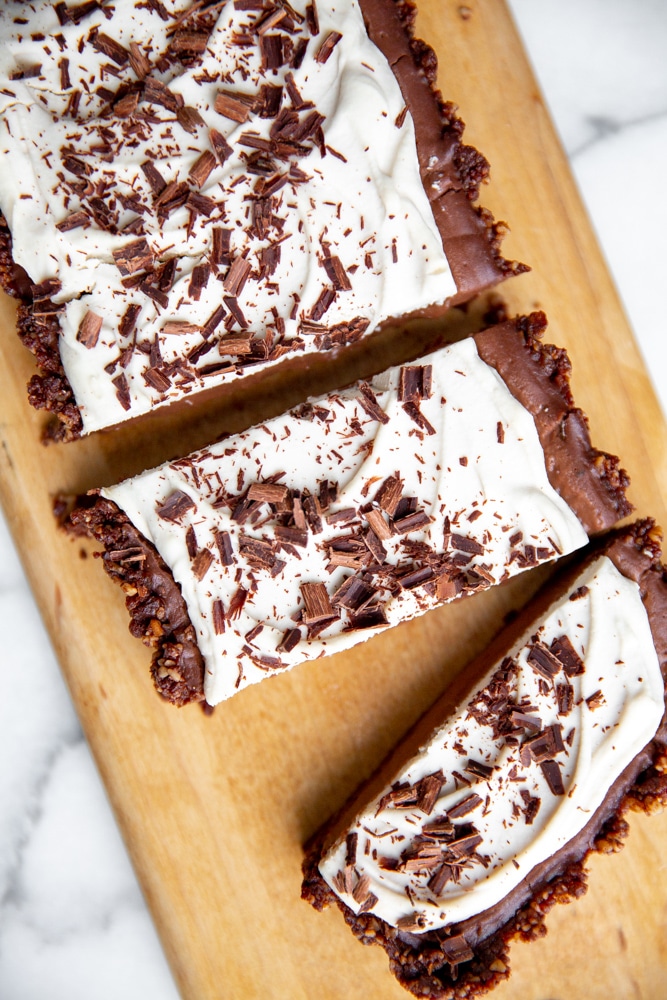
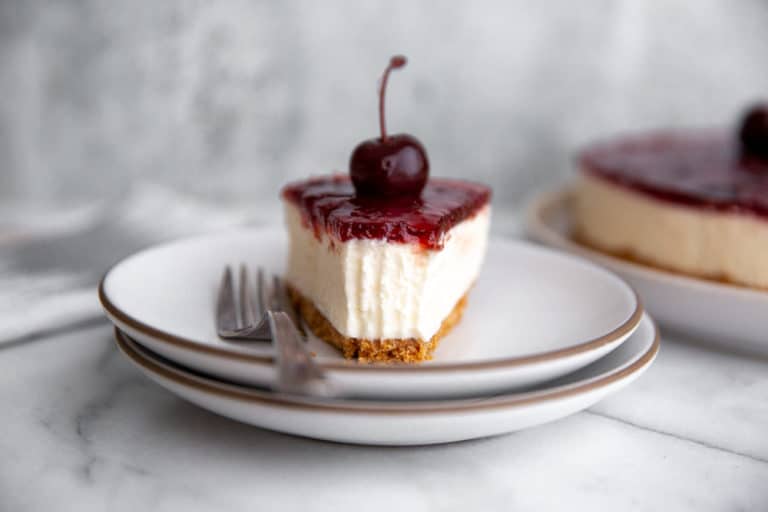
No Bake Vegan Chocolate Pudding Tart (Gluten Free)

If you're looking for a healthy(ish) dessert that tastes indulgent, is easy to make, and will appeal to all eaters at the table, then this vegan chocolate tart is for you! It's a no bake chocolate tart that anybody can master, and I'll show you all the steps below (don't miss the step-by-step VIDEO!).
Vegan chocolate tart
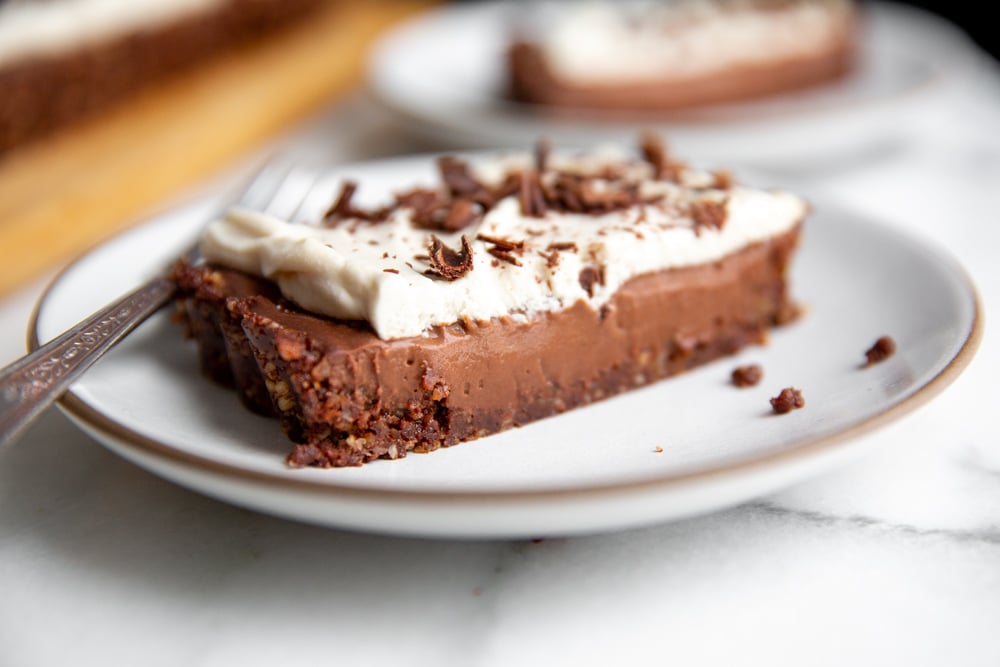
The tart is made with my easy Dark Chocolate Pudding recipe, using coconut milk as the base. The coconut milk not only makes this chocolate tart dairy free, but it also gives it an incredibly luscious, creamy texture.
No bake chocolate tart
Best of all, it doesn't even need to go in the oven! Instead, this no bake chocolate tart chills overnight (to allow the pudding to set), making it a perfect make-ahead dessert.
Healthy chocolate tart
The tart is gluten free, dairy free and is naturally sweetened, but you'd never know it. It's a healthier dessert that everybody at the table will love.
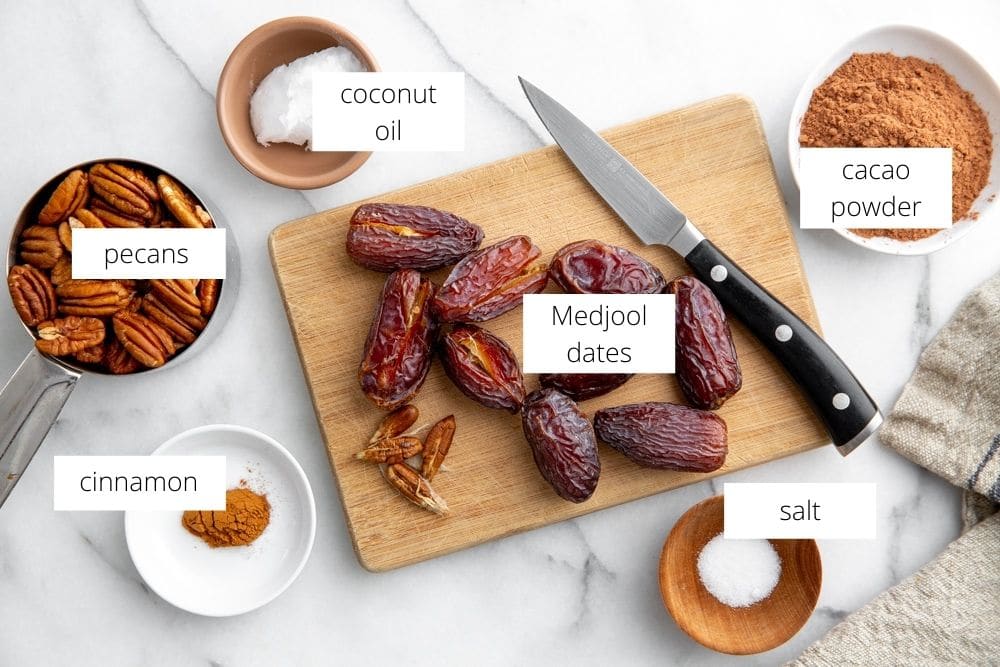
Easy date nut crust
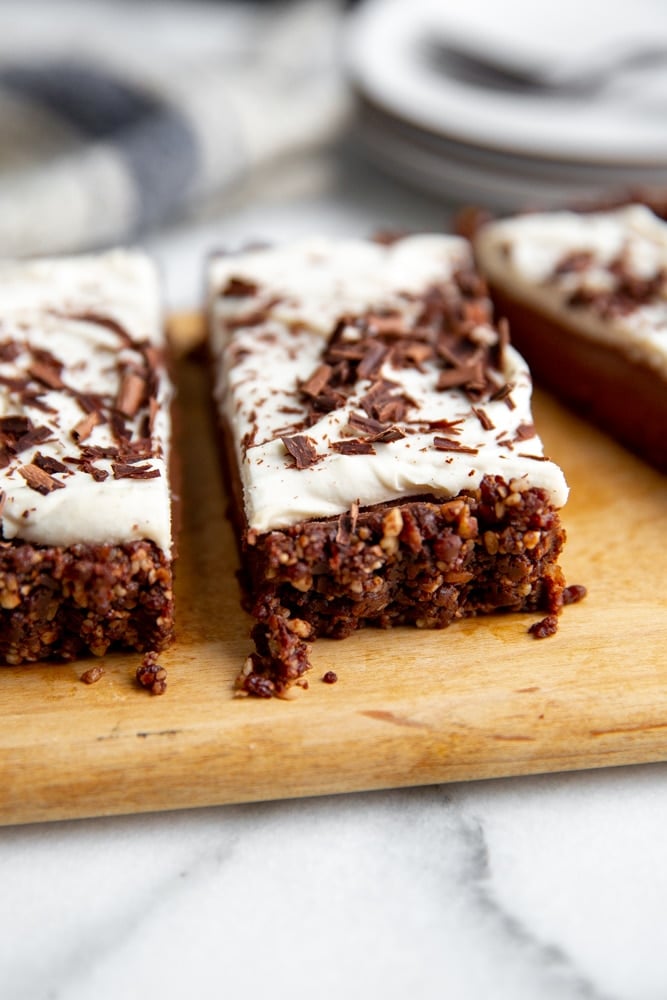
The no bake crust is made with Medjool dates and pecans. The dates provide sweetness as well as the "stickiness" that holds the crust together. Cacao powder and cinnamon lend depth of flavor.
How to make a vegan chocolate tart:
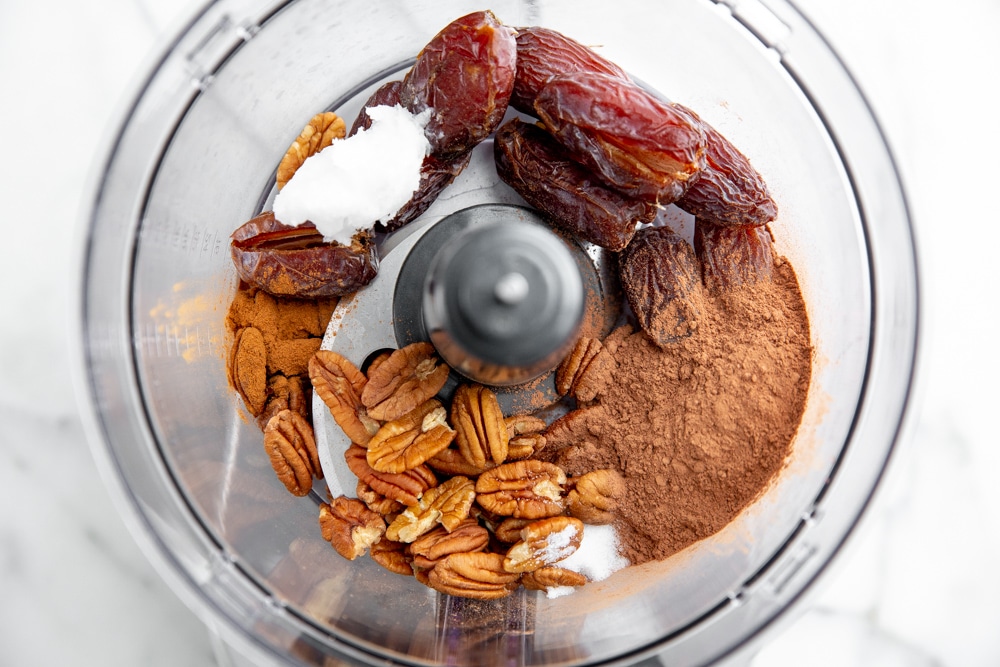
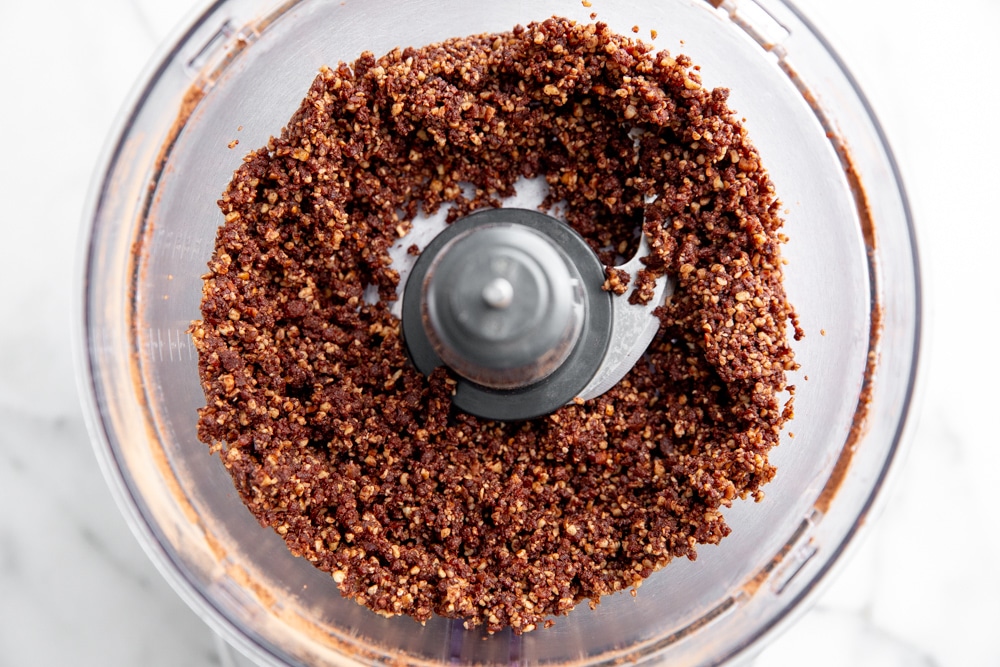
- 1. Make the date and pecan crust: In a food processor, combine pitted Medjool dates, pecans, cacao powder, cinnamon, coconut oil and salt. Process until the mixture is very finely chopped and sticky.
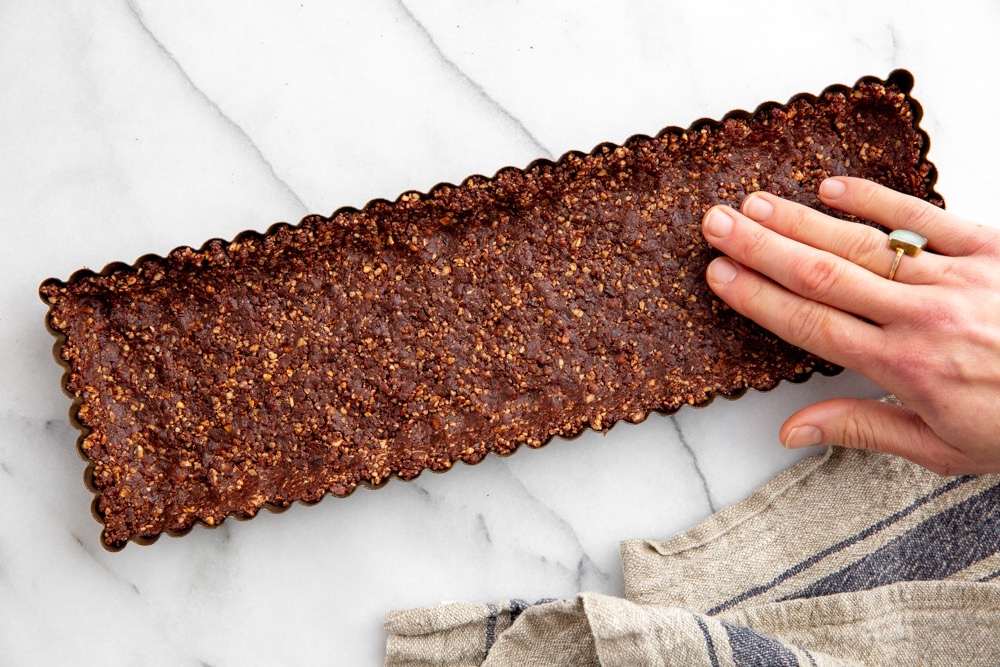
- 2. Press the crust into the pan (or glasses!): Scrape the crust into a tart pan and press it evenly along the bottom and up the sides. You can use a 14-inch rectangular tart pan, a 9-inch round tart pan, or you can ditch the pan altogether and make individual pudding trifles in glasses or ramekins (press the crust evenly along the bottom).
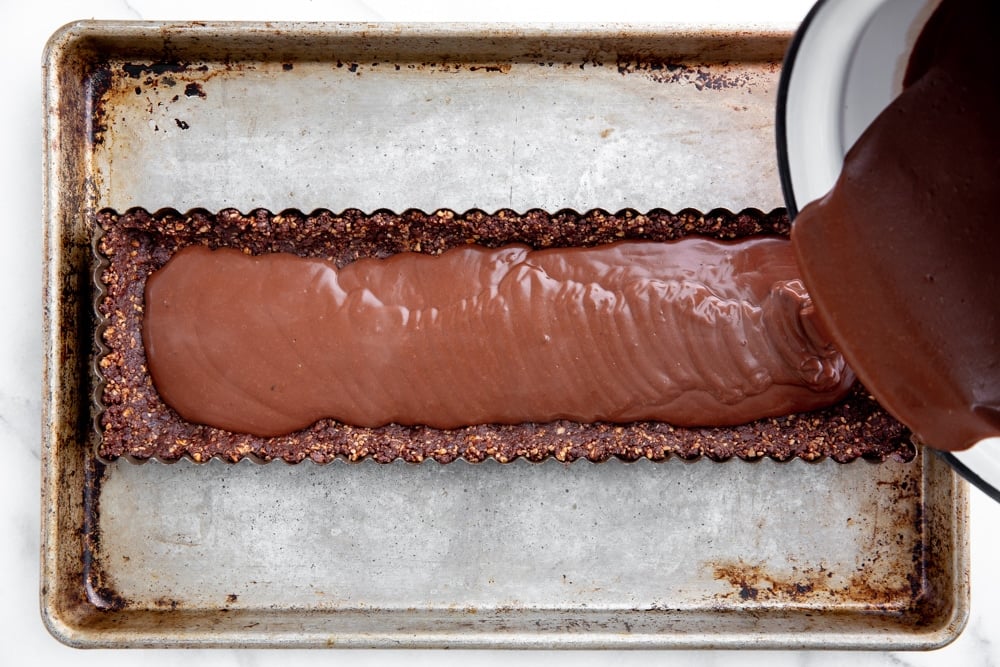
- 3. Make the chocolate pudding: Make the chocolate pudding filling using full-fat coconut milk (don't use light coconut milk or regular milk, otherwise the filling won't set).

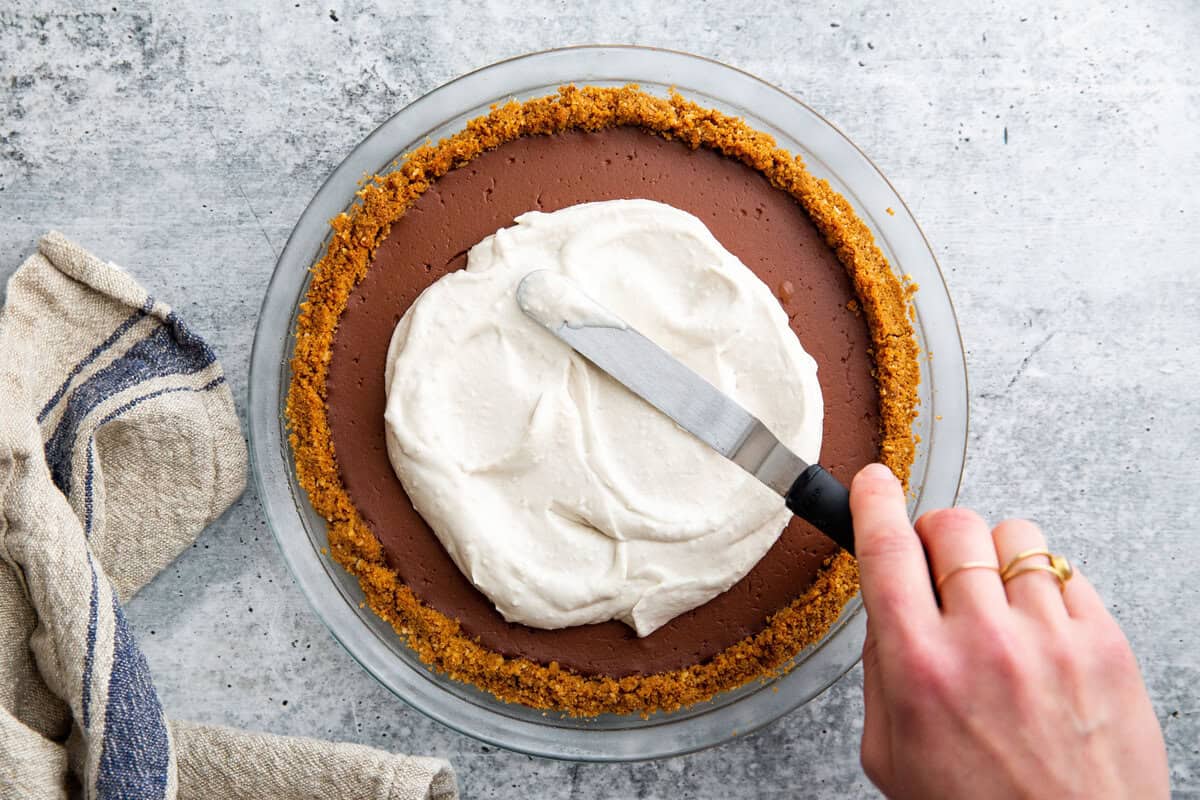
- 4. Pour the pudding into the crust: Pour the pudding into the crust and spread it in an even layer. Refrigerate the tart overnight.
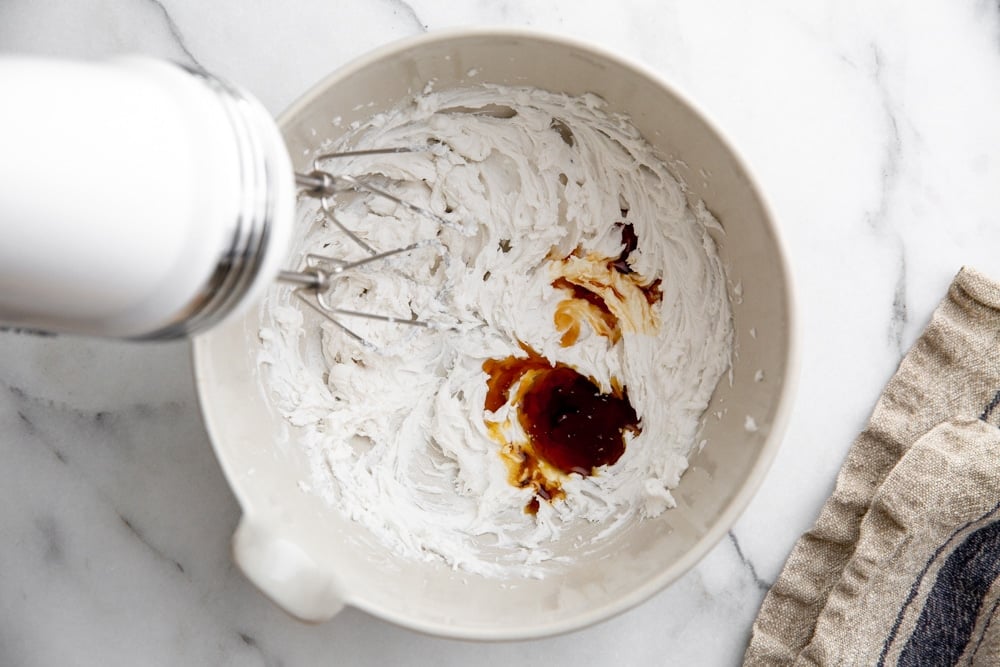
- 5. Make the coconut maple whipped cream: Beat together the chilled solids from a can of coconut cream with maple syrup and vanilla extract until smooth and creamy.
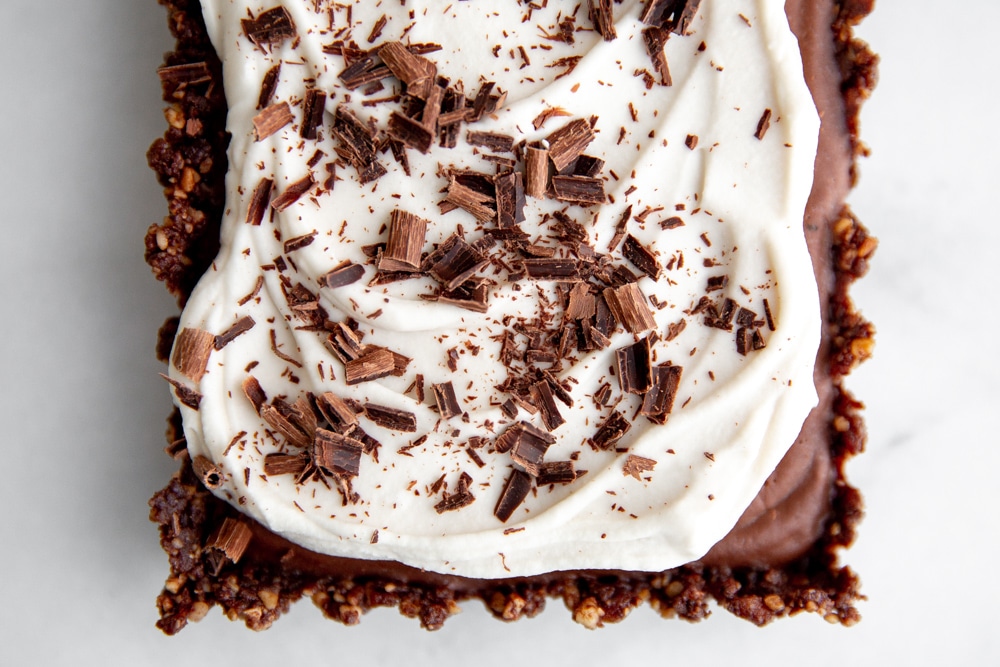
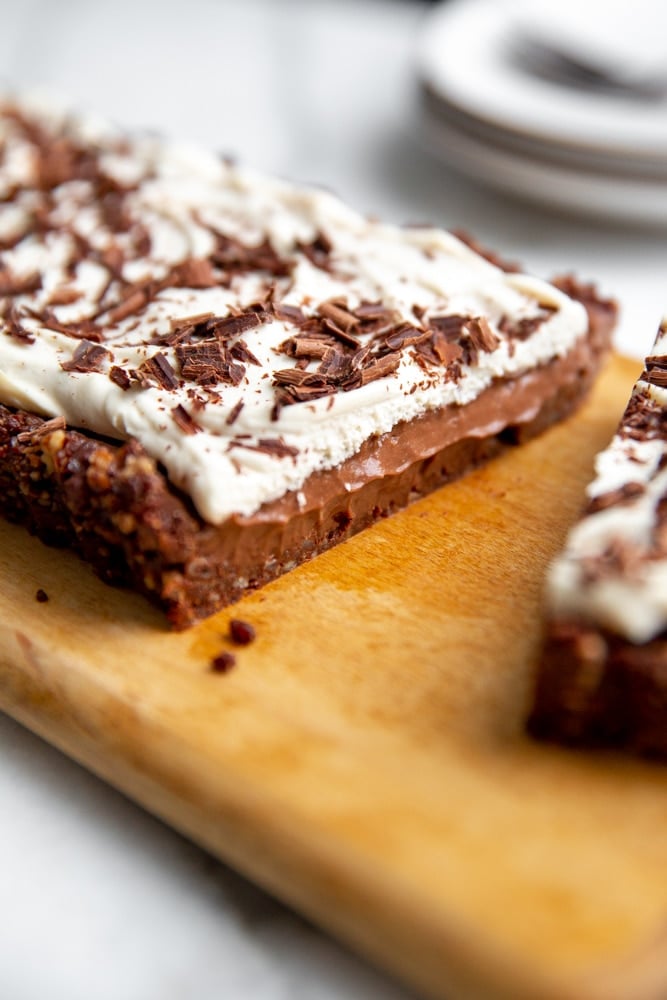
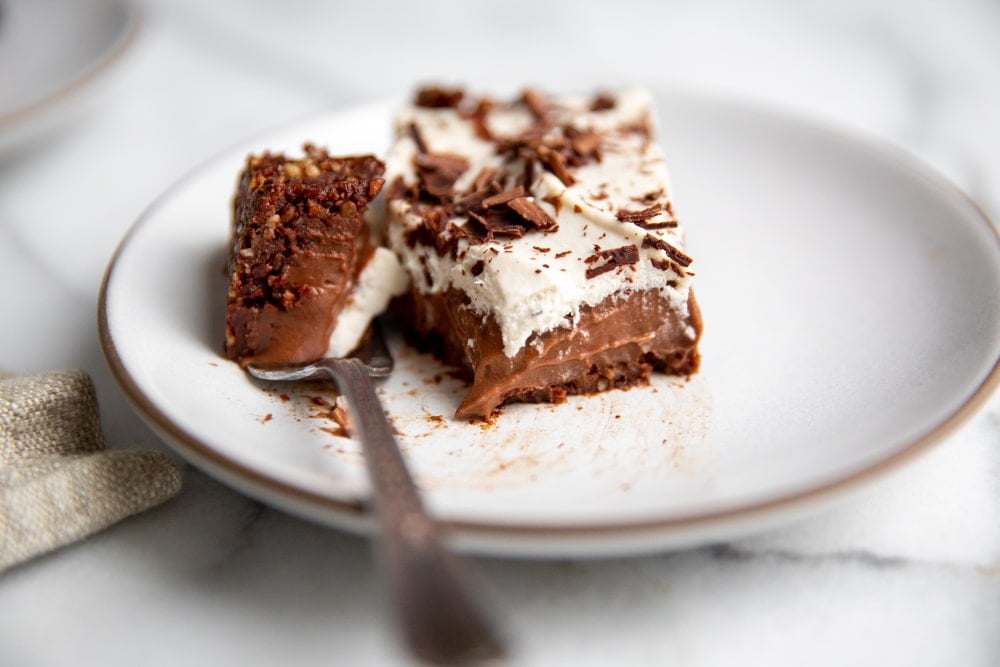
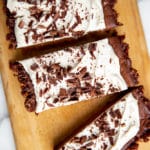
- 6. Spread the whipped cream over the tart and chill: Spread the coconut whipped cream over the tart, and sprinkle with chocolate shavings. Chill the finished tart for at least 30 minutes before serving.

FAQ
Yes! The tart without the whipped cream should be made the day before. The finished tart (with the whipped cream and chocolate) can be refrigerated for up to 4 hours before serving.
If you don't have a tart pan, you can make individual trifles in small glasses or ramekins. Simply press the crust along the bottom of each glass, then add the chocolate pudding. Chill overnight as directed, then top with the coconut whipped cream.
To make a chocolate tart without dairy or cream, use full-fat coconut milk and coconut cream instead.
Tips for making this tart:
- You will need to make a batch of Dark Chocolate Pudding for this recipe. It's important that you use full-fat coconut milk in the pudding (not light coconut milk or regular milk) otherwise it won't set up firmly enough to slice. (You will need 1 full can plus ¼ cup of coconut milk). Also, use the full 4 tablespoons of coconut sugar for the best flavor.
- You can use a 14-inch rectangular tart pan or a 9-inch round tart pan for this vegan chocolate tart, or you can ditch the pan altogether! If you prefer, you can make individual trifles instead. Divide the crust between glasses or ramekins, then press it firmly along the bottom and about ½-inch up the sides. Spoon the pudding on top. Chill overnight, then top with the coconut whipped cream as directed (since you won't be slicing the tart, you can serve it immediately after adding the whipped cream, or you can cover and chill the glasses for up to 4 hours).
- If you prefer, you can top the tart with regular whipped cream instead of coconut whipped cream.
- To make chocolate shavings, run a vegetable peeler firmly along the side of bar of chocolate, letting the shavings fall onto a piece of wax or parchment paper.
More vegan desserts you might like:
- No-Bake Vegan Chocolate Chips Cookies
- Vegan Panna Cotta with Roasted Berries
- No-Churn Vegan Mango Ice Cream
- Vegan Peach Crisp
Healthy vegan meals:
- Curried Red Lentil & Kale Soup
- Pan Fried Falafel
- Slow Cooker Dal
- Curried Sweet Potato Soup with Frizzled Kale
- Asian Peanut Noodle Salad
Watch the video!
Get the recipe!
No-Bake Vegan Chocolate Pudding Tart (Gluten Free, Naturally Sweetened)
Ingredients
Crust
- 1 cup pecans
- 1 cup pitted Medjool dates (about 9-10 dates)
- ¼ cup raw cacao powder (or regular cocoa powder)
- ½ teaspoon cinnamon
- ½ teaspoon fine sea salt
- 1 tablespoon coconut oil
Filling
- 1 batch Homemade Chocolate Pudding, using full-fat coconut milk and 4 tablespoons coconut sugar (click here for the recipe)
Garnish
- Homemade coconut whipped cream (click here for the recipe)
- Chocolate shavings (see the Tips below)
Instructions
Make the crust
- In a food processor, combine the pecans, dates, cacao powder, cinnamon, salt and coconut oil. Process, scraping the sides occasionally, until the mixture is very finely chopped and sticky (it might take a few minutes). Scrape the mixture into a tart pan with a removable bottom, pressing it firmly and evenly over the bottom and up the sides. Do Ahead: The crust can be covered with plastic wrap and refrigerated overnight.
Make the filling and chill the tart
- Make the pudding using full-fat coconut milk and 4 tablespoons of sugar.
- Place the tart pan on a baking sheet (this will make it easier to transport). Pour the pudding into the prepared crust and spread it in an even layer. Refrigerate the tart, uncovered, overnight (be sure to also refrigerate the can of coconut milk for the whipped cream topping).
Make the coconut whipped cream
- Make this homemade coconut whipped cream.
- Dollop the coconut whipped cream over the tart then spread it gently into swirls. Sprinkle the tart with chocolate shavings. Refrigerate the tart, uncovered, for at least 30 minutes (or for up to 4 hours) before serving.
- Carefully remove the sides of the tart pan. Cut the tart into slices, and serve!
Notes
- You will need to make a batch of Dark Chocolate Pudding for this recipe. It's important that you use full-fat coconut milk in the pudding (not light coconut milk or regular milk) otherwise it won't set up firmly enough to slice. (You will need 1 full can plus ¼ cup of coconut milk). Also, use the full 4 tablespoons of coconut sugar for the best flavor.
- You can use a 14-inch rectangular tart pan or a 9-inch round tart pan for this vegan chocolate tart, or you can ditch the pan altogether! If you prefer, you can make individual trifles instead. Divide the crust between glasses or ramekins, then press it firmly along the bottom and about ½-inch up the sides. Spoon the pudding on top. Chill overnight, then top with the coconut whipped cream as directed (since you won't be slicing the tart, you can serve it immediately after adding the whipped cream, or you can cover and chill the glasses for up to 4 hours).
- If you prefer, you can top the tart with regular whipped cream instead of coconut whipped cream.
- To make chocolate shavings, run a vegetable peeler firmly along the side of bar of chocolate, letting the shavings fall onto a piece of wax or parchment paper.

Subscribe
Get exclusive new weekly recipes (all gluten-free, but you'd never know it), along with tips for finding more intention, ease, and joy in the kitchen in my Mind, Body, Spirit, FOOD newsletter!
*This post contains Amazon and other affiliate links to products I use and love (from which I earn income, at no cost to you). Thank you for supporting From Scratch Fast!

I made this tart on the weekend and my whole family absolutely loved it. I added dried persimmon into the crust and it worked out great. The crust was oilier than expected so I might reduce the amount in the future (or not melt it in the microwave). The chocolate pudding was so airy and just sweet enough. The coconut milk icing really made the whole flavour more complex & delicate. Thank you for sharing this recipe! Would love to try more of your recipes 🙂
Hi Julie, thank you for your comment, and I'm so happy your family loved the tart!! The dried persimmons in the crust sound lovely. If you don't melt the coconut oil you shouldn't have an oily crust, but you can try halving the amount (just make sure that the crust still holds together when pinched). 😊
Hi Nicki. I made this this week, to rave reviews. The crust is easy and delicious - better than the sum of its parts! The pudding is the perfect chocolate pudding taste. Delicious. For night 1's dessert, I had a 1/2 can of REAL whipped cream in the spray bottle so I used that as the topping. For night 2, I was going to make the coconut whipped cream, but didn't get around to it, and we all agreed the pudding/crust were perfect without anything else. I appreciate that this is vegan, but I think next time I'll try making the pudding with the addition of egg, just to get it to set up a little more firmly. Will definitely be making this again, and sharing the recipe.
Hi Ginger, I'm so thrilled to hear this!! I love that you made the tart with regular whipped cream, then just left it off when you didn't have any. Let me know if you try it with an egg! xo
If I wanted to make just two ramekins of this, would I half the recipe? Thank you!
Hi Elizabeth, yes! You can absolutely halve the recipe. However, unless you have a small saucepan, you might want to make a full batch of the pudding (otherwise it might cook too quickly). Leftover pudding will last all week if you go that route. I hope you enjoy, and keep me posted!