Flaky Gluten Free Pie Crust Recipe
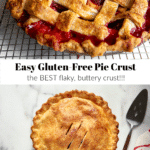
This easy gluten-free pie crust tastes just as delicious as the white-flour crusts of my childhood! It's ultra flaky with a classically rich, buttery flavor. Best of all, with just a few simple techniques, making perfect pie crust is way easier than you might think. I’ve included a step-by-step video on how to do it below - never fear pie crust again! (If you do eat gluten you can use this same recipe and technique using regular all-purpose flour.)
Best gluten free flour for pie crust
After testing dozens of gluten free flour brands, I found Cup 4 Cup flour to have the best flavor and texture by far in pie crust (this is not a paid endorsement or sponsored post!). It was also much easier to work with than other gluten free flours, which tended to be crumbly and hard to roll. If you'd rather make a gluten free flour blend from scratch, sign up for my class, Mastering Gluten Free Pie Making, where you'll learn my homemade gluten-free flour for pie dough!
Gluten free pie crust ingredients (simple and easy)
- Cup 4 Cup gluten free flour (if you're not GF you can use regular all-purpose flour)
- Fine sea salt
- Sugar (a touch of sugar gives the crust a delicious flavor and helps it brown, but it can be omitted)
- Butter (preferably a European style butter, see below)
- Apple cider vinegar (a splash of apple cider vinegar helps ensure a flaky texture)
How to make gluten free pie crust
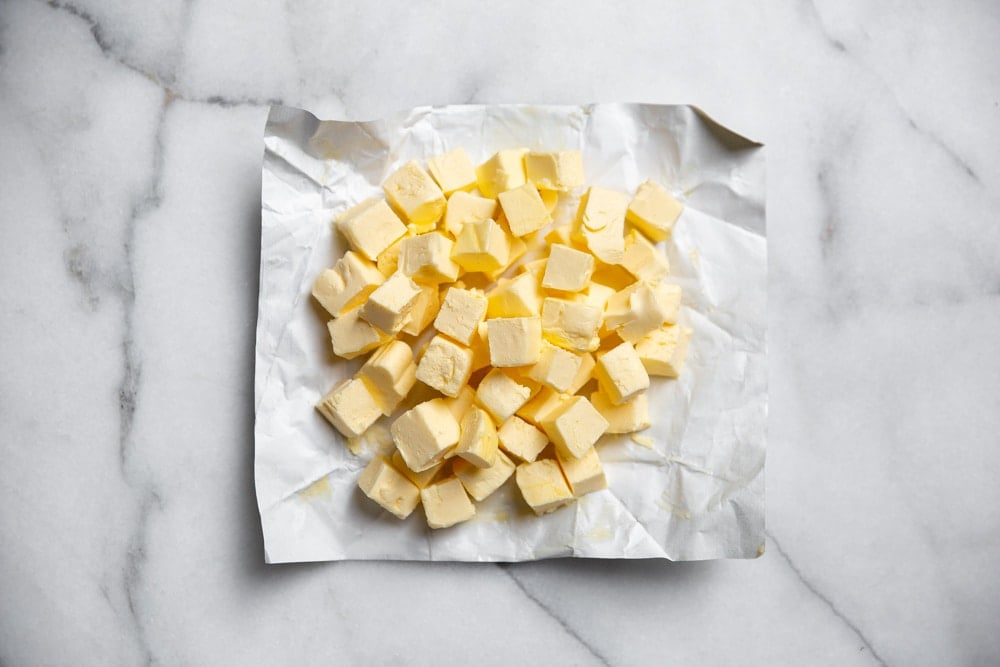
- First, use good-quality, European style butter (such as Kerrygold or Plugra), which has a higher fat content and will make rolling and working the dough much easier (not to mention that it will taste better). Cut the butter into about ½-inch sized pieces and put it in the fridge. Cold butter is key.
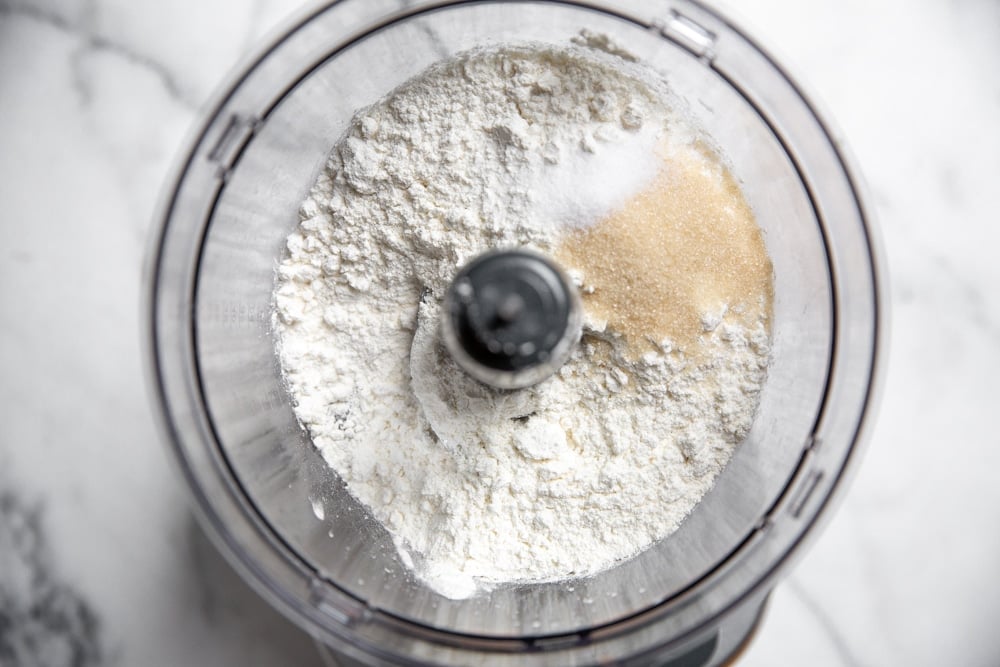
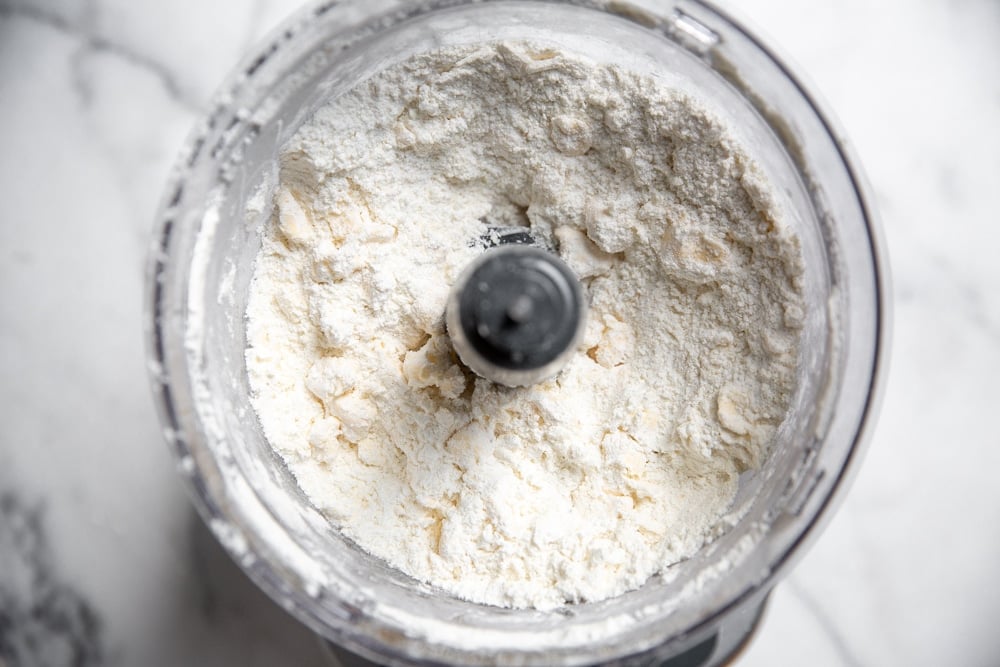
- In a food processor, add the flour (Cup 4 Cup or all-purpose), salt and sugar. Pulse to combine. You can also make pie dough using your hands or a pastry cutter (although a food processor is faster) - whisk the dry ingredients to combine.
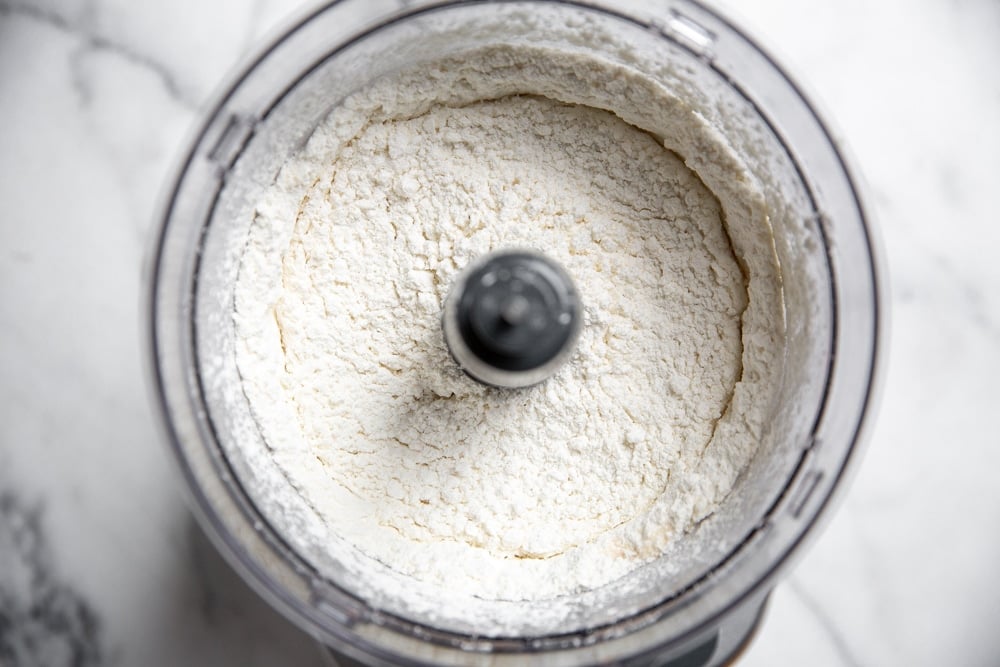
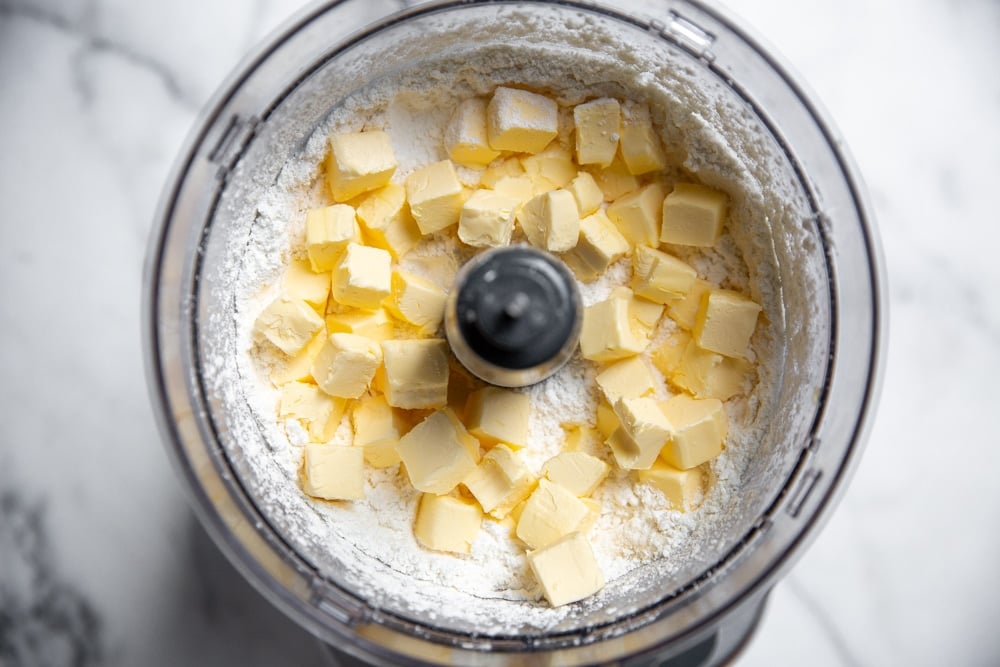
- Sprinkle the cold butter cubes over the flour and pulse just until the mixture is somewhat crumbly and there are still pea-sized (or slightly larger) chunks of butter (or use a pastry cutter to work the butter into the flour). Don’t over-mix the flour and butter, because those chunks equal a flaky crust.
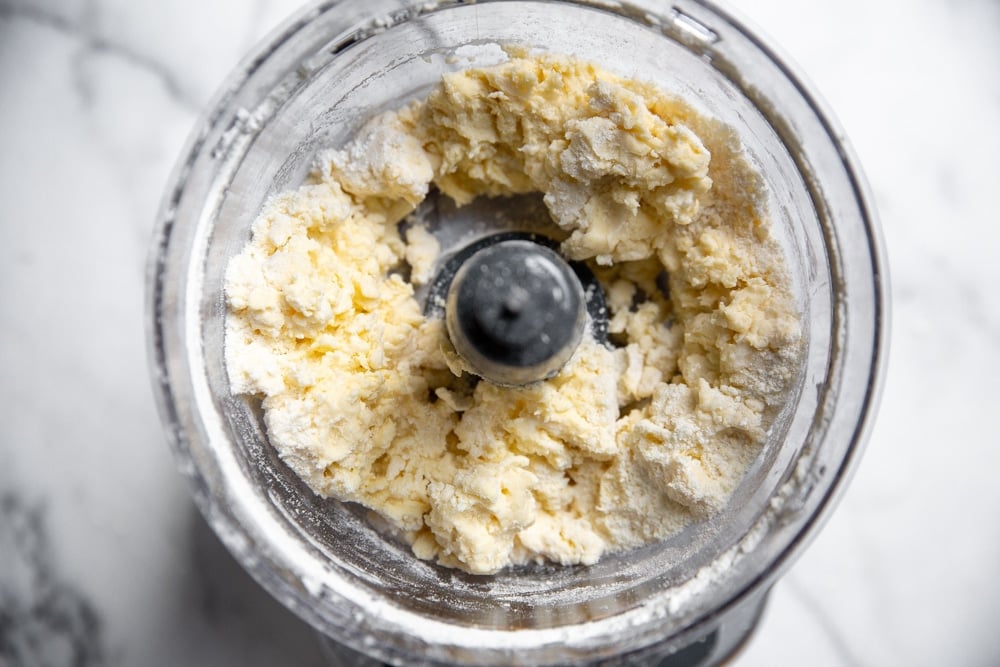
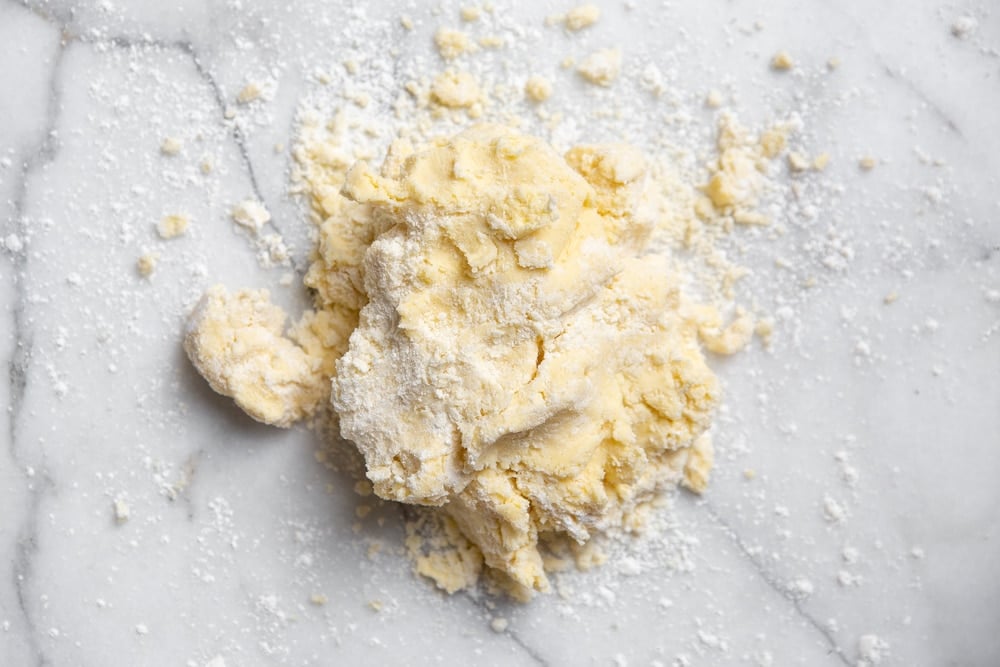
- Next, drizzle a bit of apple cider vinegar over top (this helps with flakiness). Put the lid back on, start the machine, and immediately start to drizzle in cold water. You want to add just enough water so that the dough sticks together when pinched—it should still look shaggy and a bit floury.
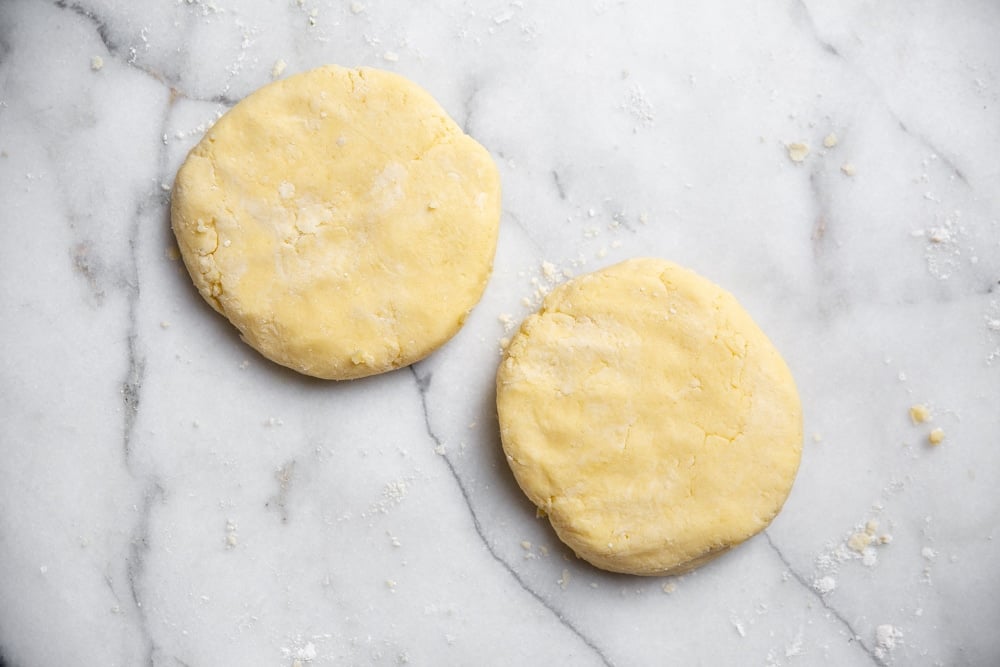
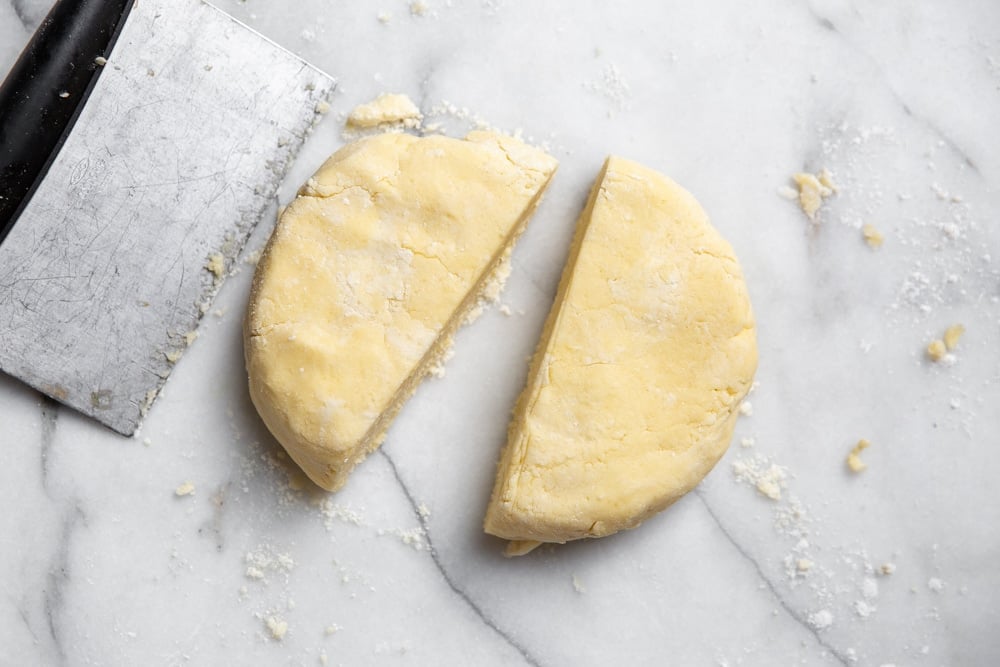
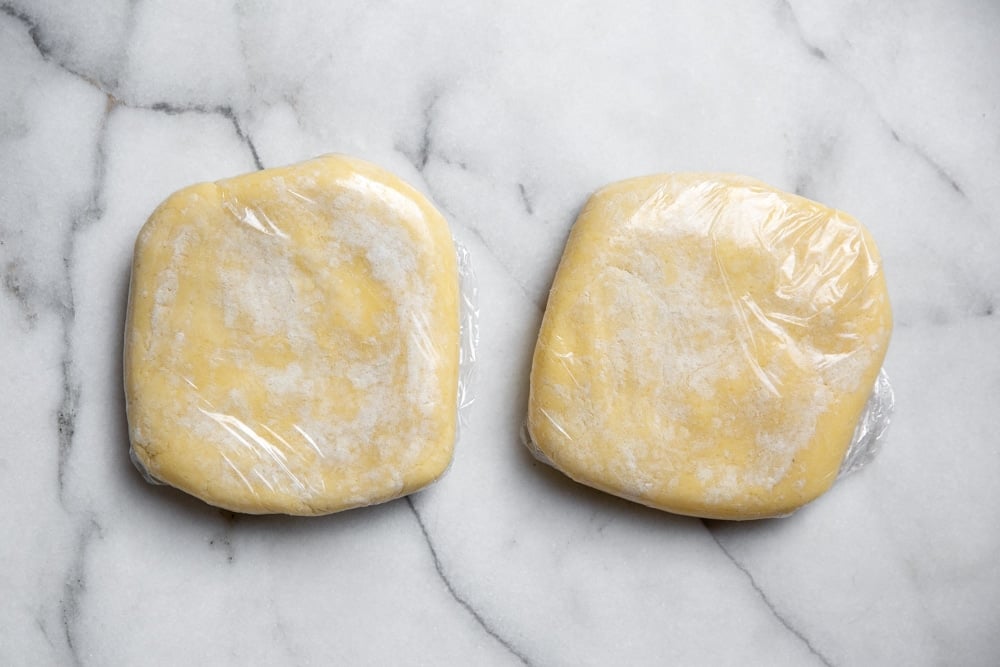
- Finally, transfer the dough to a lightly floured work surface, and use your hands to form it into a ball. Divide the dough ball in half, then press the dough into two disks. Cover the disks with plastic wrap, and refrigerate them for at least 30 minutes.
Can you make the dough ahead?
Yes! The dough can be refrigerated for up to 2 days or frozen for up to 3 months. Meaning you can go ahead and whip up the pie crusts for your holiday pies months in advance! (And if you're like me, nothing will bring you more joy than discovering a ready-made disk of pie dough in the freezer.)
How can you use gluten free pie dough?
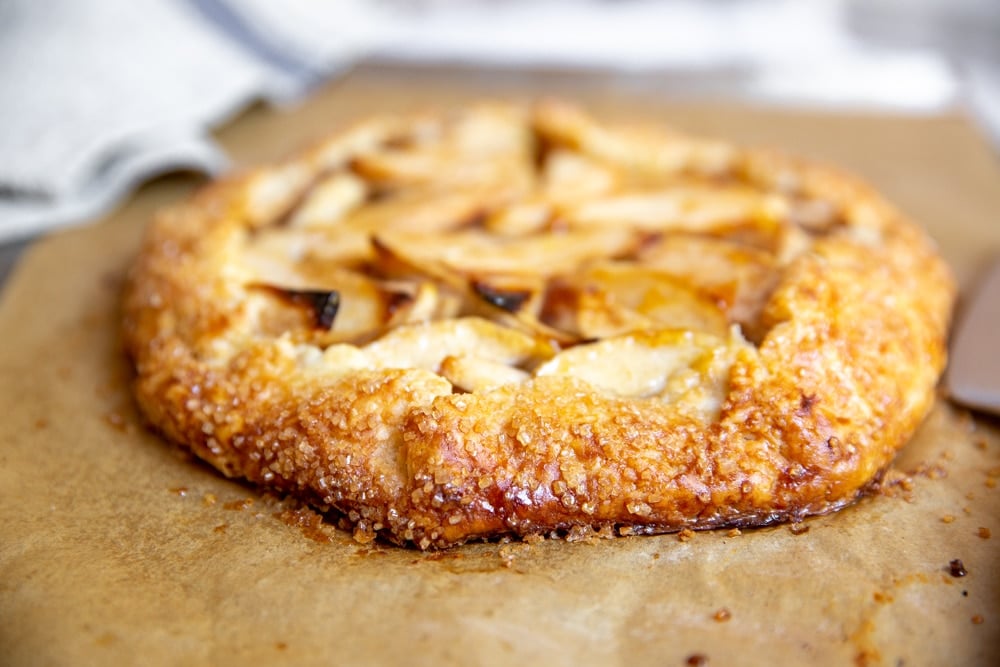
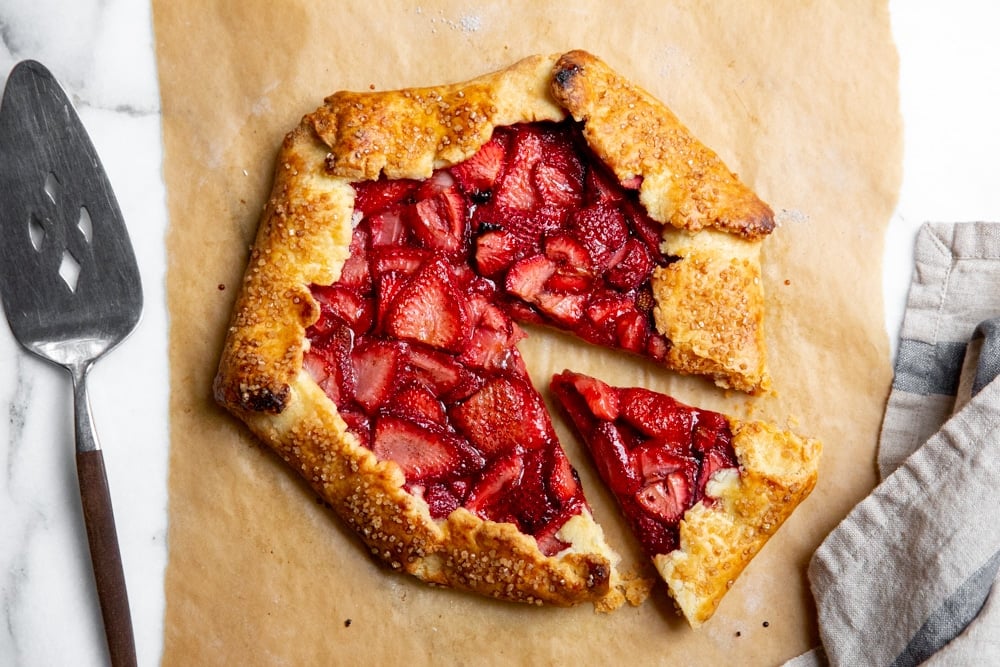
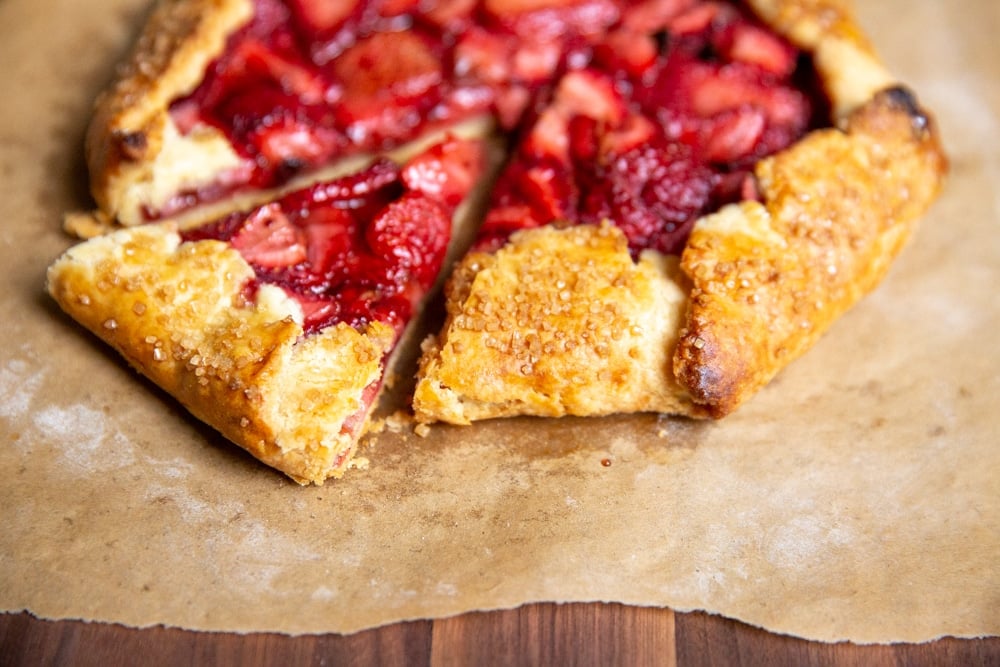
You can use this dough in any pie, tart or galette recipe (sweet or savory!). The dough makes enough for one 9-inch double crust pie, or 2 single crust pies (or 2 galettes). Whether it's your favorite berry pie or a savory egg quiche, this crust won't let you down. Don't miss my strawberry galette recipe, rhubarb galette with almond frangipane filling, apple galette, blueberry hand pies, savory spinach galette and chicken pot pie!

Tips for making gluten free pie crusts:
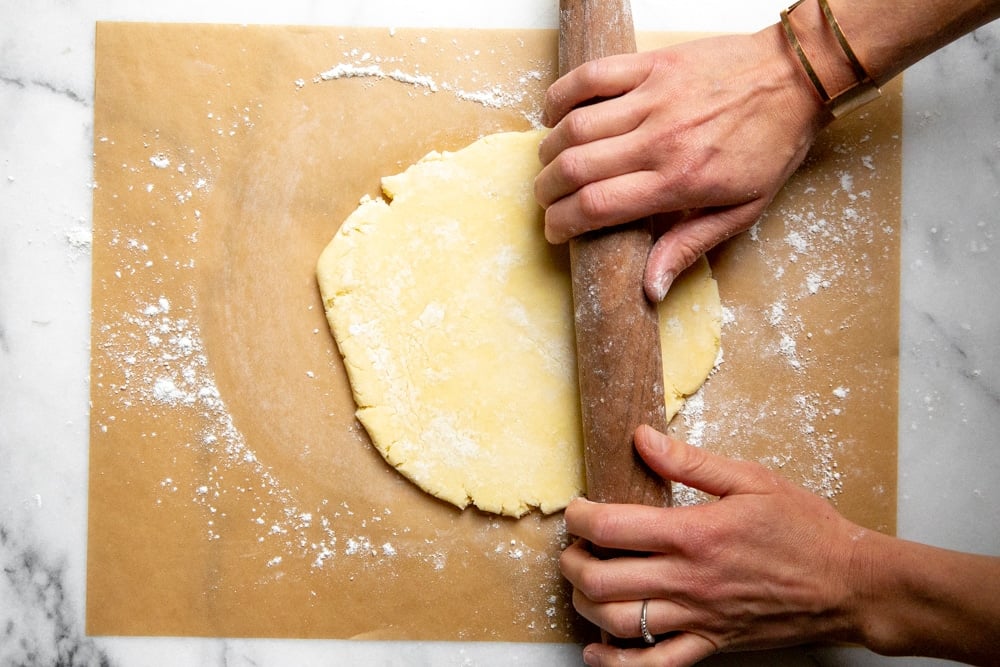
- Roll the dough out on a lightly floured piece of parchment paper to prevent sticking.
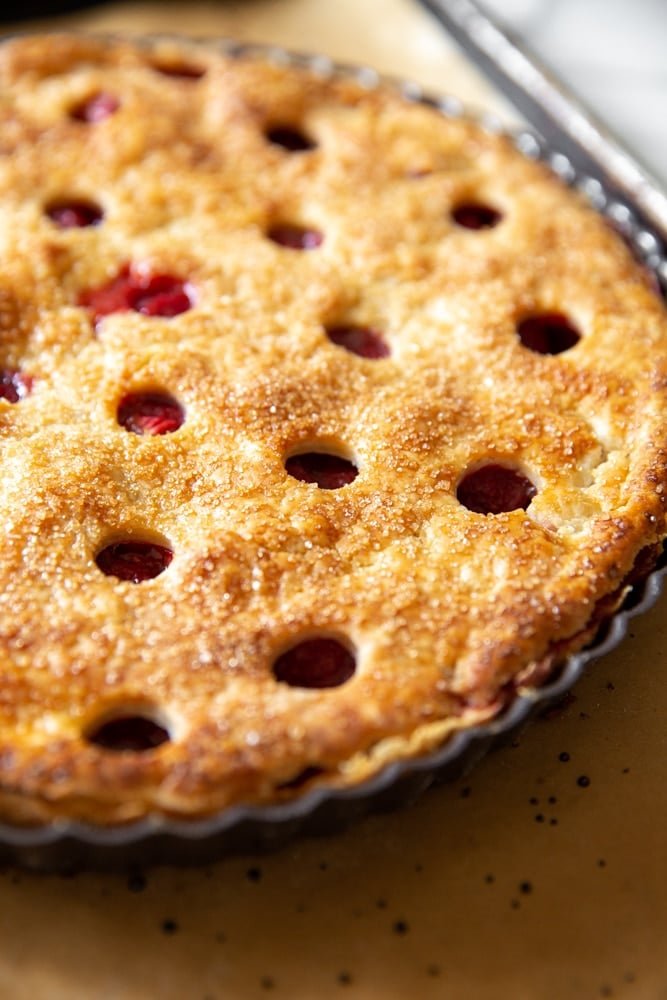
- For a beautifully browned crust, brush the dough with egg wash before baking (I also love sprinkling it with turbinado or demerara sugar for added sweetness and crunch).
- Using a glass pie plate allows you to see the bottom of the crust, ensuring that it is nicely browned before removing the pie from the oven.
- If the top of the pie gets too dark before the filling is fulling cooked, tent it with aluminum foil.
- If you don't have a food processor you can make this dough by hand. Whisk the dry ingredients in a large bowl, then add the cold butter cubes. Using your fingers (or a pastry cutter), rub the butter into the flour mixture, toss and smashing it until it's incorporated but you still see larger pea sized chunks. Drizzle in the apple cider vinegar and cold water, then toss with a fork until the dough comes together. From there you can turn it out onto a floured piece of parchment paper as indicated in the recipe.
- For more pie tips, check out this Gluten Free Pie Recipes post!
*This post contains Amazon and other affiliate links to products I use and love (from which I earn income, at no cost to you). Thank you for supporting From Scratch Fast!
I've included more tips in the recipe below for rolling out the dough and for making both single- and double-crust pies. Here's to a season (no, let's make that a YEAR) of fearless, delicious pie baking!
FAQs
Yes! You can make the dough several months in advance! Wrap the dough in plastic wrap, then freeze it in a zip-top freezer bag (defrost the dough overnight in the refrigerator before using). Alternatively, refrigerate the dough (tightly wrapped) for up to 2 days.
This gluten free pie crust is virtually indistinguishable from regular pie crust! It is ultra flaky, with a rich, buttery flavor.
This recipe calls for Cup 4 Cup gluten free flour. After testing several different store-bought all-purpose flour blends, Cup 4 Cup had the best flavor and texture and was far easier to work with than other flours.
Use this gluten free pie crust in these recipes:
- Easy Strawberry Galette
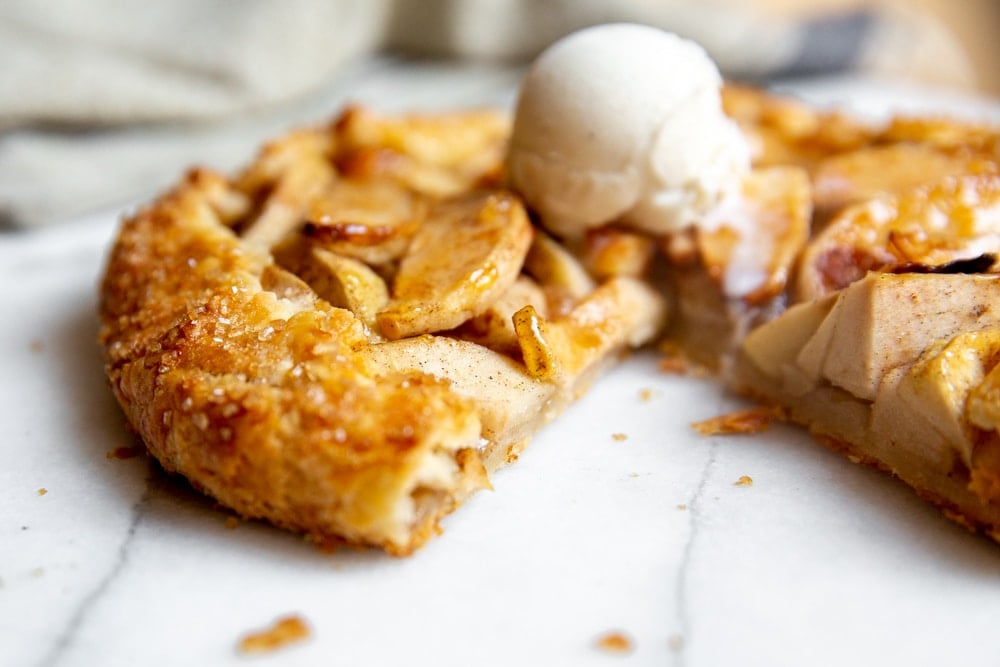
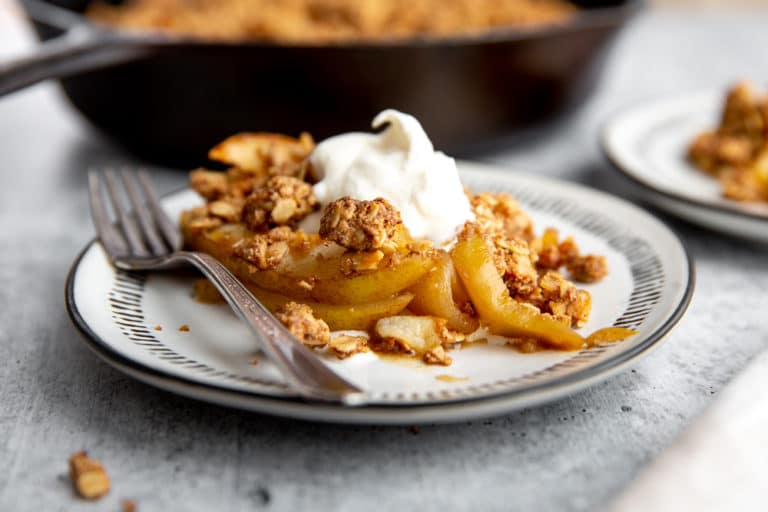
- Cinnamon Vanilla Apple Galette
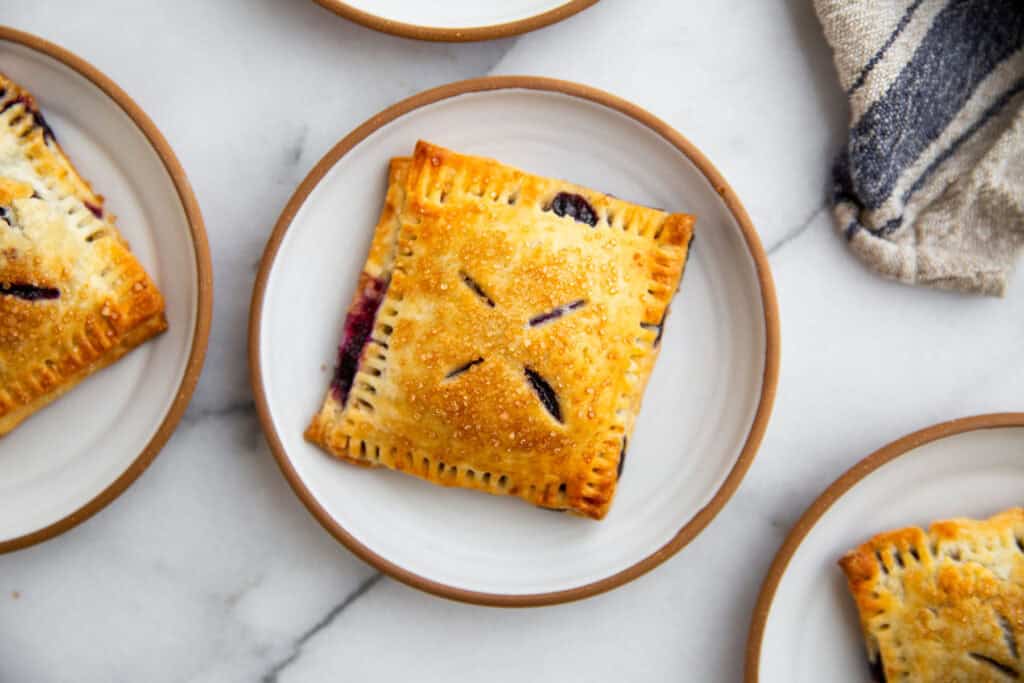
- Blueberry Hand Pies
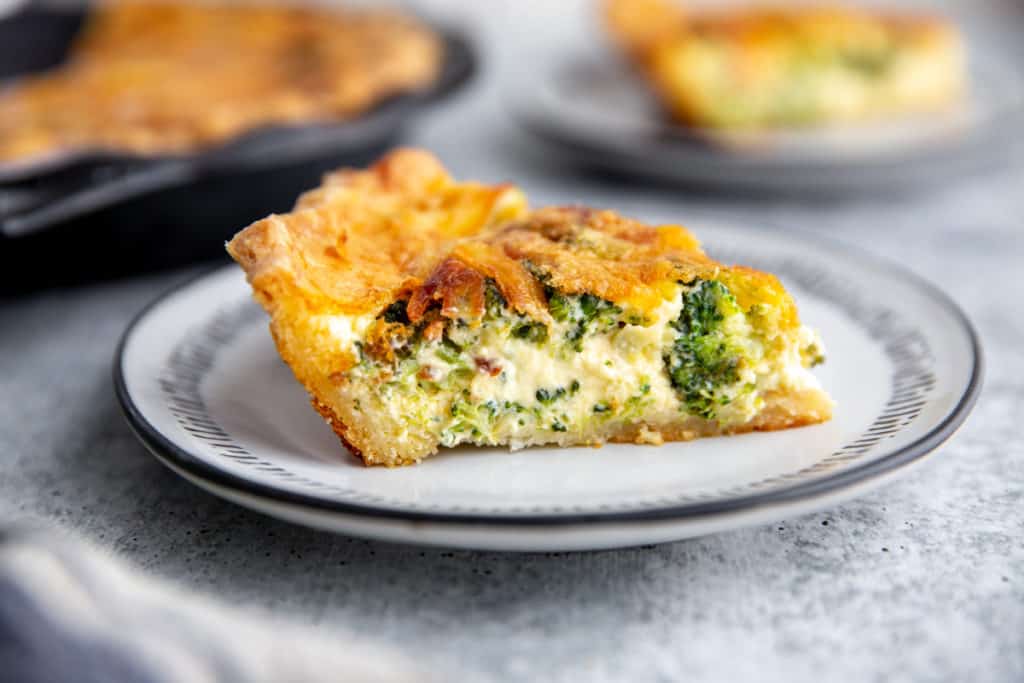
- Broccoli Cheddar Quiche
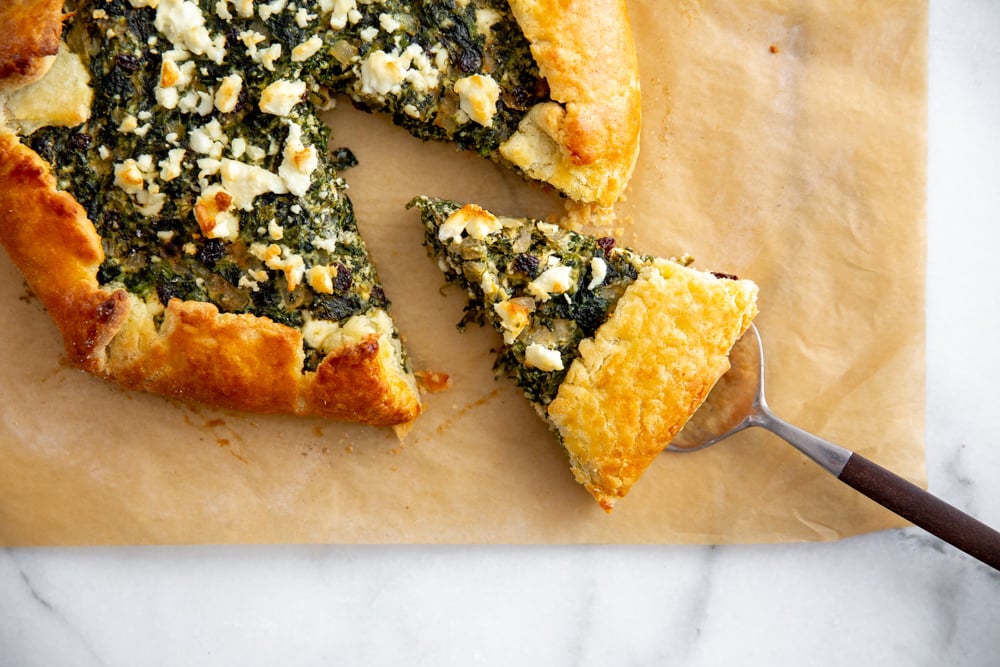
- Savory Spanakopita Spinach Galette
- Chicken (or Turkey!) Pot Pie
Other easy gluten free desserts to try:
- Gluten Free Carrot Cake (Naturally Sweetened)
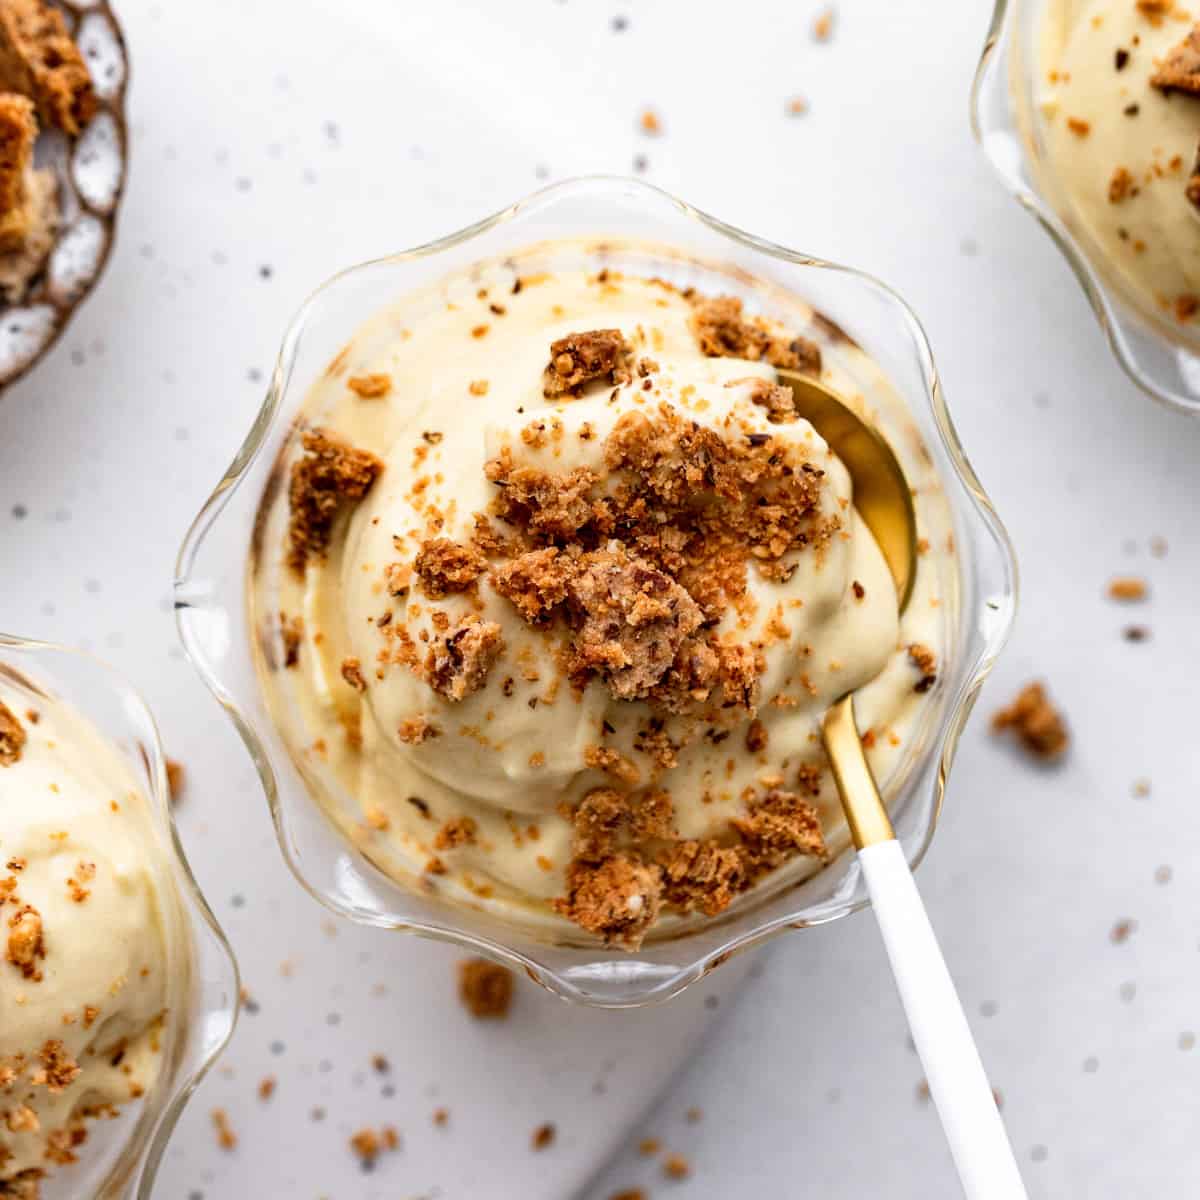
- No-Bake Mascarpone Cheesecake
- Healthy Almond and Coconut Cake
- DIY Ice Cream Cake
- Homemade Gluten Free Strawberry Shortcakes
- Individual Chocolate Flourless Cakes
Watch the video!
Stay connected
I'd love to answer any of your questions and see what you're cooking!! Don't forget to give this recipe a star rating and leave a comment below. Follow along on Instagram, Facebook, YouTube & Pinterest, and be sure to tag @nickisizemore so that I can share your creations!
Get the recipe!

Easy Gluten Free Pie Crust (the best crust ever!)
Ingredients
- 2 ½ cups (326g / 11.5oz) Cup4Cup brand gluten-free flour OR 2 ½ cups (319g / 11.25oz) all-purpose flour, plus more for workspace
- ½ teaspoon fine sea salt
- 1 tablespoon sugar (optional; this can be omitted for savory crusts)
- 2 sticks (8 ounces) unsalted, good quality butter (preferably a cultured or European style butter), cut into ½-inch dice
- 1 teaspoon apple cider vinegar
- ⅓ - ½ cup cold water
Instructions
- Put the flour, sea salt and sugar, if using, in a food processor and pulse to combine.
- Sprinkle the cold butter over the flour in the food processor. Pulse until the mixture looks crumbly with larger, pea-sized chunks of butter (those chunks of butter equal a flaky crust!). Drizzle the apple cider vinegar over top.
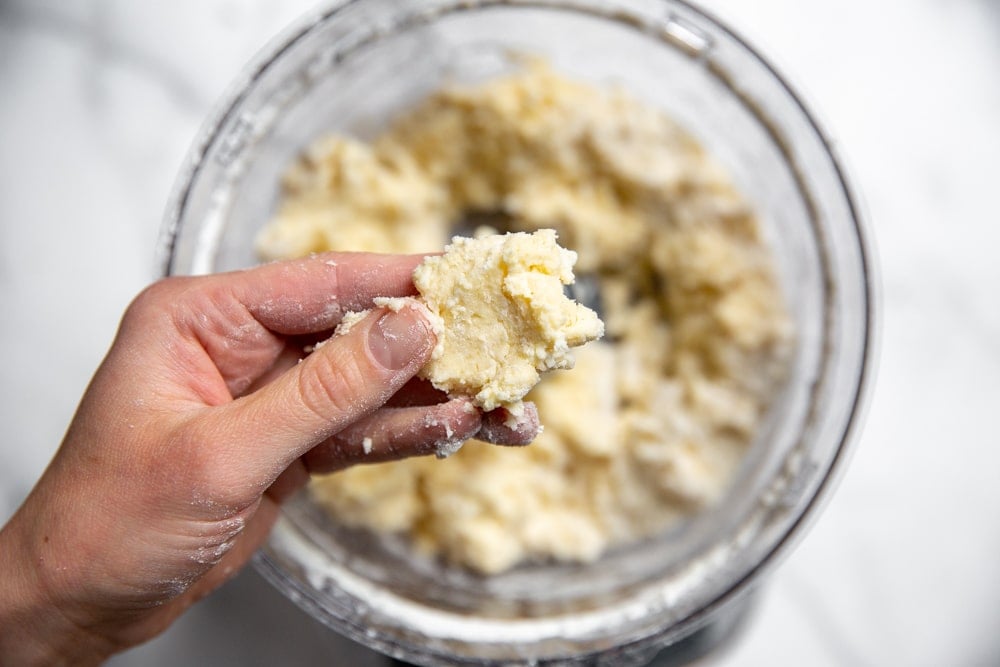
- Turn the machine on and immediately start drizzling cold water through the feed tube. Stop the machine once the mixture starts to come together and looks shaggy. Give the dough a pinch—if it sticks together, it’s ready to go. If not, turn the machine on again and drizzle in a bit more water. You might not need all of the water—you’re looking for a shaggy dough, not a cohesive ball.
- Transfer the dough to a lightly floured surface and shape it into a ball. Divide the dough into 2 equal pieces and form each into a flat disk. Wrap the disks in plastic wrap and refrigerate them for at least 30 minutes or for up to 2 days. Do Ahead: The wrapped disks can be placed in zip-top freezer bags and frozen for up to 3 months. Thaw in the refrigerator overnight before using.
- If the dough has been in the fridge for several hours, let it sit at room temperature until slightly softened, about 10-20 minutes. Roll it out on a lightly floured piece of parchment paper. If the dough immediately starts to crack once you start rolling, it’s too cold—give it a few more minutes to warm up. If the edges crack as you roll (which they probably will, so no fear!) simply patch them as needed.
Single Crust Pie
- To blind bake a single pie crust: Preheat the oven to 400˚F. Transfer the dough to a 9-inch pie plate, making sure to get in the corners. Using kitchen scissors, trim the dough to a ½-inch overhang. Fold the overhang under to form a ring around the pie plate. Crimp the ring, if you’d like. At this point, if the dough feels like it’s getting soft, pop the pie plate in the fridge or freezer for a few minutes to firm up. Prick the bottom all over with a fork. Line the crust with a large piece of parchment paper then pour in dried beans or pie weights to completely cover the bottom. Bake 15 minutes. Remove the parchment and beans. Bake 5 minutes longer, or until light golden on the bottom. Do Ahead: The crust can be blind baked up to 1 day in advance.
Double Crust Pie
- To make a double-crust pie: Preheat the oven to 400˚F. Roll out one disk of dough, and transfer it to a 9-inch pie plate, making sure to get in the corners. Add your fruit filling, and dot with butter. Roll out the second piece of dough and lay it over top. Using kitchen scissors, trim the dough to a ½-inch overhang. Roll the overhang under (pinching the top and bottom dough together) to form a ring around the pie plate. Crimp the ring, if you’d like. At this point, if the dough feels like it’s getting soft, pop the pie in the fridge or freezer for a few minutes to firm up. Brush the top dough with egg wash and sprinkle with sugar. Using a small knife, cut a few vents on top. Bake 35 minutes. Reduce the oven temperature to 350˚F and bake 15-30 minutes longer, or until the fruit is tender and bubbling. If needed, lightly tent the top crust or edges if they start to look too brown near the end of cooking.
Notes
- I use Cup 4 Cup Gluten Free Flour for this pie crust, which rolls out easily and tastes like a traditional pie crust. You can also use Bob's Red Mill 1-to-1 Gluten-Free Baking Flour, but the dough will be much crumblier and can be hard to transfer (it works best as a galette). If you're not gluten-free, you can use any regular all-purpose flour.
- Use a good quality European-style butter, such as Kerrygold, Plugra or Organic Valley.
- Don't over-process the butter and flour mixture. The small chunks of butter will give you a flakier crust!
- The finished dough will still look shaggy and a bit floury in the food processor. Don't over-process, otherwise you'll end up with a tough crust. The dough will come together on the countertop once you form it into a ball.
- If you don't have a food processor you can make this dough by hand. Whisk the dry ingredients in a large bowl, then add the cold butter cubes. Using your fingers (or a pastry cutter), rub the butter into the flour mixture, toss and smashing it until it's incorporated but you still see larger pea sized chunks. Drizzle in the apple cider vinegar and cold water, then toss with a fork until the dough comes together. From there you can turn it out onto a floured piece of parchment paper as indicated in the recipe.
- Use the pie dough in this easy strawberry galette recipe, this cinnamon and vanilla spiced apple galette, this savory spinach galette , this Broccoli Cheddar Quiche or this gluten-free chicken pot pie!
Do I have to blind bake the gluten free pie crust when I am making a pumpkin pie
Hi Cathy! Yes, I do recommend blind baking the crust for a pumpkin pie. It will result in a much better texture. I hope you enjoy!
The dough was easy to make, easy to work with and the crust turned out beautifully! I’ve tried other online GF pie crust recipes and this turned out the best, so I’ve stopped searching. This will be my Go To from now on! Thanks for sharing!
Hi Linda, thank you for your comment, and I'm thrilled to hear you loved the crust!
A question for you, please. Do you recommend the Cup 4 Gluten-free pie crust flour, or does the Cup 4 Gluten-free All Purpose Flour work just as well? Thanks, Susan.
Hi Susan, I actually only use the Cup 4 Cup Gluten-Free All Purpose Flour, as I also use it for other baked goods. It works great! Happy baking, and I hope you enjoy!
Hello, This is my first time on your site, I want to make this gluten free crust for your apple galette. Do you think I could add some/ how many frozen blueberries to your apple mixture for the galette? Thanks in advance😍
Hello and welcome!! Blueberries and apples are a bit tricky to cook together, as apples take much longer to cook and have a lower moisture content. That being said, you can certainly experiment with adding some blueberries if you'd like, but I can't guarantee the results. I would add about a cup, and I'd stick with fresh berries. Also, add 1-2 teaspoons of cornstarch, which will help the berry juices thicken. Let me know if you give it a try!
Can you use almond flour instead of all purpose or can I mix the 2 different flours
Hi Kelly, almond flour won't work in this crust, as it won't provide enough structure (it won't hold together or roll out). However, you can try this press-in almond crust, from this lemon pie, if interested! https://fromscratchfast.com/creamy-lemon-pie-almond-crust/
Hey Nicki!
Thanks so much for the recipe it tastes wonderful!! I ended up using about 15g more flour (using King Arthur’s GF flour). I did find the dough really hard to work with. Not sure if anyone else was able to lattice top the pie. My dough was just wayyy to fragile. Do you have any tips for getting for getting a less fragile dough?
I did find the dough great for freezing and using cookie cutters. It’s doughy enough that it doesn’t crack when cutting out shapes! Also freezing top crust before putting it on the pie makes it waaayyyy easier to get it on.
Hi Ben, I'm so glad you liked the crust! If you can find Cup 4 Cup flour, it really does make a difference in terms of texture - the dough will be easier to work with (I often do lattice tops). You just want to be sure to keep the dough cold as you go. Happy baking!!
I tried your regular flour for the very first time to make a pie for my granddaughter. She is gluten free so I had my reservations about making a pie crust for her. I was so pleased with the way it came out. The crusts were so flaky and crumbly and tasty! Thank you so much for the recipe and a wonderful product! She was so pleased with how good it came out! 👍🏻
I'm so glad that you and your granddaughter enjoyed!
I have been baking gluten free pies for 5 years. This is by far the best crust sans gluten I’ve made. I didn’t have Cup 4 Cup so used Costco’s brand. Thank you. This is a game changer!
I could even roll it out like a wheat flour crust. 💛💛💛
I'm so happy to hear this, and great tip about the Costco brand GF flour!
I love all your recipes.
Thank you so much, Helen!
I made your pie crust with Cup4Cup and it rolled out like a "normal" pie crust, even better without cracks at the edges. The final product was flaky and tender and tasted of butter. I loved it. Thanks. Stu
Hi Stu, thank you for your comment, and I'm so glad you enjoyed the crust!!
Made the apple and the strawberry galettes. spinach pie next. Very good GF dough. Thank you!
(Video required a log in? Couldn't figure out how to register. Help!)
Hi Earl, thank you for your comments, and I'm so glad you liked the galettes!! The video is on YouTube and should not require a log in. Can you try this link: https://youtu.be/YbrI0_H4EBA Happy baking!!
thank you for this recipe! what if I dont have a food processor? thank you
Hi Rebecca! No worries; you can use your fingers or a pastry cutter. Whisk the dry ingredients in a large bowl, then add the cold butter cubes. Using your fingers (or a pastry cutter), rub the butter into the flour mixture, toss and smashing it until it's incorporated but you still see larger pea sized chunks. Drizzle in the apple cider vinegar and cold water, then toss with a fork until the dough comes together. From there you can turn it out onto a floured piece of parchment paper as indicated in the recipe. I hope you enjoy!
Hi Nicki - I am so so happy to find your website. I love your recipe for gluten free pie dough and the same recipe can be used for galette (I love galettes!). Many thanks for sharing your wonderful recipes, I'm afraid I will be visiting again/often to check out other recipes. I appreciate your instructions are well written and in detail including dough for single use. Next, I will be looking for almond flour gluten free recipes. Again thank you so much and keep up the great job. God bless you!
Raquel (from Los Angeles)
Hi Raquel, this comment means so much to me! Thank you for sharing, and I look forward to keeping in touch. Happy cooking!
I love this pie crust! Do you think it would hold up to a pecan pie made with maple syrup rather than corn syrup?
I am so happy I found you and have tried many of your recipes... all without fail.
RN
Hi Rosemary, thank you for your comment, and I'm so glad you love the crust! Yes, I do think it would hold up in a pecan pie, but be sure to blind bake the crust first (I include instructions in the recipe). Happy baking, and keep me posted!
I didn’t use Cup 4 Cup, I’ve used Bob’s Red Mill and Pamela’s flour too and I’m still very happy with this recipe. All of my crusts have turned out great. Just as easy and just as good, maybe better, than the non-GF pies from before our celiac diagnosis. I think the Apple cider vinegar is the secret ingredient. Thank you for this great recipe.
Hi Katie, thank you for your comment, and I'm so glad you enjoyed!
Sadly, my recipe turned out poorly. Measured everything accurately and felt I mixed it properly. The dough rolled out beautifully, but after baking, the crust was completely crumbly. Had the texture of wet sawdust if that makes sense. Any thoughts or solutions would be appreciated.
I had this exact same issue. Tasted like it never had enough moisture to "cook" even though it wasn't raw. I used the European butter, apple cider vinegar, 1/3 cold water more or less. My flour was Bob's 1 for 1 baking flour. Literally tried this recipe 3 times all coming out as you described. So I ended up omitting the apple cider vinegar all together and using regular butter. Brushed egg on top too. As it's cooking you'll notice the sides aren't completely falling/crumbling off and the color will look MUCH better. The crust came out BEAUTIFUL. Hope that helps and good luck!
Hello, can lard be used instead of butter to keep the recipe dairy free?
Hi Wayne! Yes, you can swap out the butter for lard in this pie crust. I hope you enjoy!
My grand daughter has celiac disease and I've been trying various gluten-free pie crust recipes for several years with very limited success. I tried yours for the Thanksgiving pies and this is the first recipe that actually worked! The dough was just as easy to roll out as the "real thing" with regular flour and everybody said the pies were yummy and they couldn't tell the difference. Unbelievable!
Thank you!
Hi John, thank you so much for your comment, and I'm thrilled that you and your family loved the crust!!
Hi Nicki!
My family loved this pie crust on Thanksgiving! I have a couple of questions though. First, how thick do you typically roll it out for pie crust and second, when I did my blind bake, the crust split in a couple of places on the bottom and also shrank a bit. After putting it in the pie pan, I did cover it with plastic wrap and put it back in the refrigerator to rest for about a half an hour. Is there anything else I can do to prevent the splitting and shrinkage? Thanks in advance! I'm trying to get this perfect!!
Hi Rachel, I'm so glad your family loved the crust! You want to roll out the dough about 1/8-inch thick (although you can go a bit thicker, especially for galettes). For the blind bake, did you line the crust with parchment and use dried beans or pie weights? That will prevent the crust from shrinking in on the sides. Also, when you place the dough in the pie plate, be sure to press it into all the corners, and if you're blind baking, prick the dough all over with a fork (this will prevent it from bubbling up). You can get all the details in the recipe. Let me know if this helps!!
This pie crust is the best gluten free crust I've ever made.. it was tender and flaky just like my mom's regular flour crust was. I've been trying for 5 years to come close and it's either hard as a rock, has no flavor or isn't cooked completely. But, I finally did it with this recipe! This will be the pie crust I use every holiday forward!
Thank you for posting this wonderful recipe 😊
Hi Linda, I'm so glad you loved the crust!!