Flaky Gluten Free Pie Crust Recipe

This easy gluten-free pie crust tastes just as delicious as the white-flour crusts of my childhood! It's ultra flaky with a classically rich, buttery flavor. Best of all, with just a few simple techniques, making perfect pie crust is way easier than you might think. I've included a step-by-step video on how to do it below - never fear pie crust again! (If you do eat gluten you can use this same recipe and technique using regular all-purpose flour.)
Best gluten free flour for pie crust
After testing dozens of gluten free flour brands, I found Cup 4 Cup flour to have the best flavor and texture by far in pie crust (this is not a paid endorsement or sponsored post!). It was also much easier to work with than other gluten free flours, which tended to be crumbly and hard to roll. If you'd rather make a gluten free flour blend from scratch, check out my Mastering Pie Making Course, where I share my homemade gluten-free flour for pie dough and walk you through every step of the pie making process.
Gluten free pie crust ingredients (simple and easy)
- Cup 4 Cup gluten free flour (if you're not GF you can use regular all-purpose flour)
- Fine sea salt
- Sugar (a touch of sugar gives the crust a delicious flavor and helps it brown, but it can be omitted)
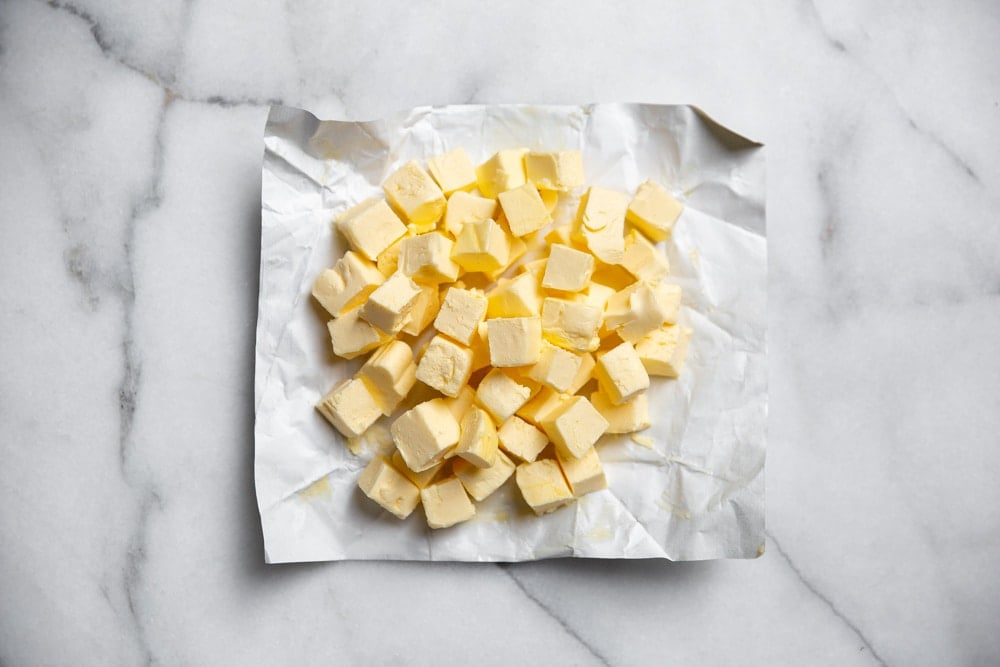
- Butter (preferably a European style butter, see below)
- Apple cider vinegar (a splash of apple cider vinegar helps ensure a flaky texture)
How to make gluten free pie crust
- First, use good-quality, European style butter (such as Kerrygold or Plugra), which has a higher fat content and will make rolling and working the dough much easier (not to mention that it will taste better). Cut the butter into about ½-inch sized pieces and put it in the fridge. Cold butter is key.
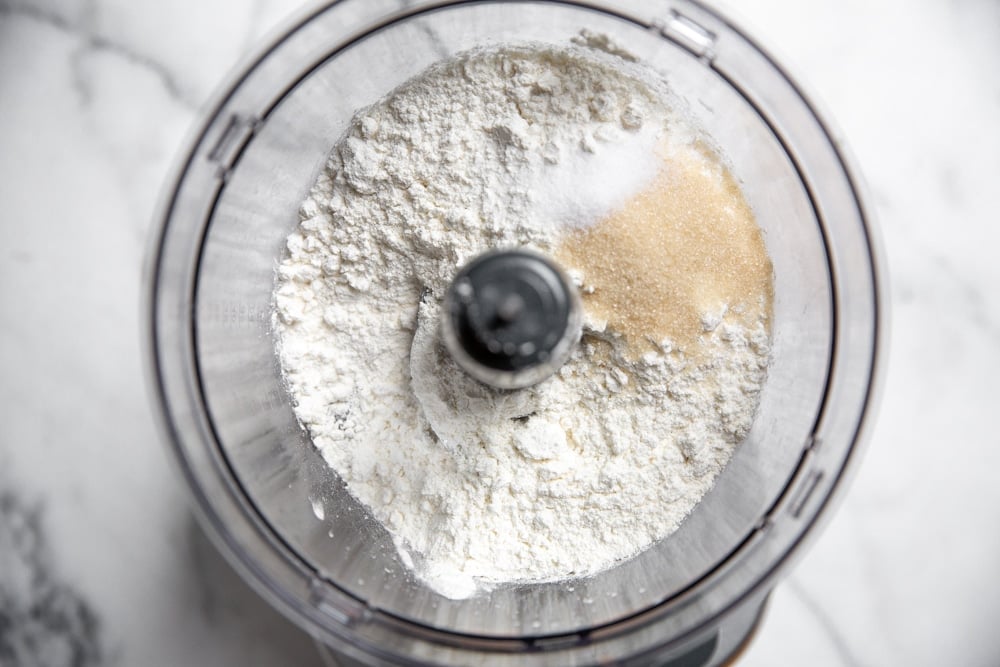
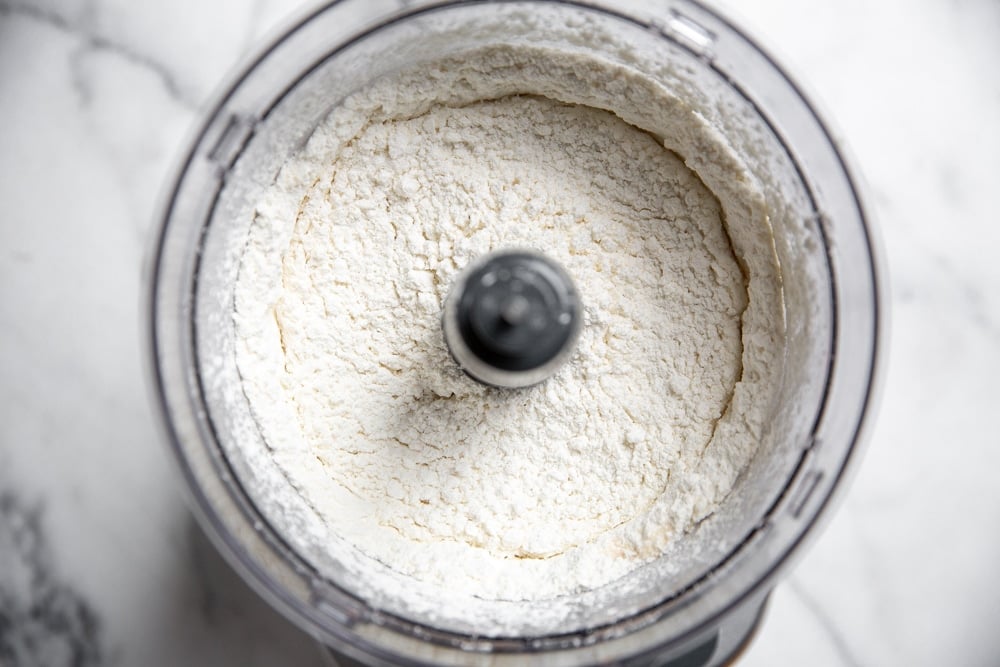
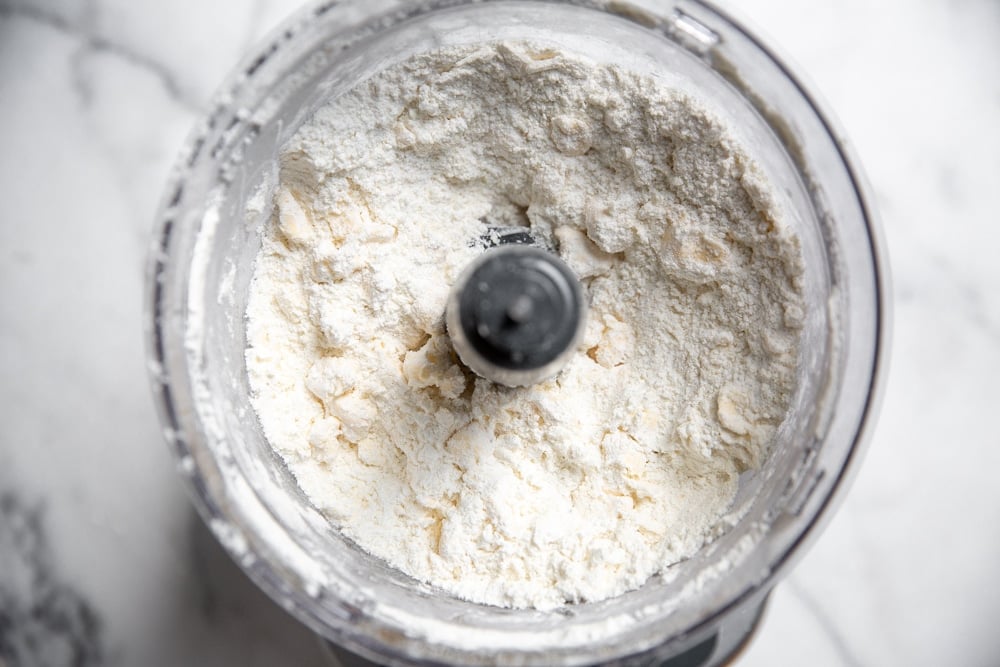
- In a food processor, add the flour (Cup 4 Cup or all-purpose), salt and sugar. Pulse to combine. You can also make pie dough using your hands or a pastry cutter (although a food processor is faster) - whisk the dry ingredients to combine.
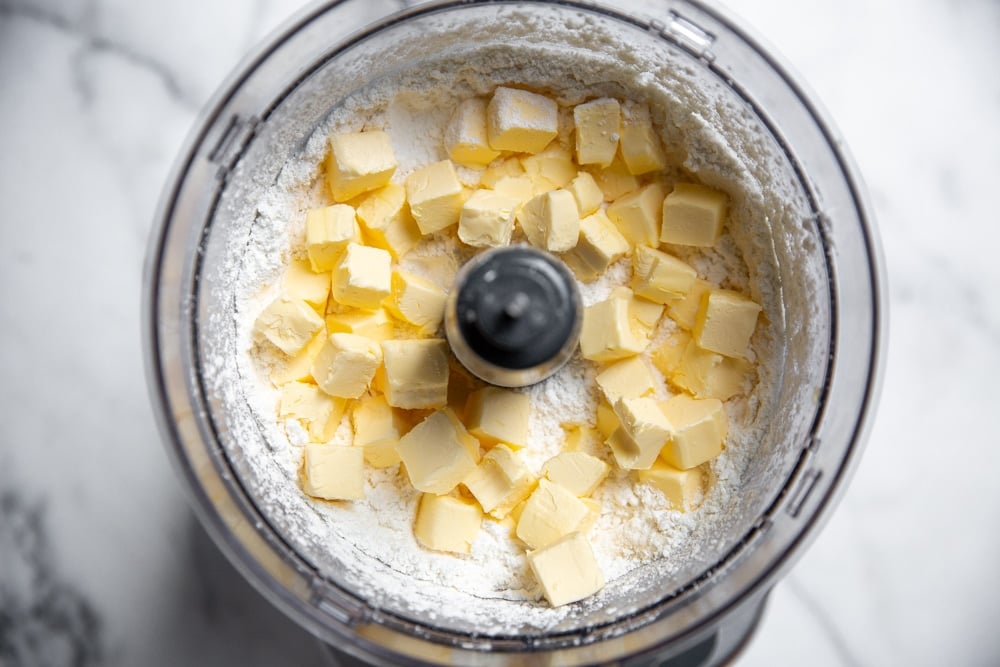
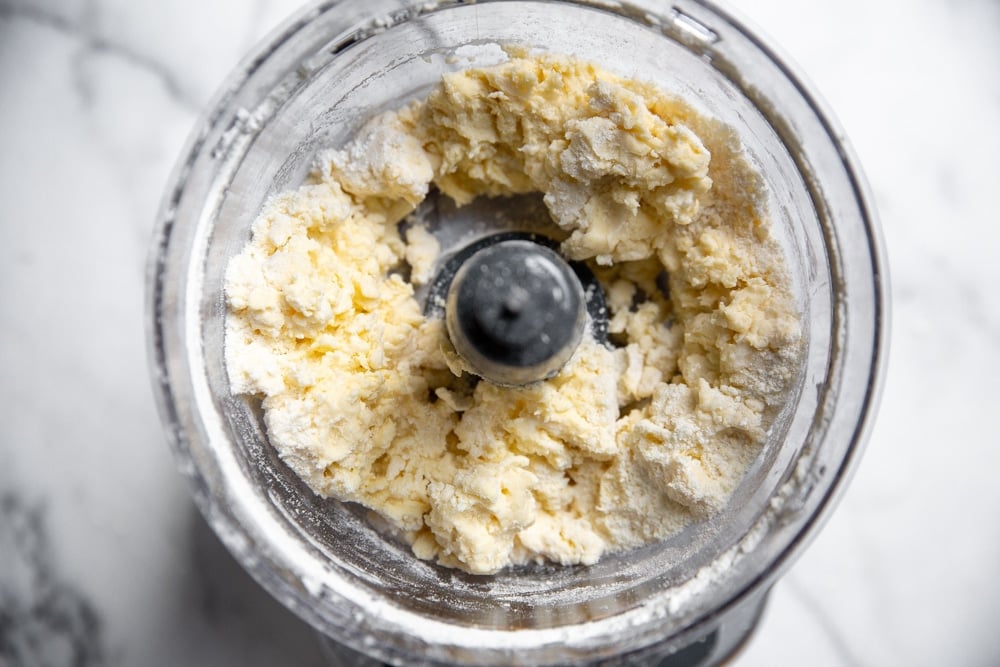
- Sprinkle the cold butter cubes over the flour and pulse just until the mixture is somewhat crumbly and there are still pea-sized (or slightly larger) chunks of butter (or use a pastry cutter to work the butter into the flour). Don't over-mix the flour and butter, because those chunks equal a flaky crust.
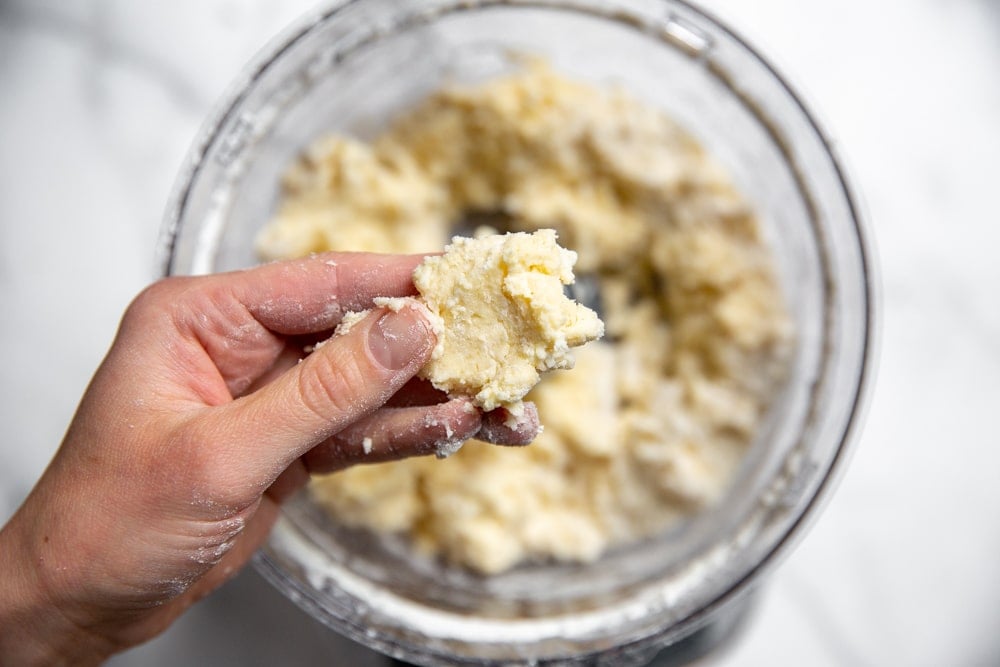
- Next, drizzle a bit of apple cider vinegar over top (this helps with flakiness). Put the lid back on, start the machine, and immediately start to drizzle in cold water. You want to add just enough water so that the dough sticks together when pinched-it should still look shaggy and a bit floury.
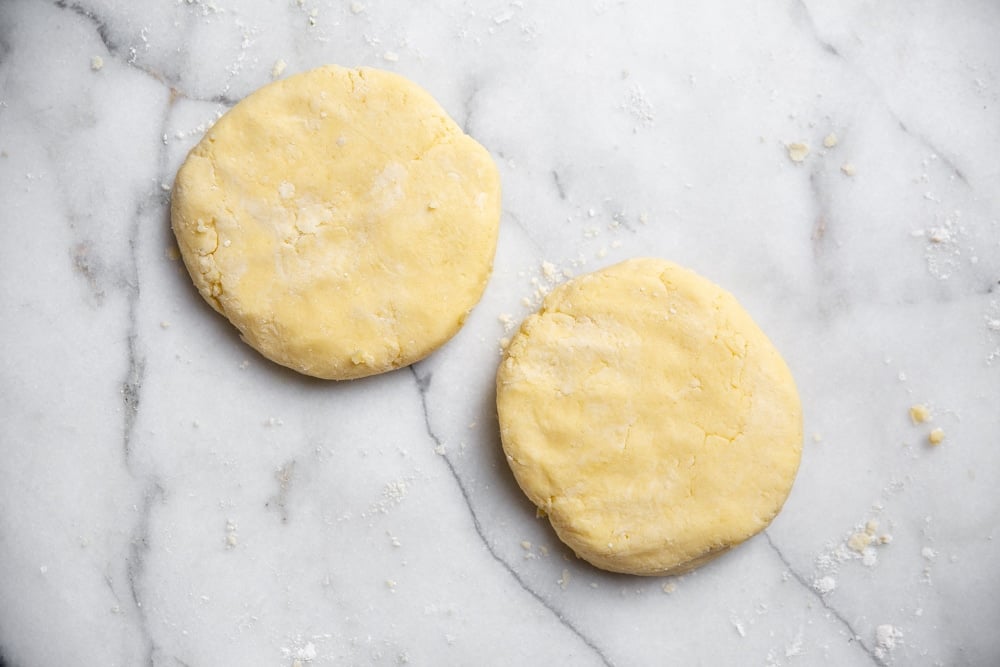
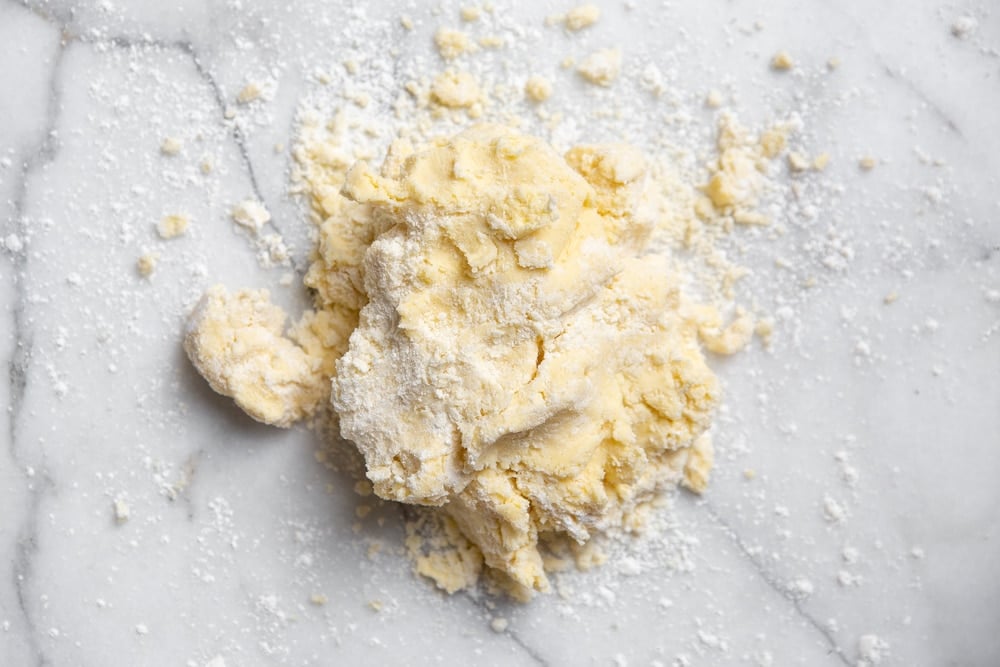
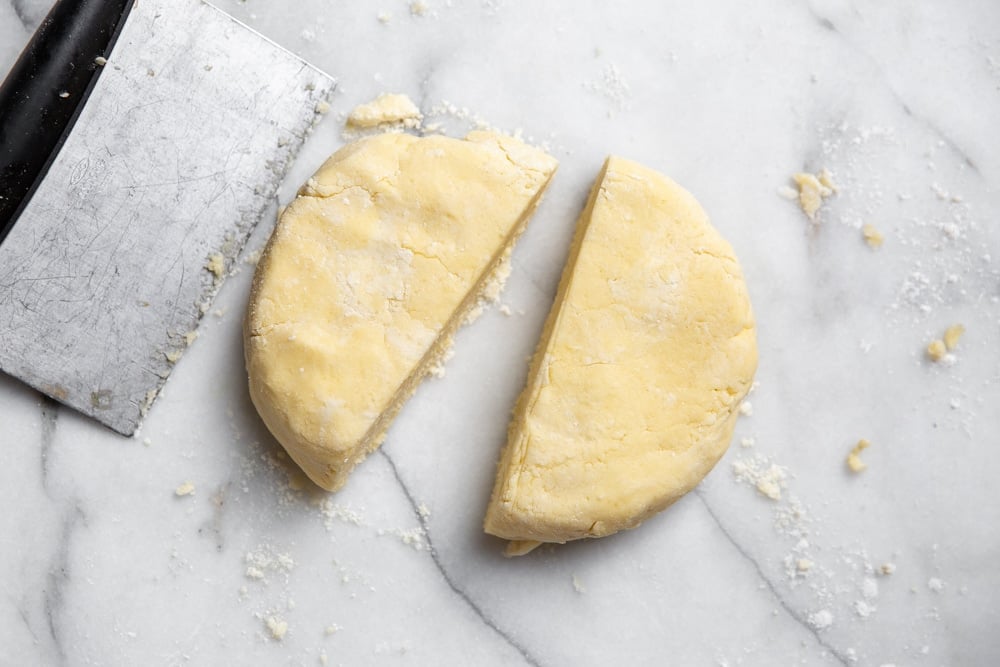
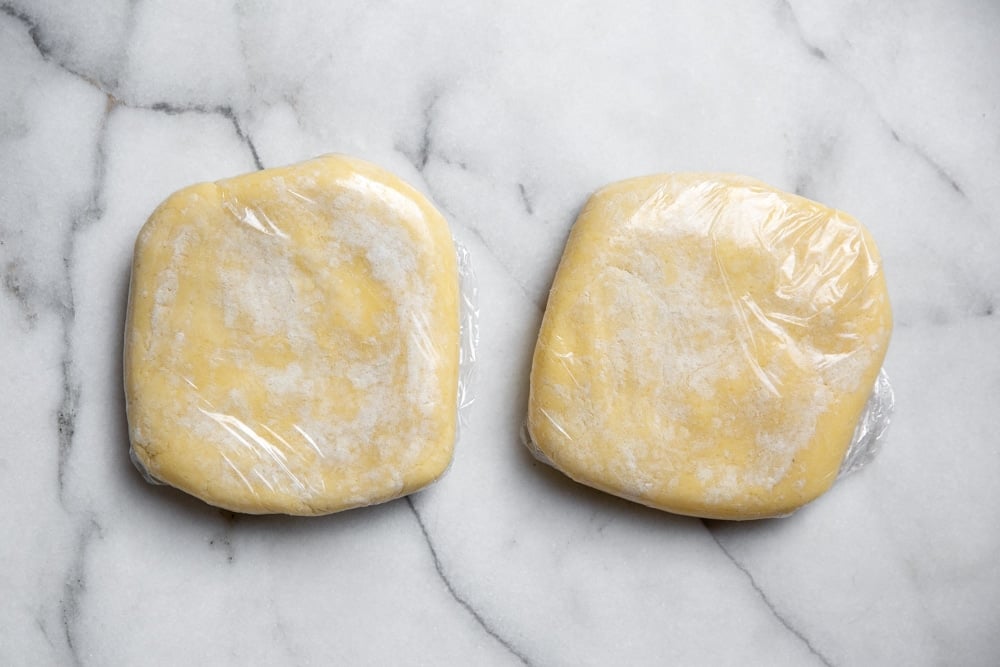
- Finally, transfer the dough to a lightly floured work surface, and use your hands to form it into a ball. Divide the dough ball in half, then press the dough into two disks. Cover the disks with plastic wrap, and refrigerate them for at least 30 minutes.
Can you make the dough ahead?
Yes! The dough can be refrigerated for up to 2 days or frozen for up to 3 months. Meaning you can go ahead and whip up the pie crusts for your holiday pies months in advance! (And if you're like me, nothing will bring you more joy than discovering a ready-made disk of pie dough in the freezer.)
How can you use gluten free pie dough?
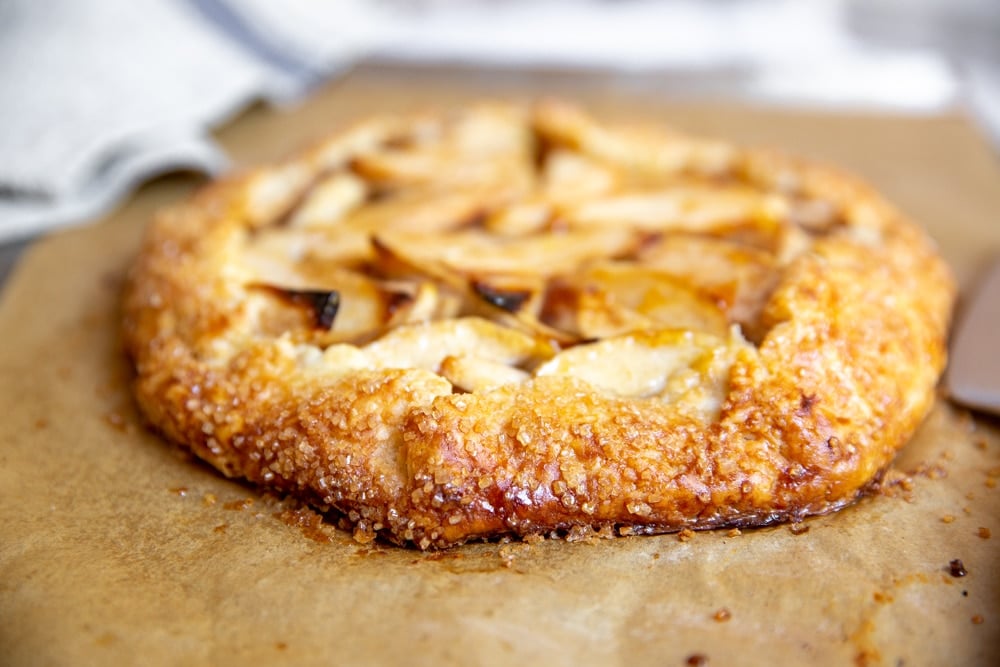
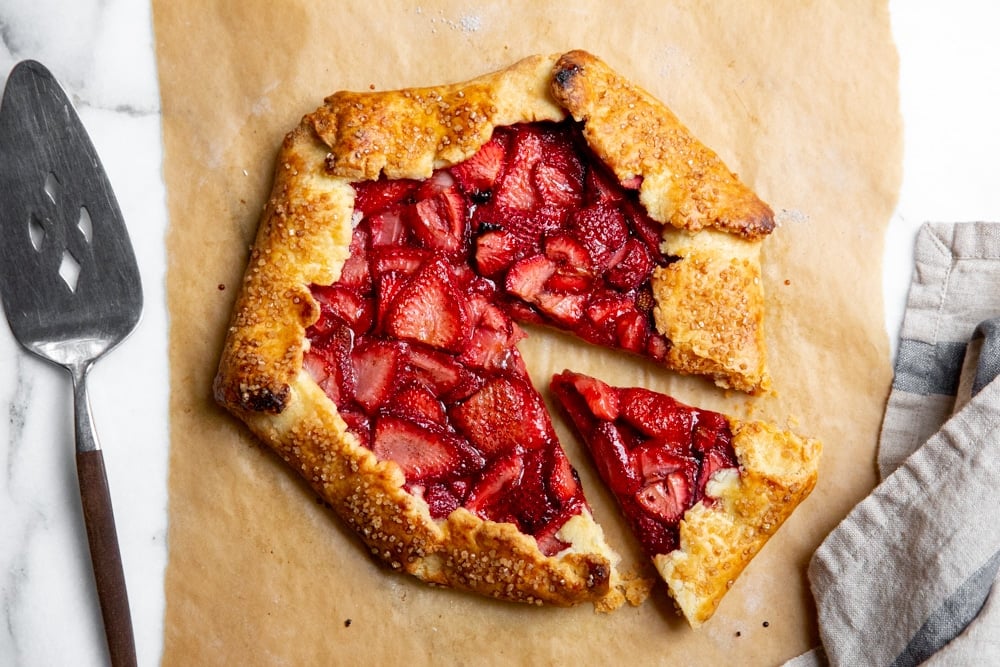
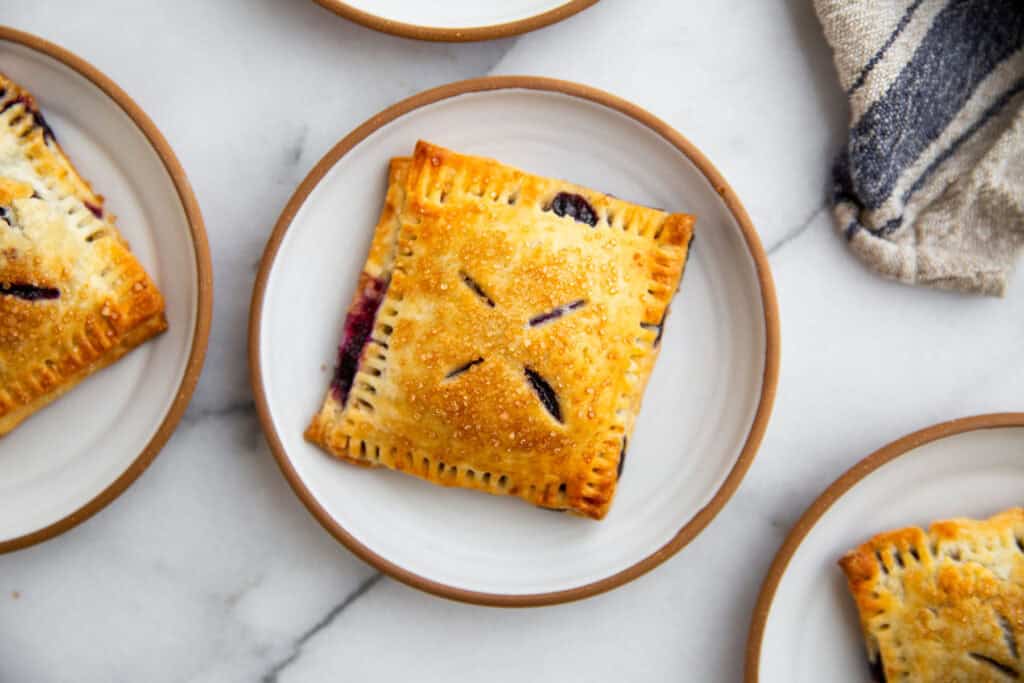
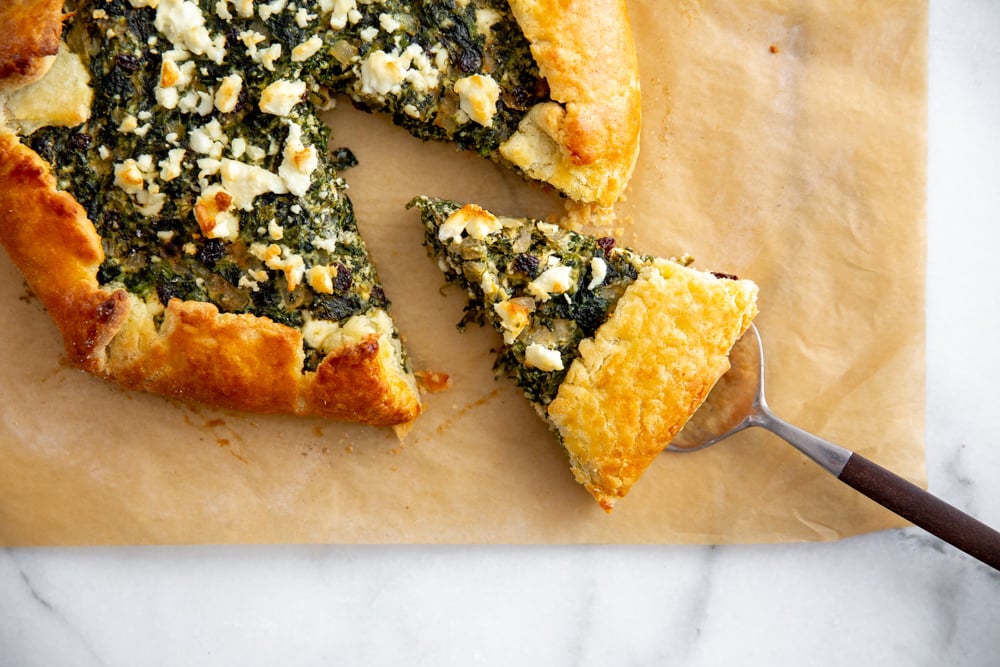
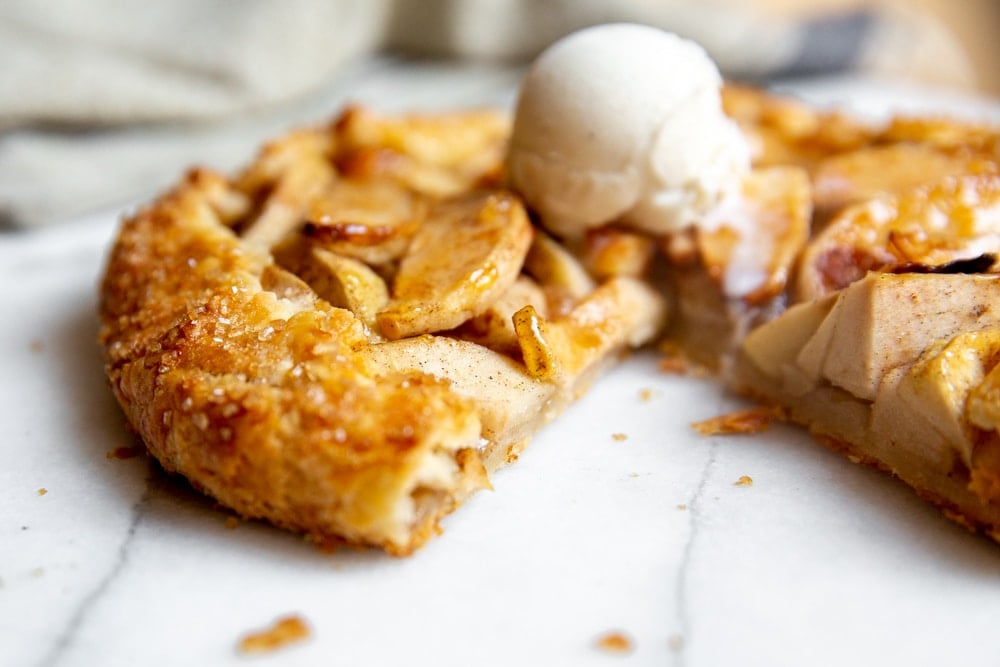
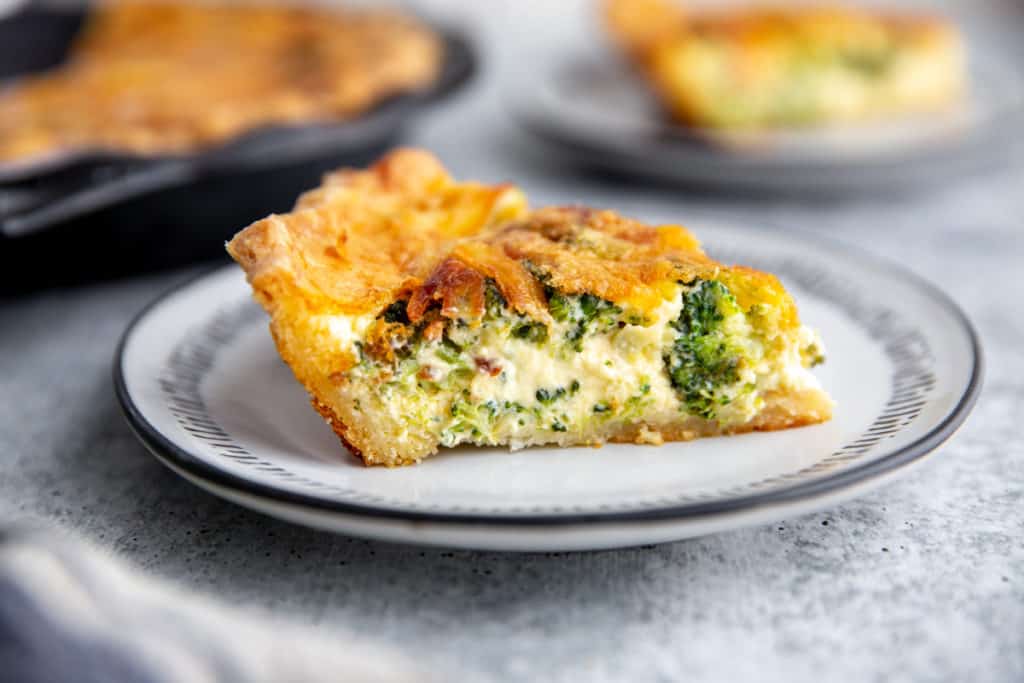
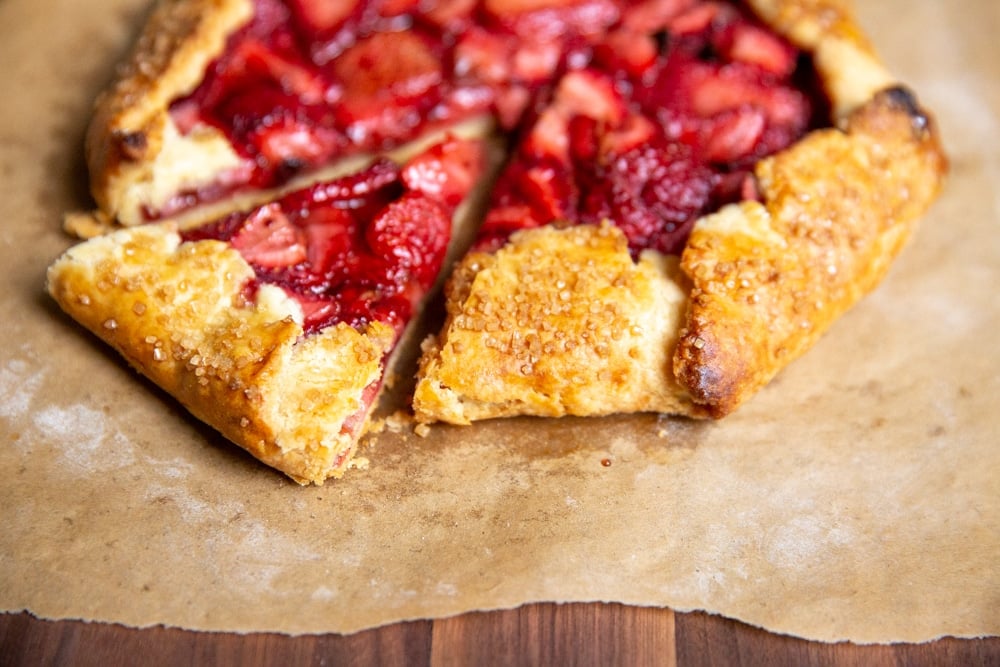
You can use this dough in any pie, tart or galette recipe (sweet or savory!). The dough makes enough for one 9-inch double crust pie, or 2 single crust pies (or 2 galettes). Whether it's your favorite berry pie or a savory egg quiche, this crust won't let you down. Don't miss my strawberry galette recipe, rhubarb galette with almond frangipane filling, apple galette, blueberry hand pies, savory spinach galette and chicken pot pie!

Tips for making gluten free pie crusts:
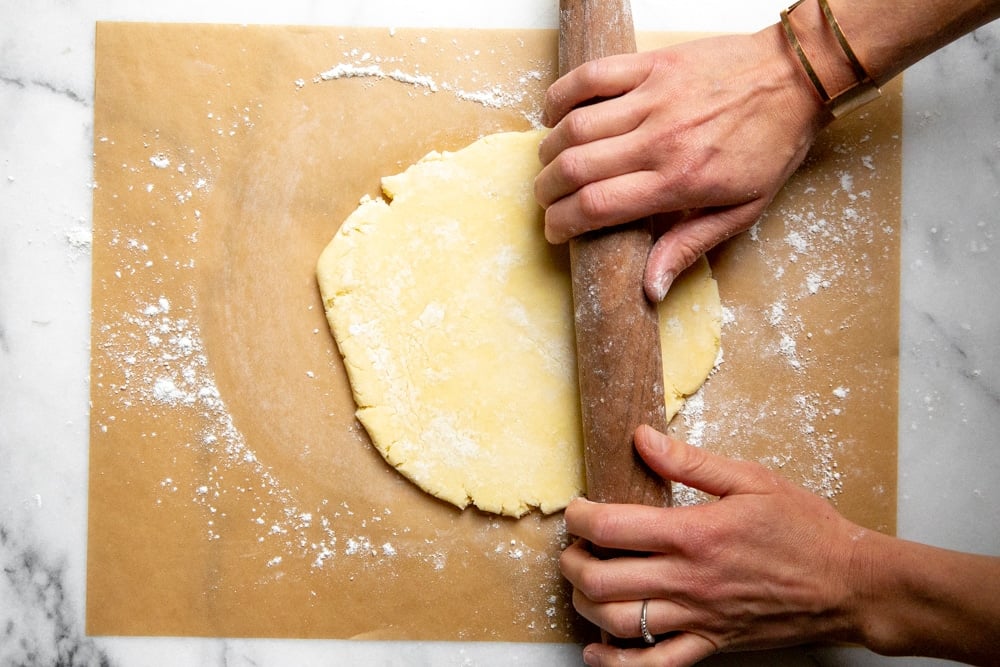
- Roll the dough out on a lightly floured piece of parchment paper to prevent sticking.
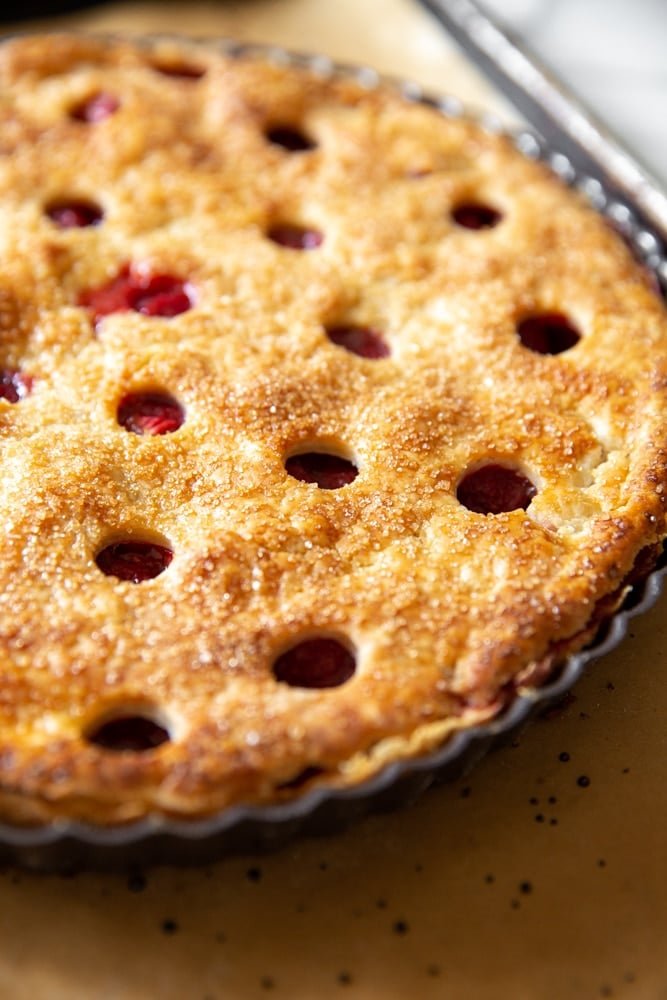
- For a beautifully browned crust, brush the dough with egg wash before baking (I also love sprinkling it with turbinado or demerara sugar for added sweetness and crunch).
- Using a glass pie plate allows you to see the bottom of the crust, ensuring that it is nicely browned before removing the pie from the oven.
- If the top of the pie gets too dark before the filling is fulling cooked, tent it with aluminum foil.
- If you don't have a food processor you can make this dough by hand. Whisk the dry ingredients in a large bowl, then add the cold butter cubes. Using your fingers (or a pastry cutter), rub the butter into the flour mixture, toss and smashing it until it's incorporated but you still see larger pea sized chunks. Drizzle in the apple cider vinegar and cold water, then toss with a fork until the dough comes together. From there you can turn it out onto a floured piece of parchment paper as indicated in the recipe.
- For more pie tips, check out this Gluten Free Pie Recipes post!
*This post contains Amazon and other affiliate links to products I use and love (from which I earn income, at no cost to you). Thank you for supporting From Scratch Fast!
I've included more tips in the recipe below for rolling out the dough and for making both single- and double-crust pies. Here's to a season (no, let's make that a YEAR) of fearless, delicious pie baking!
FAQs
Yes! You can make the dough several months in advance! Wrap the dough in plastic wrap, then freeze it in a zip-top freezer bag (defrost the dough overnight in the refrigerator before using). Alternatively, refrigerate the dough (tightly wrapped) for up to 2 days.
This gluten free pie crust is virtually indistinguishable from regular pie crust! It is ultra flaky, with a rich, buttery flavor.
This recipe calls for Cup 4 Cup gluten free flour. After testing several different store-bought all-purpose flour blends, Cup 4 Cup had the best flavor and texture and was far easier to work with than other flours.
Use this gluten free pie crust in these recipes:
- Easy Strawberry Galette
- Cinnamon Vanilla Apple Galette
- Blueberry Hand Pies
- Broccoli Cheddar Quiche
- Savory Spanakopita Spinach Galette
- Chicken (or Turkey!) Pot Pie
Other easy gluten free desserts to try:
- Gluten Free Carrot Cake (Naturally Sweetened)
- No-Bake Mascarpone Cheesecake
- Healthy Almond and Coconut Cake
- DIY Ice Cream Cake
- Homemade Gluten Free Strawberry Shortcakes
- Individual Chocolate Flourless Cakes
Watch the video!
Stay connected

Subscribe
Get exclusive new weekly recipes (all gluten-free, but you'd never know it), along with tips for finding more intention, ease, and joy in the kitchen in my Mind, Body, Spirit, FOOD newsletter!
Get the recipe!

Easy Gluten Free Pie Crust (the best crust ever!)
Ingredients
- 2 ½ cups (326g / 11.5oz) Cup4Cup brand gluten-free flour OR 2 ½ cups (319g / 11.25oz) all-purpose flour, plus more for workspace
- ½ teaspoon fine sea salt
- 1 tablespoon sugar (optional; this can be omitted for savory crusts)
- 2 sticks (8 ounces) unsalted, good quality butter (preferably a cultured or European style butter), cut into ½-inch dice
- 1 teaspoon apple cider vinegar
- ⅓ - ½ cup cold water
Instructions
- Put the flour, sea salt and sugar, if using, in a food processor and pulse to combine.
- Sprinkle the cold butter over the flour in the food processor. Pulse until the mixture looks crumbly with larger, pea-sized chunks of butter (those chunks of butter equal a flaky crust!). Drizzle the apple cider vinegar over top.
- Turn the machine on and immediately start drizzling cold water through the feed tube. Stop the machine once the mixture starts to come together and looks shaggy. Give the dough a pinch-if it sticks together, it's ready to go. If not, turn the machine on again and drizzle in a bit more water. You might not need all of the water-you're looking for a shaggy dough, not a cohesive ball.
- Transfer the dough to a lightly floured surface and shape it into a ball. Divide the dough into 2 equal pieces and form each into a flat disk. Wrap the disks in plastic wrap and refrigerate them for at least 30 minutes or for up to 2 days. Do Ahead: The wrapped disks can be placed in zip-top freezer bags and frozen for up to 3 months. Thaw in the refrigerator overnight before using.
- If the dough has been in the fridge for several hours, let it sit at room temperature until slightly softened, about 10-20 minutes. Roll it out on a lightly floured piece of parchment paper. If the dough immediately starts to crack once you start rolling, it's too cold-give it a few more minutes to warm up. If the edges crack as you roll (which they probably will, so no fear!) simply patch them as needed.
Single Crust Pie
- To blind bake a single pie crust: Preheat the oven to 400˚F. Transfer the dough to a 9-inch pie plate, making sure to get in the corners. Using kitchen scissors, trim the dough to a ½-inch overhang. Fold the overhang under to form a ring around the pie plate. Crimp the ring, if you'd like. At this point, if the dough feels like it's getting soft, pop the pie plate in the fridge or freezer for a few minutes to firm up. Prick the bottom all over with a fork. Line the crust with a large piece of parchment paper then pour in dried beans or pie weights to completely cover the bottom. Bake 15 minutes. Remove the parchment and beans. Bake 5 minutes longer, or until light golden on the bottom. Do Ahead: The crust can be blind baked up to 1 day in advance.
Double Crust Pie
- To make a double-crust pie: Preheat the oven to 400˚F. Roll out one disk of dough, and transfer it to a 9-inch pie plate, making sure to get in the corners. Add your fruit filling, and dot with butter. Roll out the second piece of dough and lay it over top. Using kitchen scissors, trim the dough to a ½-inch overhang. Roll the overhang under (pinching the top and bottom dough together) to form a ring around the pie plate. Crimp the ring, if you'd like. At this point, if the dough feels like it's getting soft, pop the pie in the fridge or freezer for a few minutes to firm up. Brush the top dough with egg wash and sprinkle with sugar. Using a small knife, cut a few vents on top. Bake 35 minutes. Reduce the oven temperature to 350˚F and bake 15-30 minutes longer, or until the fruit is tender and bubbling. If needed, lightly tent the top crust or edges if they start to look too brown near the end of cooking.
Notes
- I use Cup 4 Cup Gluten Free Flour for this pie crust, which rolls out easily and tastes like a traditional pie crust. You can also use Bob's Red Mill 1-to-1 Gluten-Free Baking Flour, but the dough will be much crumblier and can be hard to transfer (it works best as a galette). If you're not gluten-free, you can use any regular all-purpose flour.
- Use a good quality European-style butter, such as Kerrygold, Plugra or Organic Valley.
- Don't over-process the butter and flour mixture. The small chunks of butter will give you a flakier crust!
- The finished dough will still look shaggy and a bit floury in the food processor. Don't over-process, otherwise you'll end up with a tough crust. The dough will come together on the countertop once you form it into a ball.
- If you don't have a food processor you can make this dough by hand. Whisk the dry ingredients in a large bowl, then add the cold butter cubes. Using your fingers (or a pastry cutter), rub the butter into the flour mixture, toss and smashing it until it's incorporated but you still see larger pea sized chunks. Drizzle in the apple cider vinegar and cold water, then toss with a fork until the dough comes together. From there you can turn it out onto a floured piece of parchment paper as indicated in the recipe.
- Use the pie dough in this easy strawberry galette recipe, this cinnamon and vanilla spiced apple galette, this savory spinach galette , this Broccoli Cheddar Quiche or this gluten-free chicken pot pie!

My dough was delicate and after baking it was extremely crumbly. Would this happen if I added too much water?
Hi Liz! It sounds like you didn't add enough water. While the dough should look floury, it should stick together and shouldn't be crumbly. Did you use Cup4Cup flour? If not that might have also been the issue, as other GF flour blends don't work as well and will result in a dough that's harder to shape. Let me know!
I didn't use Cup4Cup but I did use a flour that has generally performed pretty well as as a substitute in most recipes. When I added the water the dough did not look floury- it actually was much closer to a cohesive ball which your instructions said to avoid, so that's why I thought it could have been partially due to the water.
Thanks for letting me know! Ironically, adding too much water will typically make the dough tougher and sticker, not crumblier. It sounds like the issue was with the flour. While I use several different GF flour blends in my kitchen, Cup4Cup far outperforms them for crust (I've tested the majority of store-bought brands). Hopefully you'll have better luck next time!!
Can you use this same recipe to make apple tarts?
Hi Rosemary! Yes, this crust works well in any pie or tart. I hope you enjoy!!
My gosh, this is so wonderful! I have made my own crusts for decades, but this one will now replace it! My sons and husband absolutely love it! I am using it for vegetable pot pies and also for vegetable tarts.
I want to ask you, is there something I can use in place of the apple cider vinegar? Will lemon juice or anything else work? I ask because I am one of the unlucky people who are made nauseaus by apple cider vinegar, even tiny amounts.
Most hopeful for your kind reply,
Liz
Hi Liz, I'm so happy to hear you loved the crust! You can swap out the apple cider vinegar for white vinegar. Happy baking!
Thank you, Nicki! I'm so grateful you share your recipes and expertise with all of us! I will try the white vinegar.
Nicki…This crust is it! I cook A LOT & I’ve had my share of bad doughs as everyone has, but you’ve nailed it with this one. For part of my Christmas dinner, I made a spanakopita. I’m Greek
& my gf husband had not had it for 10 years. Growing up, my grandma would make spanakopita on occasion with a rolled out dough instead of with phyllo dough. It’s village (horatiko) style & I actually preferred it. Well I brought it back with your dough! I doubled the recipe, so I had 4 discs, rolled a bottom for a ceramic baker, & filled it with my grandma’s amazing spanakopita filling.
Topped it the second crust, scored it, brushed it with egg wash & topped it with sesame seeds. Perfection!
Thank you for testing this recipe & really creating a beautiful crust ~ it’s rough in the gf world at times & you really added lots of smiles to our Christmas dinner❤️
Hi Cynthia, this message warmed my heart! I'm so happy you and your family enjoyed, and I would LOVE to taste that spanakopita!!!
My family's tradition is to make tourtière on Christmas Eve. I was so bummed when my local grocery store was out of GF pie crusts. Then, I realized my homegirl Nicki probably has a good recipe, so I gave this a try. It turned out AMAZING! And was so easy to make.
Also, I used King Arthur gf flour and it worked great. Thank you for the awesome recipe!
I’m so happy to hear!! (And I want a slice of that tourtière 😉)
Like Mimi, I’ve been gluten free since 2008 and had given up making gf crusts, instead buying them premade. My husband wanted an apple pie today and I don’t like apple pie without a top crust so I made half a recipe and used it on top of the premade crust. I only had Bob’s gf on hand and because my son is both gf and dairy free, I used Earth Balance. I use Earth Balance in all his baking and cooking and usually it works pretty well.
So my crust turned out great and we all loved it. Considering my substitutions and the fact that I rushed the cooling and resting periods, it did great. I wasn’t able to get the top crust on without it breaking but I’m hopeful next time I will. And I’ll love using it for galettes. Thanks!
Thanks so much for your comment, Laura, and happy pie baking!
This worked wonderfully for me!!! I have been GF since 2008 and never found a pie crust recipe that worked until this one. I literally jumped for joy when i realized the crust dough was holding together well enough for me to make a lattice top. Yay!! Thank you for this!
Woohoo! I’m so glad you enjoyed!
I’m confused about the butter. Is it 8oz total?
I sent you the wrong email address on my first post
Hi Gwyn! Yes, you need 8 ounces of butter total (which is the equivalent of 2 sticks).
You might not get this in time but I’m confused about the amount of butter. Is it 8oz total?
I think the crust was actually better than a wheat flour crust. It was easy to make although the cup4cup thing is confusing. I used Trader Joe's gluten free flour. (The cup4cup brand doesn't seem to be available in our area.) The dough was elegant and light and tasted good raw, which was a good sign. (I always taste test pie dough.) However it was very fragile. I ended up not being able to put the the top crust onto the pie, it broke into pieces. I just sort of laid it on top of the apples and patted it together. Fortunately the dough is very forgiving and the apple pie was a big hit. It leaked but I used a non-stick pie pan, so we could still get the pie out. I do wish there were instructions for cooks without a food processor. I used a pastry cutter by hand, and it was fine.
Hi Vickie! I'm so glad you liked the crust. Cup4Cup brand flour will give you a much more sturdy crust that's easy to work with, but I understand it's harder to find. Trader Joe's GF flour results in a dough that's harder to work with, as you experienced, but it still works with a bit more patching. I will include instructions for how to make the dough by hand, so you have it for future batches!
This looks great! Would you suggest pre-baking w a pumpkin pie? Thanks so much!
Hi Stefanie! I do recommend pre-baking with a pumpkin pie, although it’s a personal preference. I bake my pumpkin pie at 325 degrees F for about 1 hour, although some recipes have you start the temperature high then reduce it, in order to brown the crust. Happy baking!
Could a stand mixer be used in place of the food processor?
Hi Emily, a food processor is best for this recipe, as it works the dough slightly differently. However, if you don’t own one you can make the dough by hand! Whisk the dry ingredients in a large bowl, then add the cold butter cubes. Using your fingers (or a pastry cutter), rub the butter into the flour mixture, toss and smashing it until it's incorporated but you still see larger pea sized chunks. Drizzle in the apple cider vinegar and cold water, then toss with a fork until the dough comes together. From there you can turn it out onto a floured piece of parchment paper as indicated in the recipe.
If don't have fine sea salt, how much regular salt should I use?
Hi there! You can use the same quantity of regular table salt.
Hi, I was a little confused about the first line in the ingredients. Is it 2 1/2 cups flour or 4 cups?
Thank you Anne
Hi Anne! You'll need 2 1/2 cups flour. You can either use Cup4Cup brand gluten free flour, or regular all-purpose flour. I hope you enjoy!
Just discovered this yesterday (2022-11-19) and made it by hand using Bob's Red Mill GF flour. It got rave reviews, so I'll be saving this recipe, especially with pie season coming on!
For my lactose-intolerant friends, though, I wonder if shortening would work?
I was wondering the same thing they make butter flavoured shortening and I was wondering if I could use that?
When you say you used Bob's red mill, was it the GF or the 1 for 1?
Hi Claire, while the Bob's Red Mill 1-to-1 Flour will work, it's much harder to roll out and transfer than the Cup4Cup. It will work for a galette, but if you're making a double crust pie I recommend the Cup4Cup.
I am making a no-bake pie and would like to use this recipe.
How should I bake the crust before adding the pie filling?
Hi Ariel! For a no-bake pie you'll just need to blind bake the crust. Follow the instructions for the single crust pie, then you'll be all set!
Can I use margarine for this?
Hi Sarah, I haven't tested this recipe with margarine so can't guarantee the results. I've had some readers use vegan butter with success, however!
I would like to say how amazed I am. First off, gluten free pie crust/ dough is not easy to find. So I always have to make it from scratch. I tried a recipe last week that took nearly 2 hours to put together and it was such a messy process. This came together in less than 5 minutes. Incredible!!!
Woohoo! I'm so happy to hear you enjoyed the dough! I definitely love how easy it is too. 🙂
I would like to use this recipe for mini lemon tarts (using a mini muffin tin). Should I prebake? If so, how long do you recommend? Thank you!!
Hi Rachel! I haven't tested the crust in mini muffin tins so can't make any guarantees, but it should work. I do recommend pre-baking the crust. While typically I'd line the pie tin with parchment and use dried beans for pie weights, that sounds awfully fussy for mini muffin cups. I think you can skip this, but be aware that the crust will likely shrink or bubble. If that happens, use your fingers to press it back into the cups after it pre-bakes. I would guess that they'll need about 10 minutes in the oven, but keep your eyes on them - they should be light golden. Good luck, and keep me posted!
Amazing recipe! I have followed every step & bought the best quality gf flour & I can’t tell the difference between gf pie crust & regular. Finally you have provided a tried & true recipe! Thank you for making our life of GF closest to normal!!
I’m so happy to hear!